


Overview
This blog post is gonna show you one of the hands-on experience that clearly demonstrates how to use File Parameter with `input` step to upload a single file in the middle of Jenkins Build.
The build does not run on Jenkins master, it runs on a Jenkins slave instead so you need to add more steps to copy the file from master to current slave workspace in Pipeline.
ref: Jenkins Master and Slave Architecture
This example only applies to small files. I want to pass an input file dynamically for my test scenario. This case will be useful for test scenarios that do not depend on fixed input data.
And it is designed to work on Windows 10 Pro only, not on a macOS or Linux machine.
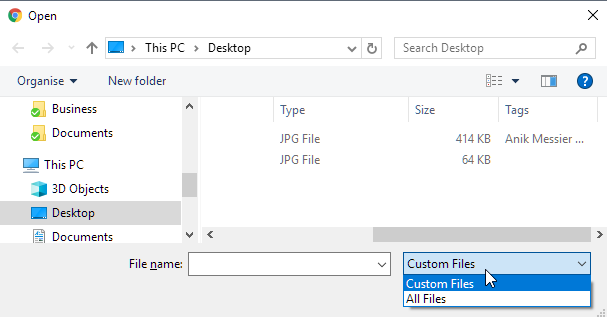
During the steps, you will be required to upload a local file via File Upload dialog on Chrome.
And you need to have a valid credentials on Git to clone the existing repository.
Configure & Run Jenkins Pipeline
The test scenario in Pipeline is really simple, I want to show you the difference in the content of the file before and after the file is uploaded.
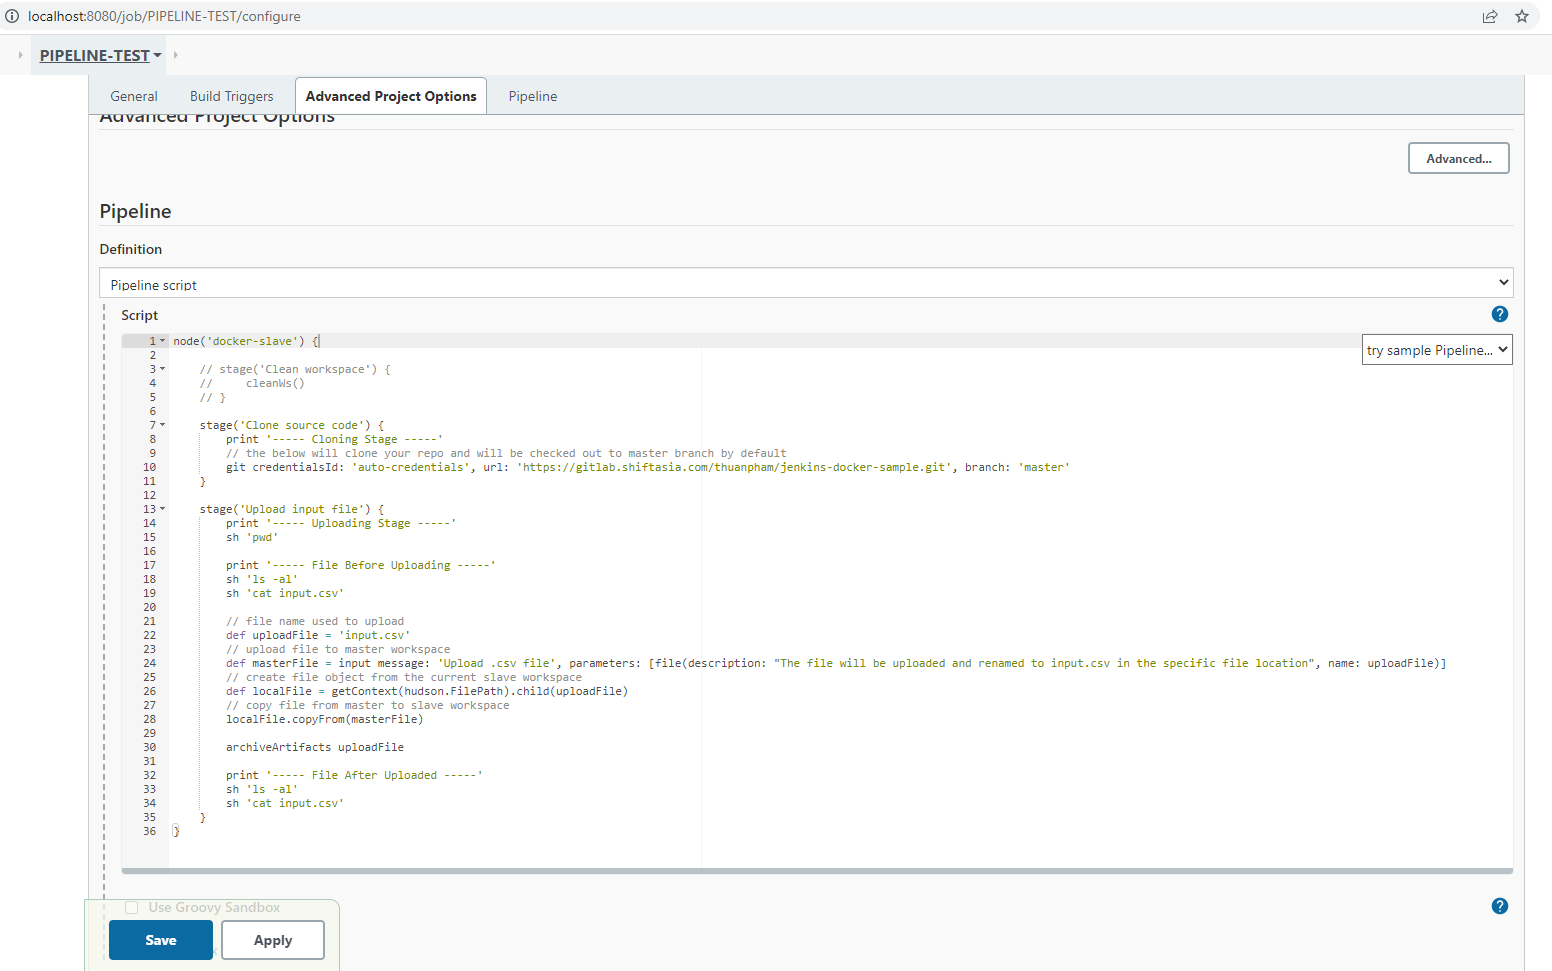
When the Jenkins Server Startup successfully, you need configure your Pipeline as below
In each steps, you can see comments to understand more what I try to do.
node('docker-slave') {

    // stage('Clean workspace') {
    //     cleanWs()
    // }

    stage('Clone source code') {
        print '----- Cloning Stage -----'
        // the below will clone your repo and will be checked out to master branch by default
        git credentialsId: 'auto-credentials', url: 'https://gitlab.shiftasia.com/thuanpham/jenkins-docker-sample.git', branch: 'master'
    }

    stage('Upload input file') {
        print '----- Uploading Stage -----'
        sh 'pwd'

        print '----- File Before Uploading -----'
        sh 'ls -al'
        sh 'cat input.csv'

        // file name used to upload
        def uploadFile = 'input.csv'
	// upload file to master workspace
        def masterFile = input message: 'Upload .csv file', parameters: [file(description: "The file will be uploaded and renamed to input.csv in the specific file location", name: uploadFile)]
	// create file object from the current slave workspace
        def localFile = getContext(hudson.FilePath).child(uploadFile)
	// copy file from master to slave workspace
        localFile.copyFrom(masterFile)

        archiveArtifacts uploadFile

        print '----- File After Uploaded -----'
        sh 'ls -al'
        sh 'cat input.csv'
    }
}
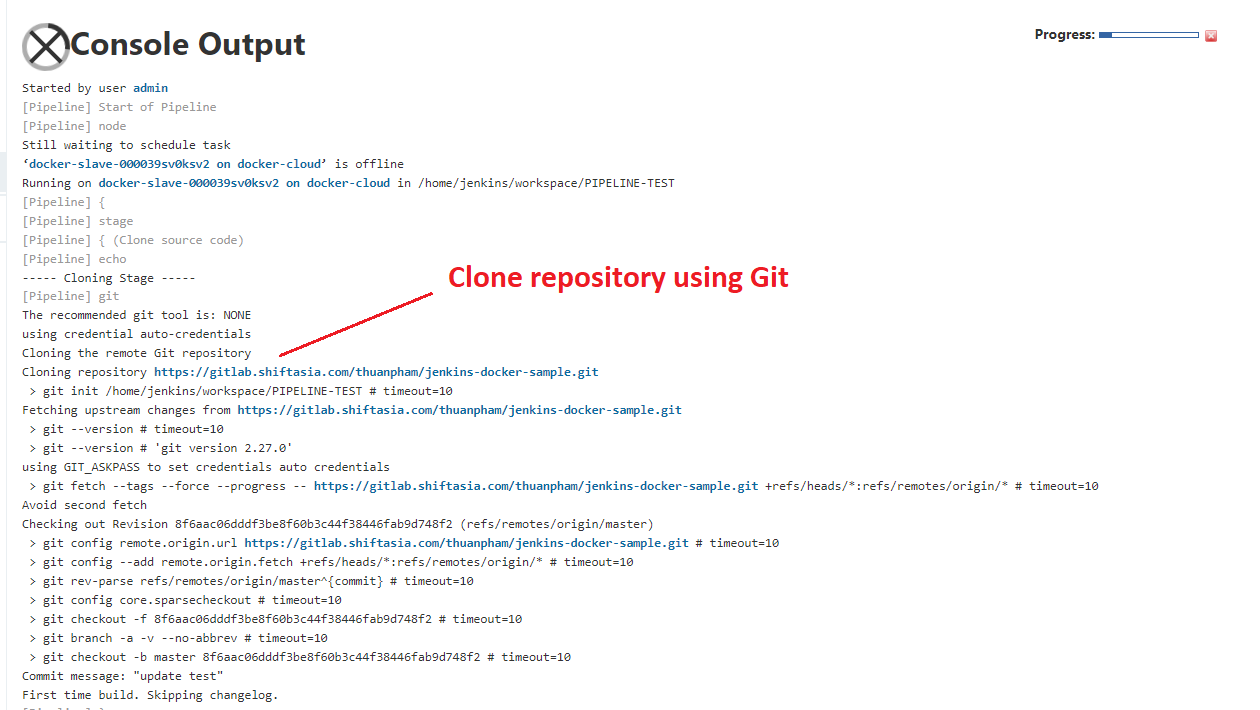
If you are currently working from home, VPN connection is required to run the Pipeline build. It will download source code from Git.
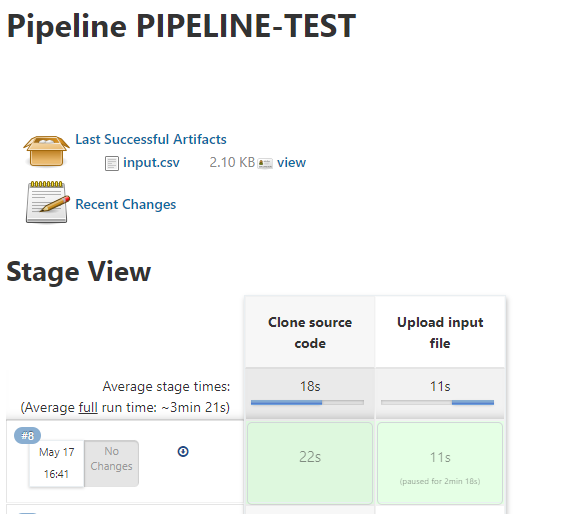
The first stage of Pipeline, the build clones source code from the target repository
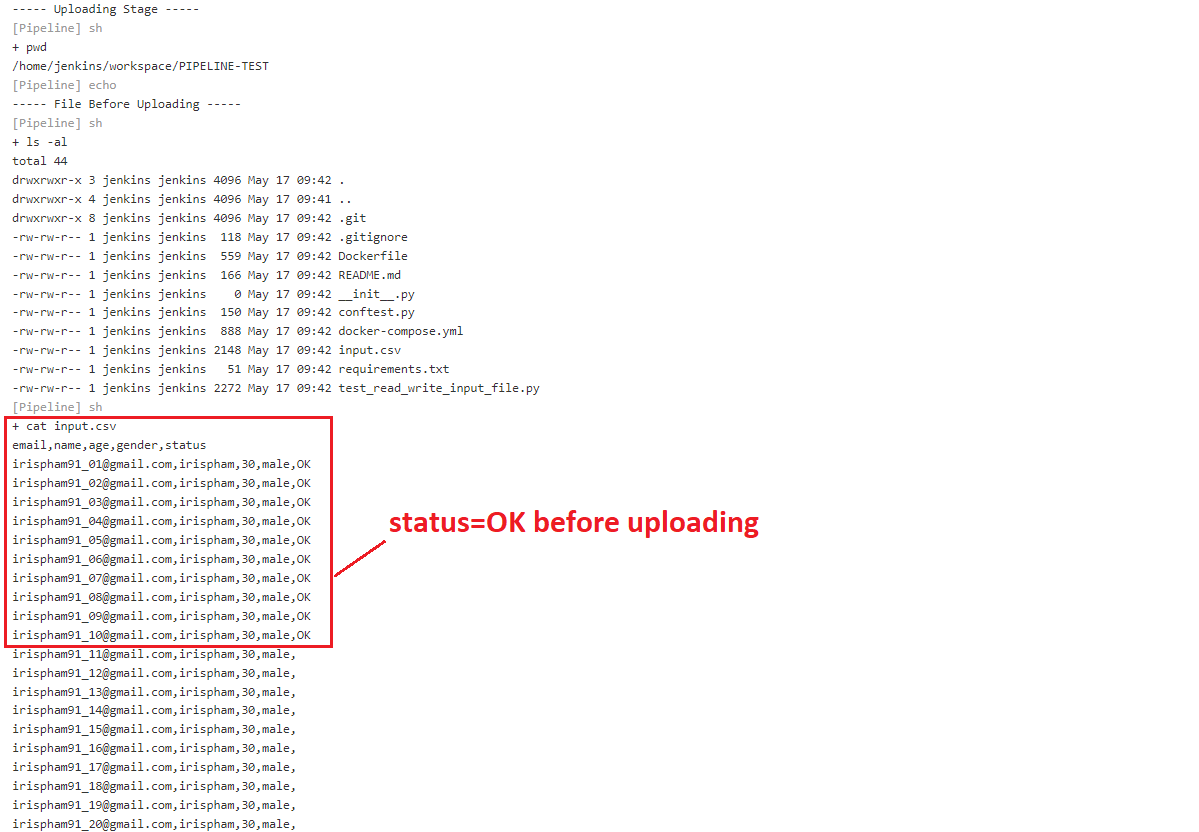
Before uploading a file, the build prints the content of file
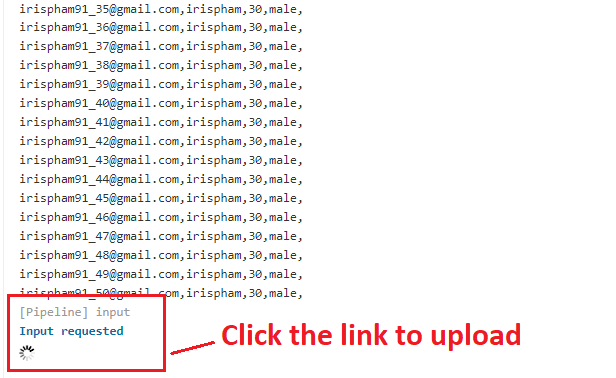
In the middle of build, you are required to upload local file with the same name to overwrite the existing file.
The build is pending for uploading the file.
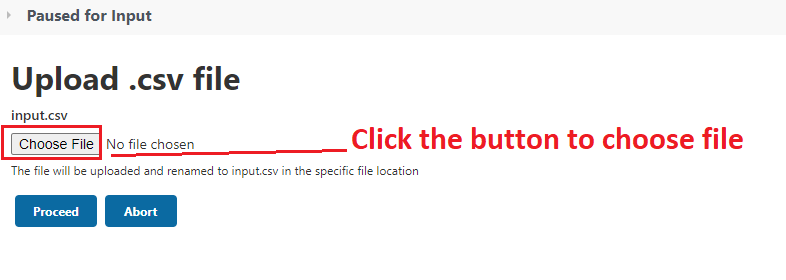
Click Choose File button on the screen
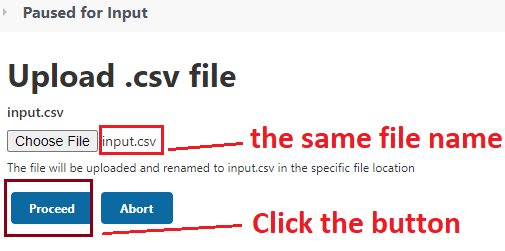
The same file name is chosen and then click Proceed button to continue the build
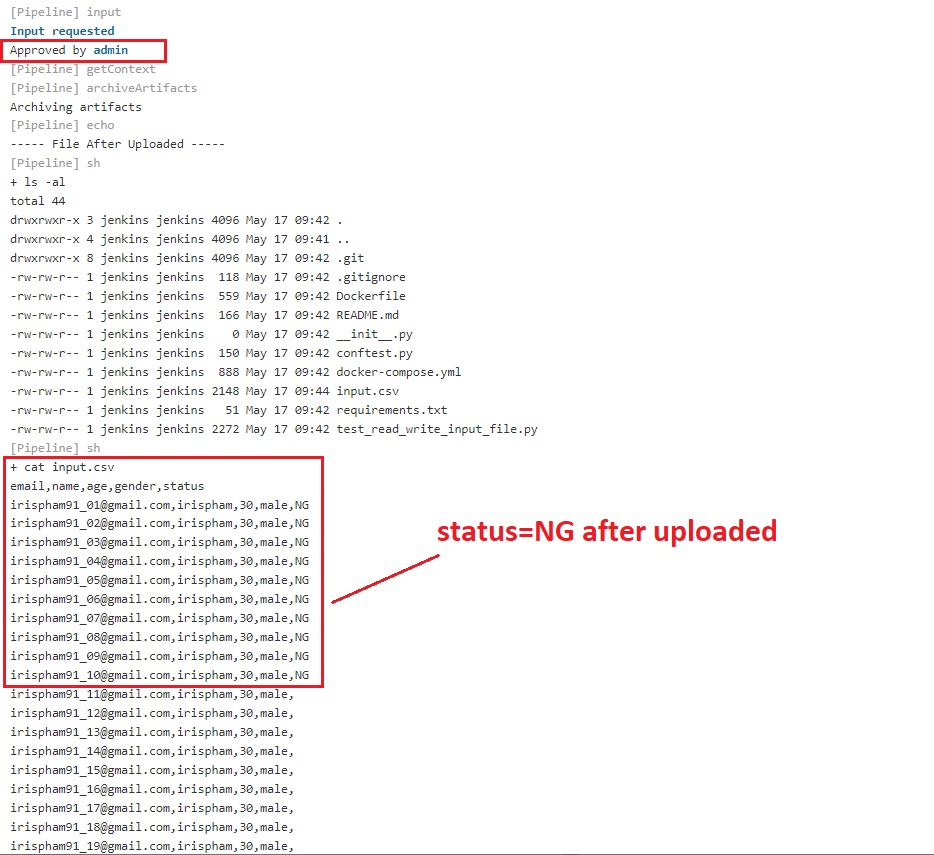
The build continues the next steps to print the content of file.
The file is overwritten successfully.
The build is completed
That's all for the example, thanks for reading.
Enjoy it!