

Considering these stats, if you are thinking of building a new website or redesign one, you should consider developing your website as PWA with no doubts.
Starting from a PWA could be the perfect start for your projects, you don’t need too much effort and you can build one application that works for all platforms!
What is a PWA?
A Progressive Web App (PWA) is a hybrid of a regular web page and a mobile application.
A PWA combines features offered by most modern browsers with the benefits of the mobile experience. They are built using standard web technologies, including HTML, CSS, and JavaScript.
The functionalities include working offline, push notifications, and device hardware access and enabling creating user experiences similar to native applications.
You can add them to the home of your phone exactly as a mobile app
Why should you build a PWA?
It was impressive to find out how the companies improved the performance of their website, mostly more than 100%.
A Progressive Web App can cut load times, allow users to navigate offline, increase the time spent on the website, increase revenue, can be much smaller than a mobile app, and much more.
Who is already using PWA?

It’s interesting to see the companies which already have a PWA, some of the world’s biggest company such as Twitter, Instagram, Uber, Pinterest, Forbes, Alibaba and much more.
How to make a PWA
To make a Progressive Web App at first, we need to develop a responsive website. Once you have done this, we need only two things: a manifest.json and a service worker. Let’s see what they are!
The Web App Manifest
The web app manifest is a simple JSON file that tells the browser about your web application and how it should behave when added on the user’s mobile device or desktop.
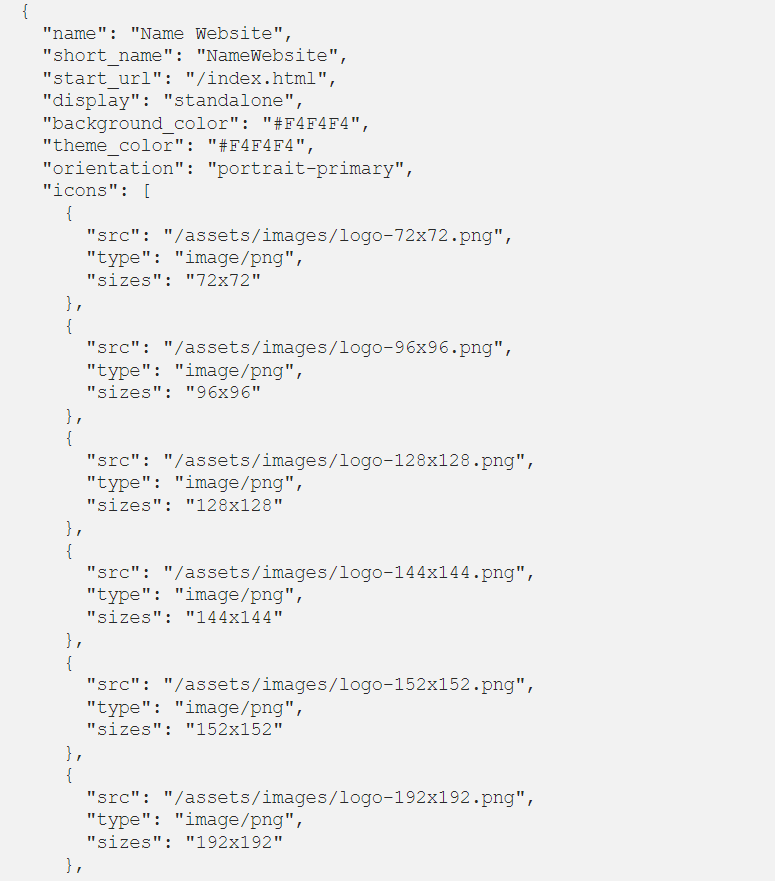
The properties:
- name: is the name used in the app install prompt
- short_name: is the name used on the user’s home screen, launcher, or other places where space may be limited
- start_url: tells the browser where your application should start when it is launched
- display: it allows us to customize what browser UI is shown when your app is launched. The most used value is standalone: it opens the web app to look and feel like a standalone native app.
- background_color: is used on the splash screen when the application is launched
- theme_color: it sets the color of the toolbar
- orientation: it allows to enforce a specific orientation
- scope: to be honest usually I don’t use this property, but it defines the set of URLs that the browser considers being within your app and often it’s used to decide when the user has left the app
- icons: when a user adds your site to their home screen, you can define a set of images for the browser to use
The Service Worker
It’s essentially a JavaScript file that runs separately from the main browser thread, with a Service Worker you can:
- intercepting network requests
- caching or retrieving resources from the cache
- delivering push messages
Service worker lifecycle
- Registration: tells the browser where your service worker is located, and to start installing it in the background.
- Installation: triggers an install event where we can run some tasks when the service worker installs.
- Activation: if there are any open pages controlled by the previous service worker, the new service worker enters a waiting state. The new service worker only activates when there are no longer any pages loaded that are still using the old service worker and can be used to run some tasks too.
Let’s build our PWA step by step in 5 minutes
Now it’s time to implement our Progressive Web App
Before to start I suggest you install the Lighthouse extension.
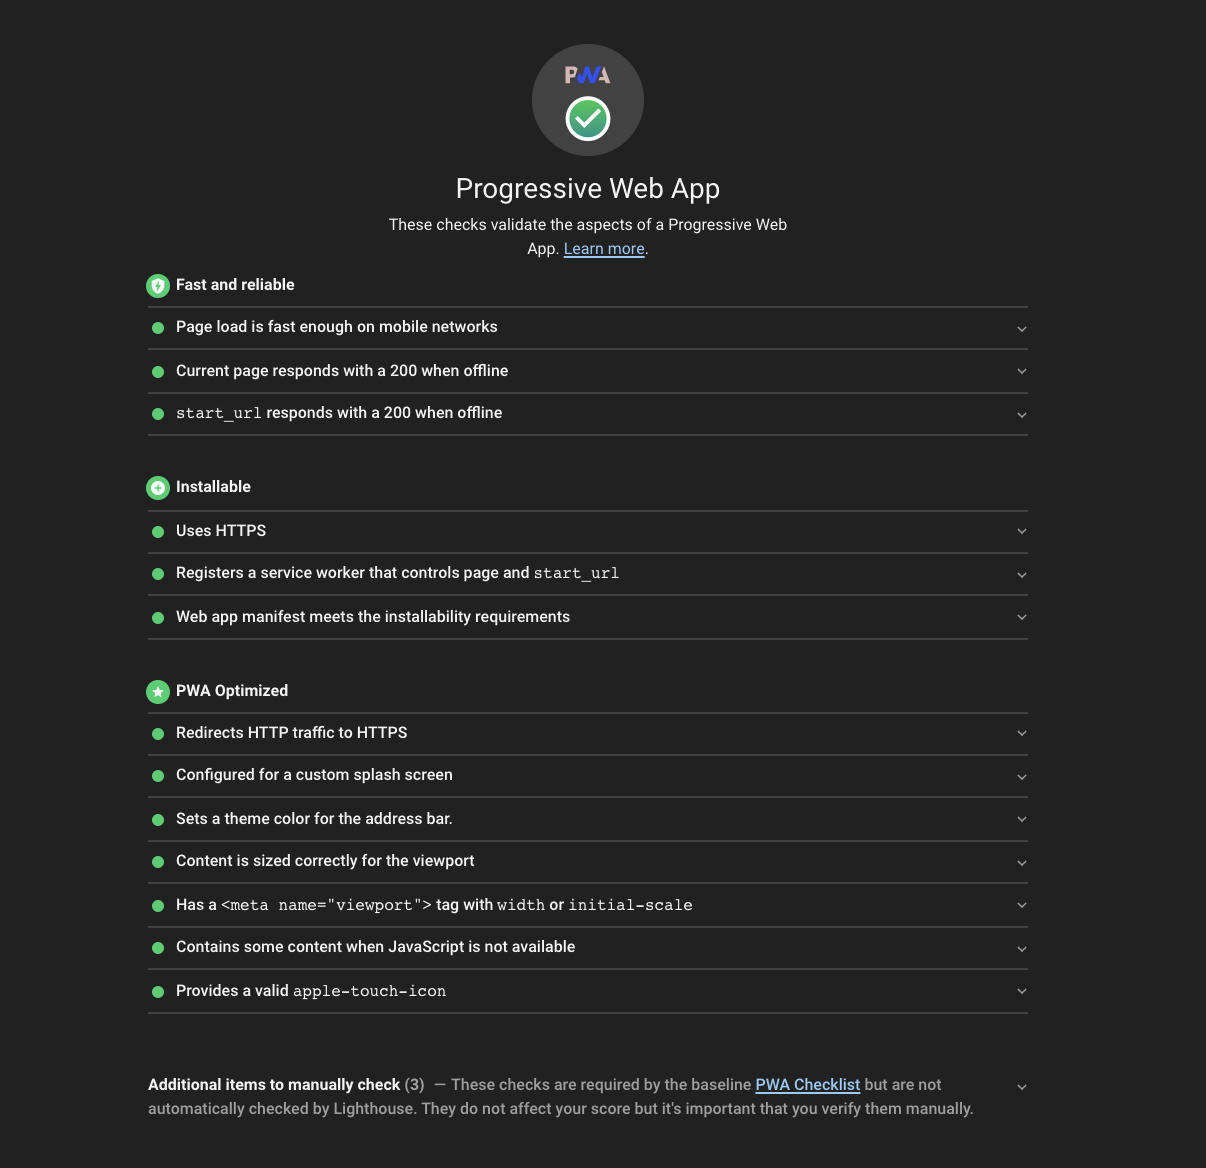
Lighthouse is a tool (by Google) for improving the quality of web pages, and it gives you a report like this
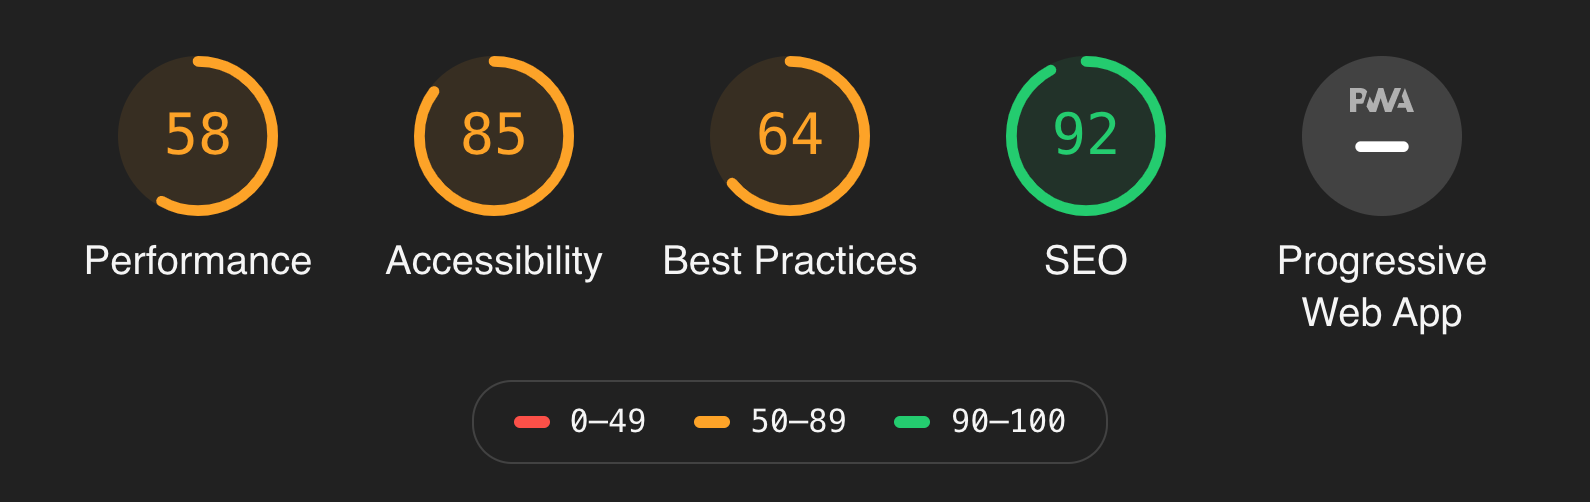
and from there, you can check which issues you need to solve to improve performance, accessibility, best practices, SEO and PWA of your website or web app.
You can install the extension for Chrome here.
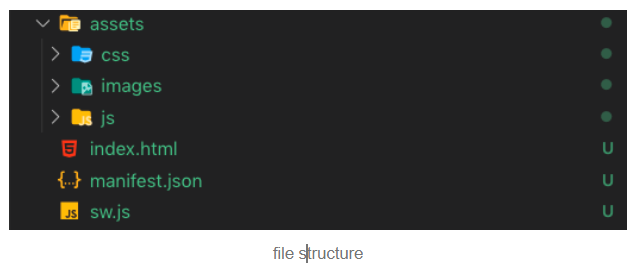
The file structure in our example will look like this
You will find the full code on Github here, and you can switch branches to see the dynamic or the static cache.
In our index.html let’s call our manifest.json

But we also need to call our app.js file(where we will register our service worker) and some meta tag necessary to optimize our PWA

these are the main tags, but of course, we will have more, and they can also have different paths, it is up to you!
Cache static
To begin, we are going to implement a static cache, that’s mean that manually we are going to say precisely which resources to put in our cache, for example, all our images, CSS and js files.
This method is useful, especially when you want to download all the resources of your website and to cache them at the first landing on the page.
Let’s start with our manifest.json
After we need to check if the browser allows service workers, and if so, we will register our service worker in our app.js.

Now let’s write our service worker in our sw.js file
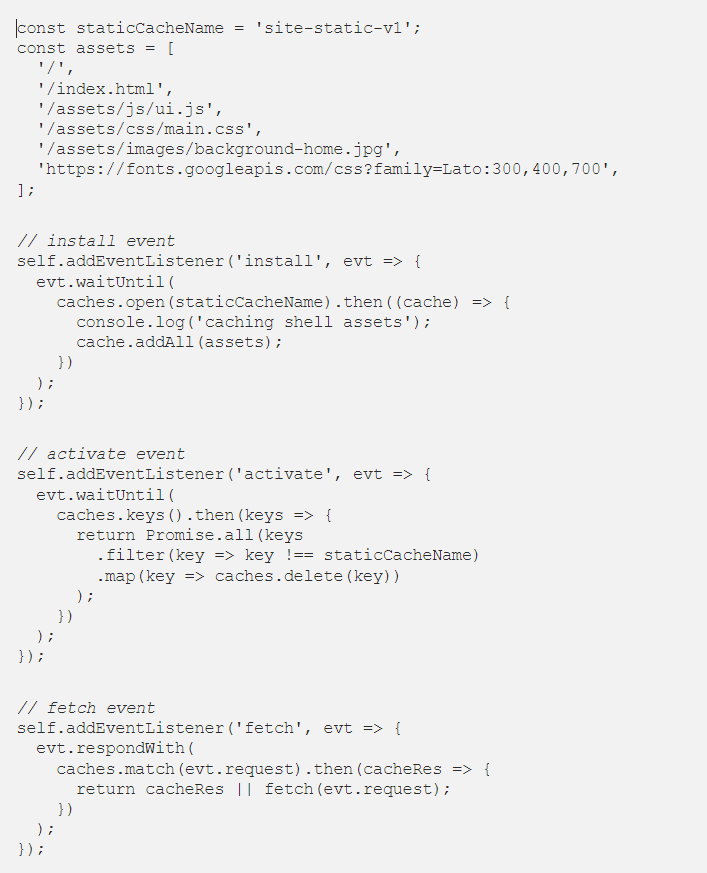
We store in the array all the resources that we want to put in our cache
Install event
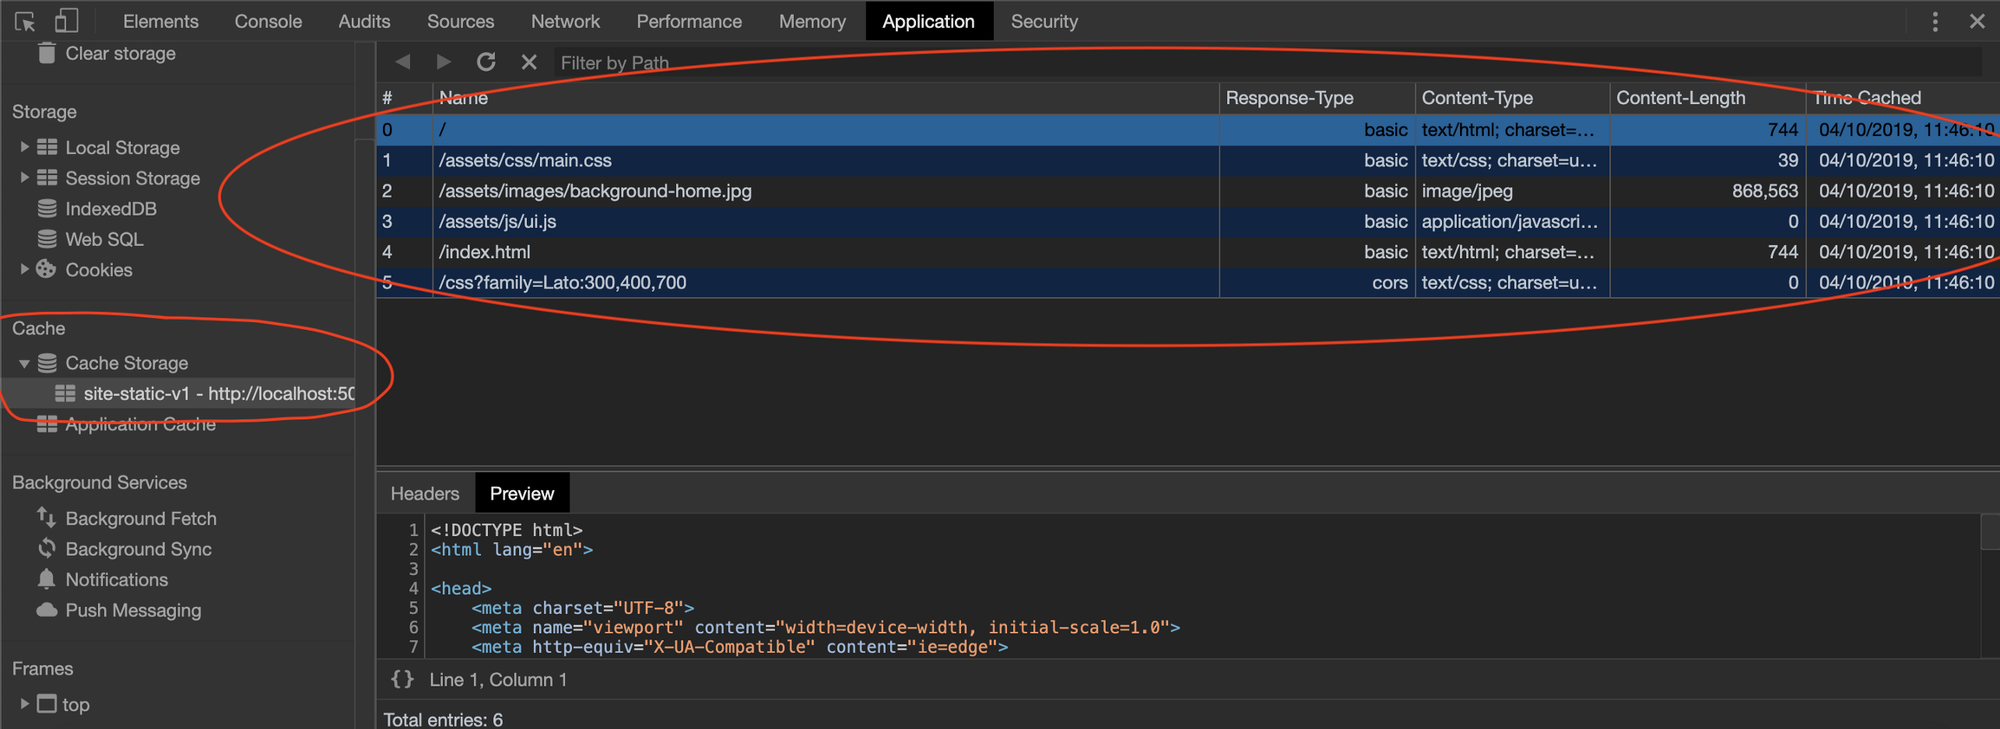
we add to the cache all the static assets, and we can see it in our Chrome Console
Activate event
When we change the name of our cache, we could have multiple caches stored, and that could create problems. To avoid that, we need to delete the old one. In this function we check the key (our cache name), if the same is different from the previous, we delete the previous. Doing that, we always have only the last cache.
Fetch event
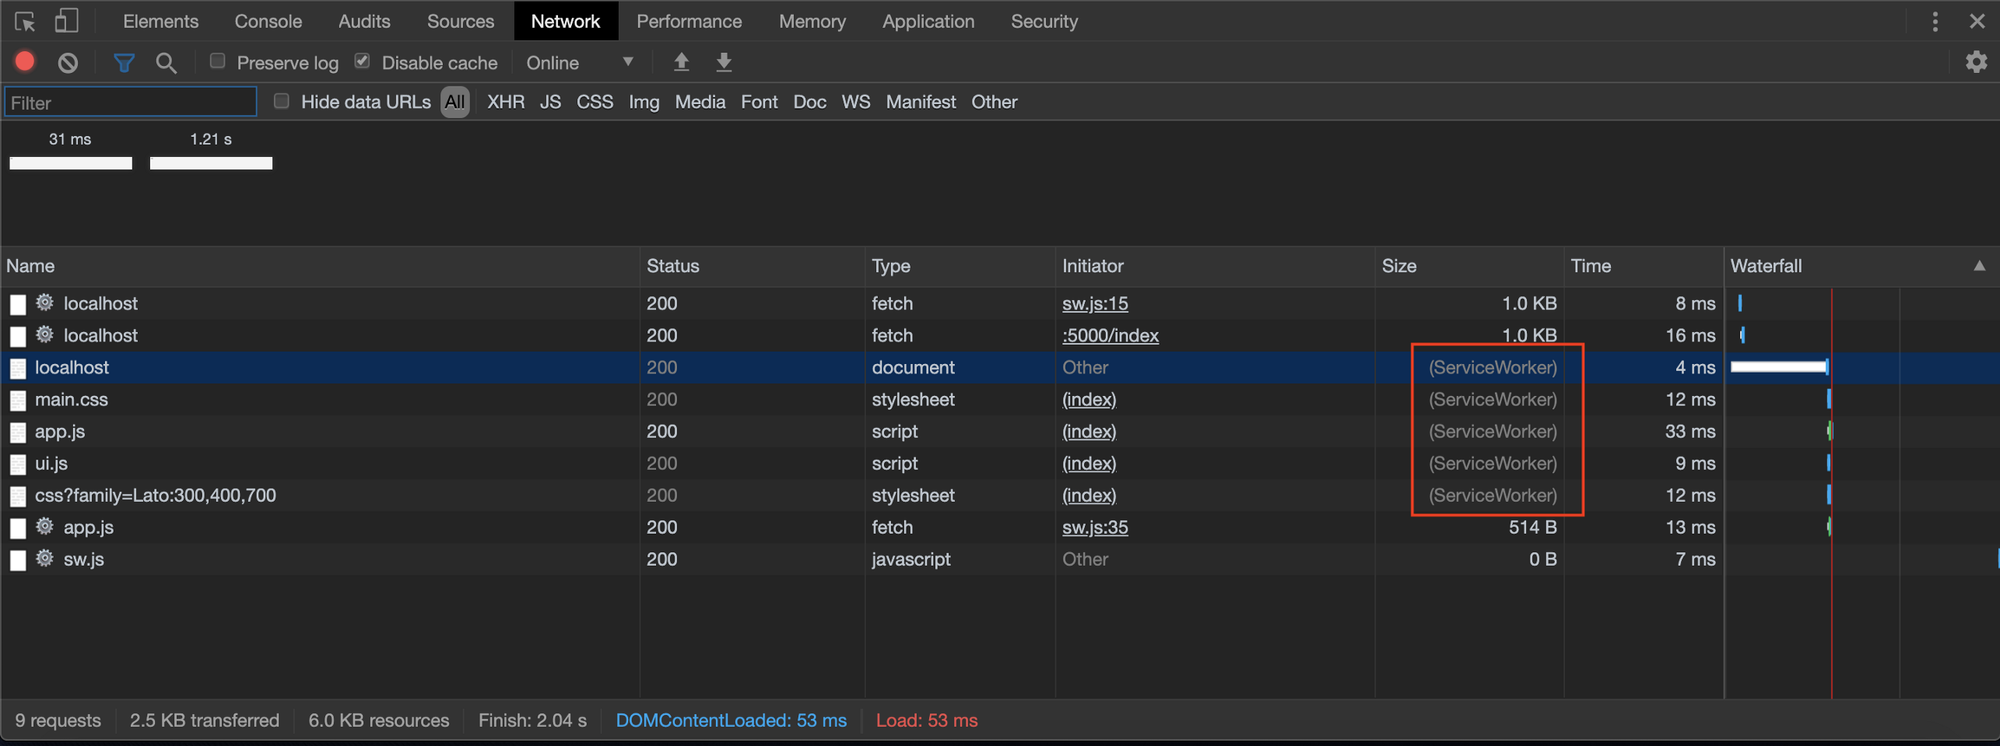
Here we check if already exists a cache if it exists we don’t download the resources anymore, but we take them from the cache, and we can see it again in the console.
ps. When we change our service worker file, we need to change the name of the cache. This allows us to update our service worker and create a new cache.
Dynamic cache
The dynamic cache is very powerful because it will cache all the fetch requests automatically during your navigation. This cache must be used carefully because, if you use it when you have an API call, you wouldn’t see the new data when they change.
All the configuration that you have seen before it’s perfectly good you need to change your sw.js file with this:
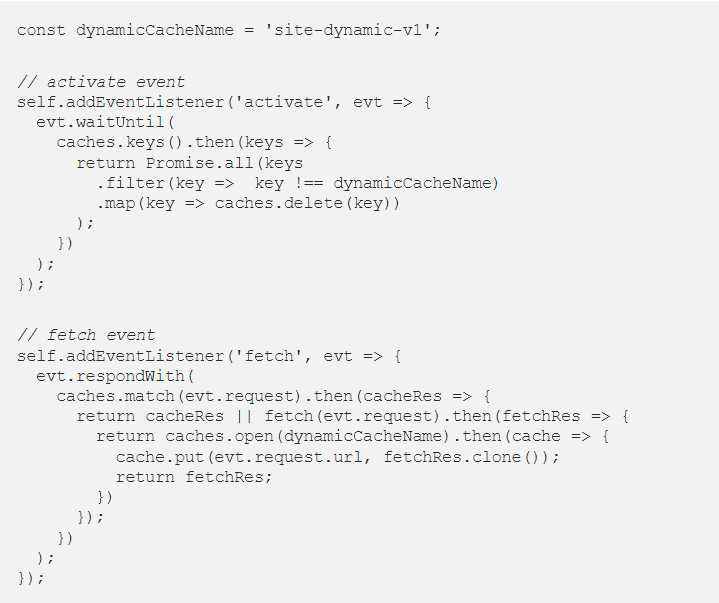
Active event
Here we do the same thing of the static cache
Fetch event
In the fetch event, we put in the cache automatically all the fetch requests.
If you try both the cache and after you run Lighthouse, you can see that your website is a WPA.
You can find the code of static and dynamic caches here.