
First: What is Web Part?
Web parts are a block of UI we can render within the SharePoint page. There are some OOTB web parts available that we can use on Modern pages but we can add our custom web parts using SPFx. In this article, we will create one custom web part using SharePoint Framework. Note that this tutorial is based on our experiences.
So let create first project.
We created a folder with the appropriate project name to the location where we want to create the solution. Here we have created one folder with the name FirstSPFxProject
Then we ran the below command in the terminal to create a new solution inside the current root folder FirstSPFxProject.
yo @microsoft/sharepoint
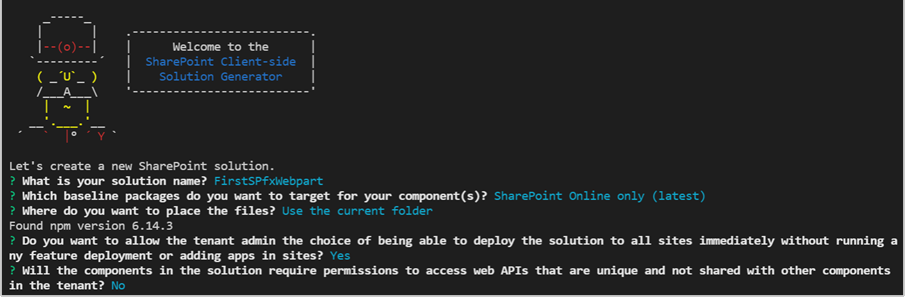
SharePoint Generator will run and ask for user input like Solution name, Target environment, file placement, tenant deployment feature, and permission requirement for web APIs. Below we have answered all these user inputs from the SharePoint generator.
After that generator will ask for one important user input which is the component type. We can create a Web part, extension, or library using SPFx so we need to choose from this option because the functionality of all three solutions will be different.

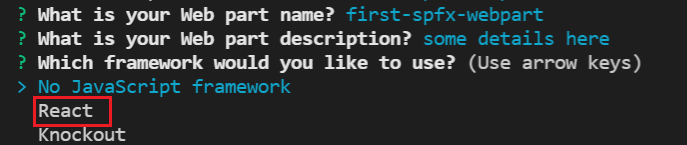
After selecting the solution type we need to enter the web part name and web part description. Here web part name can be different from the solution name because we can create multiple web parts in single solutions. After creating the one web part if we run the same SharePoint generator command it will add another web part in the same solution and directly ask for the web part name instead of the solution name.
After inserting the web part name and description we need to select the Framework. There are three Frameworks we can use to develop the Spfx web part. That is No Javascript Framework, React, and Knockout. No Javascript Framework is pure JavaScript without any other framework. Among all of these, React is a very popular framework to develop the SPfx components. So we will also select React framework here.
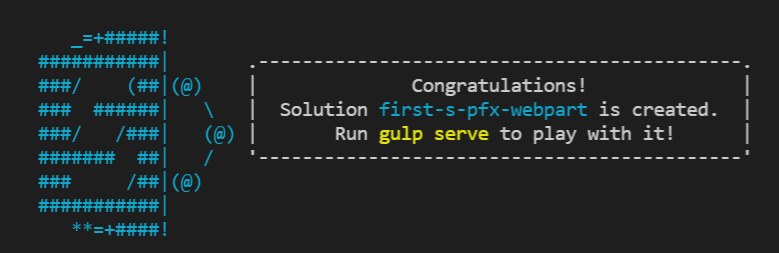
After selecting the framework terminal will show the progress bar and will start creating the files and folder inside our selected folder and finally gives a success message as given below:
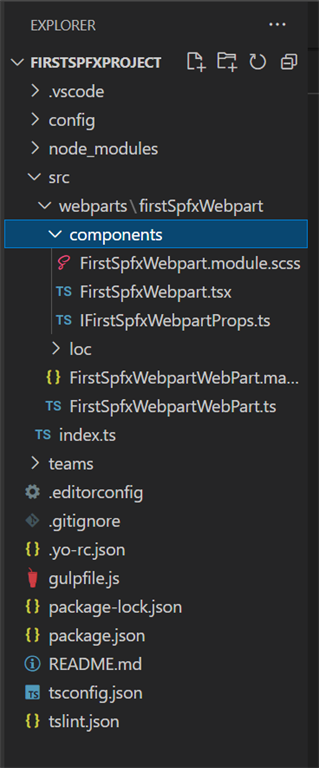
Also, we can see created files in Explorer. Code for every Web Part that we will create in the solution will be staying in the Web Parts folder and required files for the Web Part will be staying in the folder with the Web Part name.
Second: Test it!
After creating the solution we can test the Web Part on a workbench but before testing the Web Part if it is our first Web Part on an installed development environment and we are testing it on a local workbench then we need to run the below command to trust the self-signed certificate otherwise we can face a certificate error.
gulp trust-dev-cert
After that, we can run the solution by running the below command:
gulp serve
Run a Web Part on the Local Workbench
After running the gulp serve command we will automatically redirect to a local workbench in the default browser and the URL of the workbench will be given below:
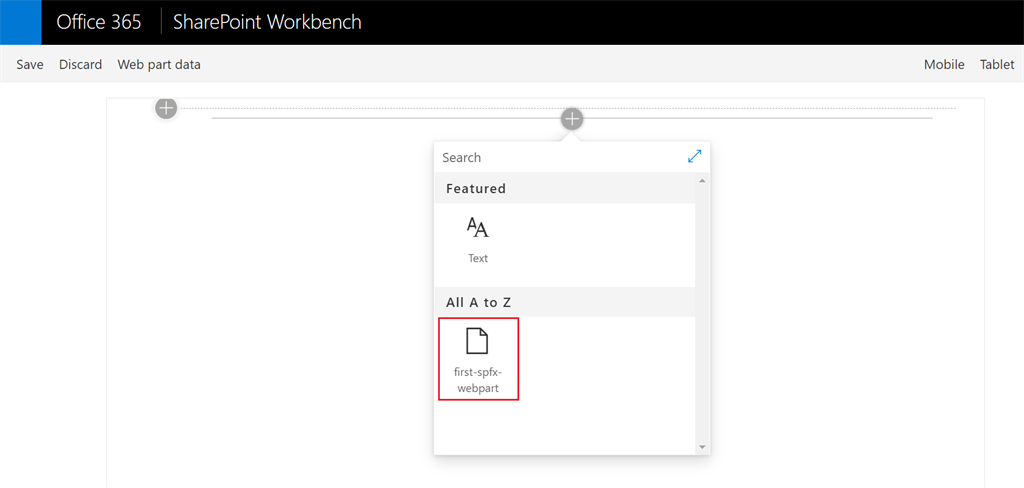
Run a Web Part on the SharePoint Workbench
In the local workbench, the SharePoint context will not be available so to test the web part with the current SharePoint context we can use the SharePoint workbench. The URL of the SharePoint workbench will be given below:
https://your-sharepoint-tenant.sharepoint.com/_layouts/workbench.aspx
Here we can give our SharePoint site URL before /layouts/workbench.aspx so that we can get that site’s context in our Web Part and list and libraries will be available to use.
Add the Web Part in the workbench
We need to add the Web Part by clicking the + sign on the workbench page then we can see the Web Part in the Web Part List.
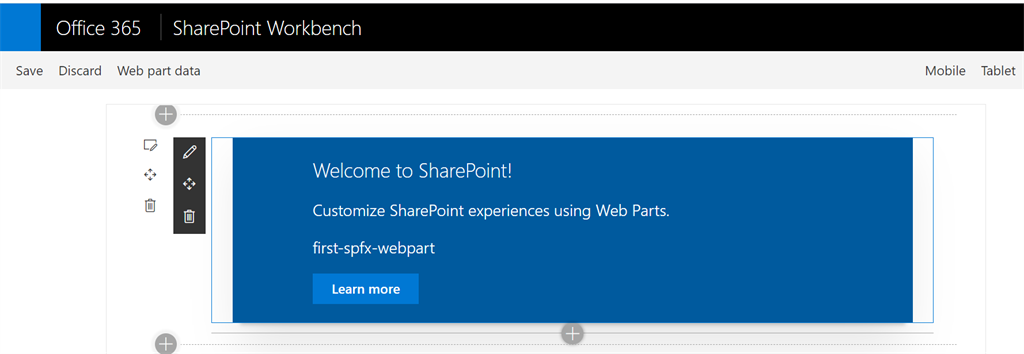
After adding the Web Part we can see the loaded Web Part on the workbench.
Publish the Web Part
After completing the development of the Web Part we can publish our Web Part in SharePoint so that it will be available to add on SharePoint Pages.
To publish the Web Part we can follow the below steps:
- Bundle the Solution
We need to bundle the solution by running the below command in the Node Terminal.
gulp bundle –ship
Package the solution
We need to run the below command to package the solution in the .sppkg file. After running the command we will get the solution file with the .sppkg extension on \sharepoint\solution folder path.
gulp package-solution –ship
- Upload the solution in App catalog site
We need to upload the generated
- Deploy the Solution
After uploading the solution package Dialog box to deploy the solution will appear from where we can deploy the solution in our SharePoint. We will see Make this solution available to all sites in the organization option in a dialog if we have selected Yes in Tenant level deployment while creating the solution if we select the Check box then web parts will be available in the whole tenant without adding as an app to each site. Otherwise, the web part will be available to only those sites where a solution is added as an app in Site contents.
After deploying the solution web part will be available to add on SharePoint pages.
Note
To use SPFx web parts in SharePoint sites Custom Scripting should be enabled for the SharePoint Site.
That's it! Thanks for reading!