

In this post, i will guide you to install self-hosted github action runner, then setup a simple workflow to run some command on that runner. To setup github action self-hosted runner, we will use action-runner-controller. I will use minikube and create a private repository on github for demo purpose. The runner controller will use Personal Access Token to authenticate with Github API.
1. Create Personal Access Token (PAT).
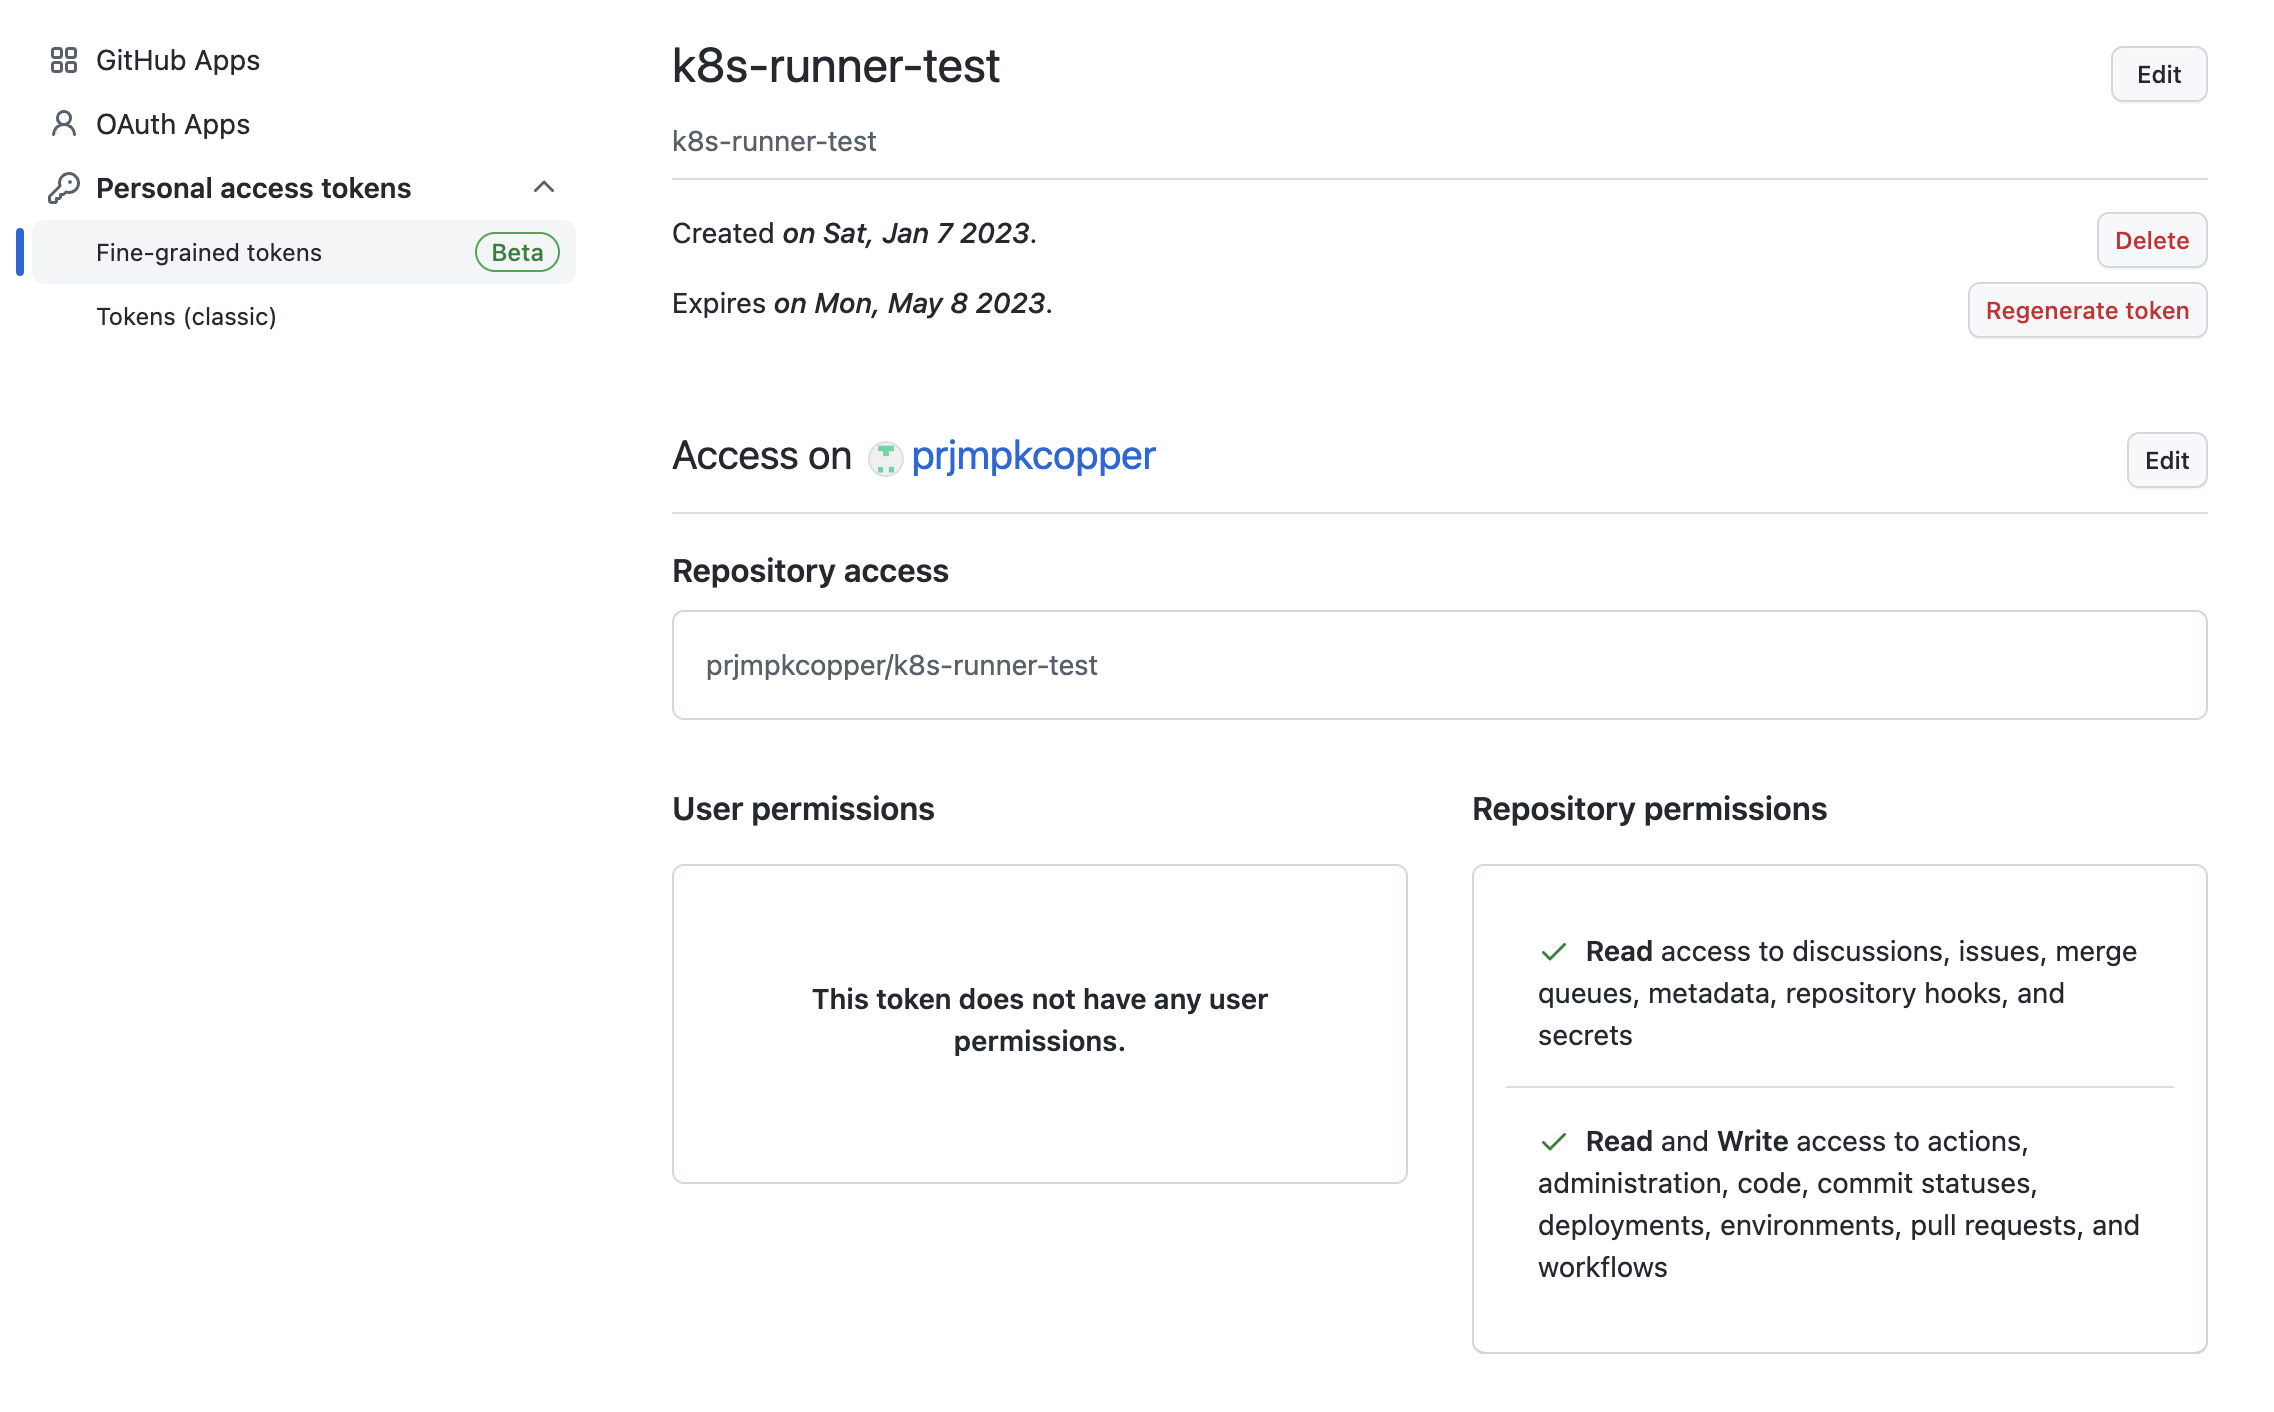
Go to https://github.com/settings/tokens?type=beta and create a PAT with the following repository permission.
- Read access to discussions, issues, merge queues, metadata, repository hooks, and secrets
- Read and Write access to actions, administration, code, commit statuses, deployments, environments, pull requests, and workflows
2. Setup Action Runner Controller
For this part, we will use helm and follow this instruction. Run the following command to install controller and their dependency.
2.1 Install cert-manager in your cluster
Add the Helm repository
helm repo add jetstack https://charts.jetstack.ioUpdate your local Helm chart repository cache:
helm repo updateInstall cert-manager
helm install \
  cert-manager jetstack/cert-manager \
  --namespace cert-manager \
  --create-namespace \
  --version v1.11.0 \
  --set installCRDs=true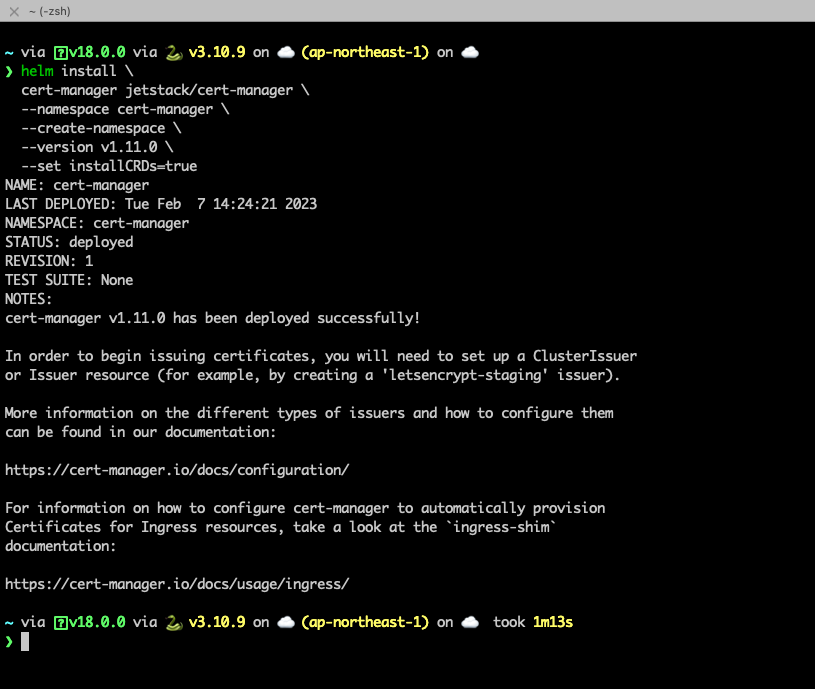
2.2 Install Action Runner Controller
Add the helm repository
helm repo add actions-runner-controller https://actions-runner-controller.github.io/actions-runner-controllerUpdate local chart
helm repo updateInstall controller, replace your PAT.
helm upgrade --install --namespace actions-runner-system --create-namespace\
  --set=authSecret.create=true\
  --set=authSecret.github_token="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"\
  --wait actions-runner-controller actions-runner-controller/actions-runner-controller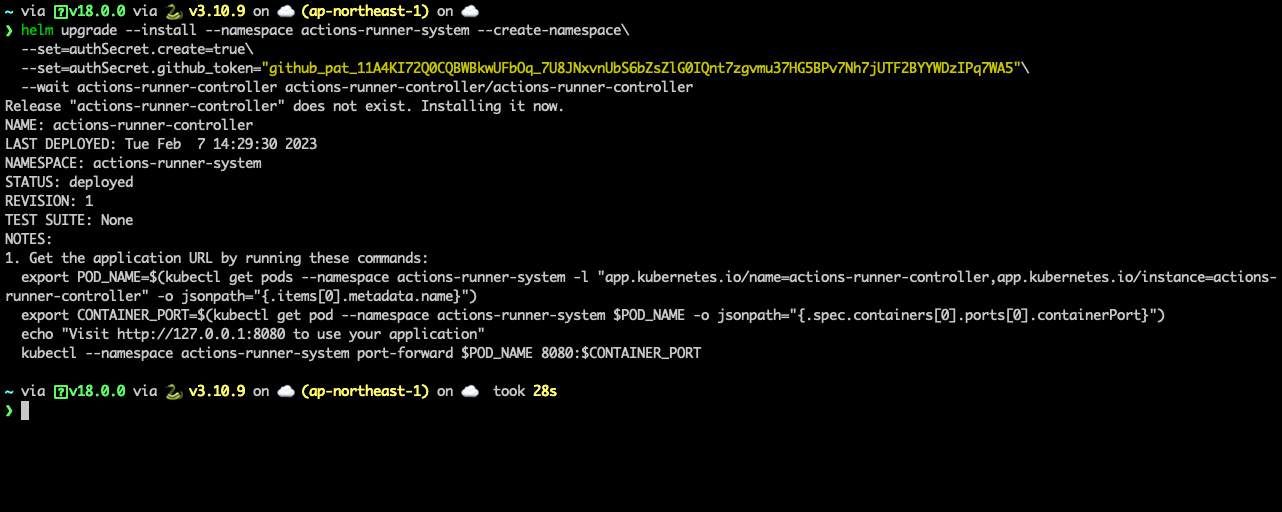
2.3 Create Runner Deployment
Create service account for runner. For demo purpose, i will create a service account and binding cluster admin role to this service account. The content of service-account.yaml is same as below.
apiVersion: v1
kind: ServiceAccount
metadata:
  namespace: default
  name: github-runner-api-sa
automountServiceAccountToken: true
---
apiVersion: rbac.authorization.k8s.io/v1
kind: ClusterRoleBinding
metadata:
  name: github-runner-api-cluster-role-binding
  namespace: default
subjects:
  - kind: ServiceAccount
    name: github-runner-api-sa
    namespace: default
    apiGroup: ""
roleRef:
  kind: ClusterRole
  name: admin
  apiGroup: rbac.authorization.k8s.io
kubectl create -f service-account.yaml
Create RunnerDeployment resource. The content for runner.yaml is same as below.
You need to modify repository and labels to match with your repository.
apiVersion: actions.summerwind.dev/v1alpha1
kind: RunnerDeployment
metadata:
  name: github-runner-api
  namespace: default
spec:
  replicas: 1
  template:
    spec:
      serviceAccountName: github-runner-api-sa
      automountServiceAccountToken: true
      image: summerwind/actions-runner-dind
      dockerdWithinRunnerContainer: true
      labels:
        - k8s-api
      repository: prjmpkcopper/k8s-runner-test
      workVolumeClaimTemplate:
        storageClassName: "standard"
        accessModes:
          - ReadWriteOnce
        resources:
          requests:
            storage: 5Gi
      env: []
kubectl create -f runner.yaml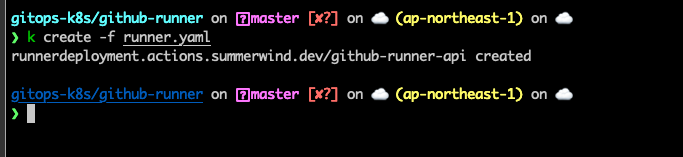
2.4 Check runner status
Run the below command to list and check status of this runner.
kubectl get runner
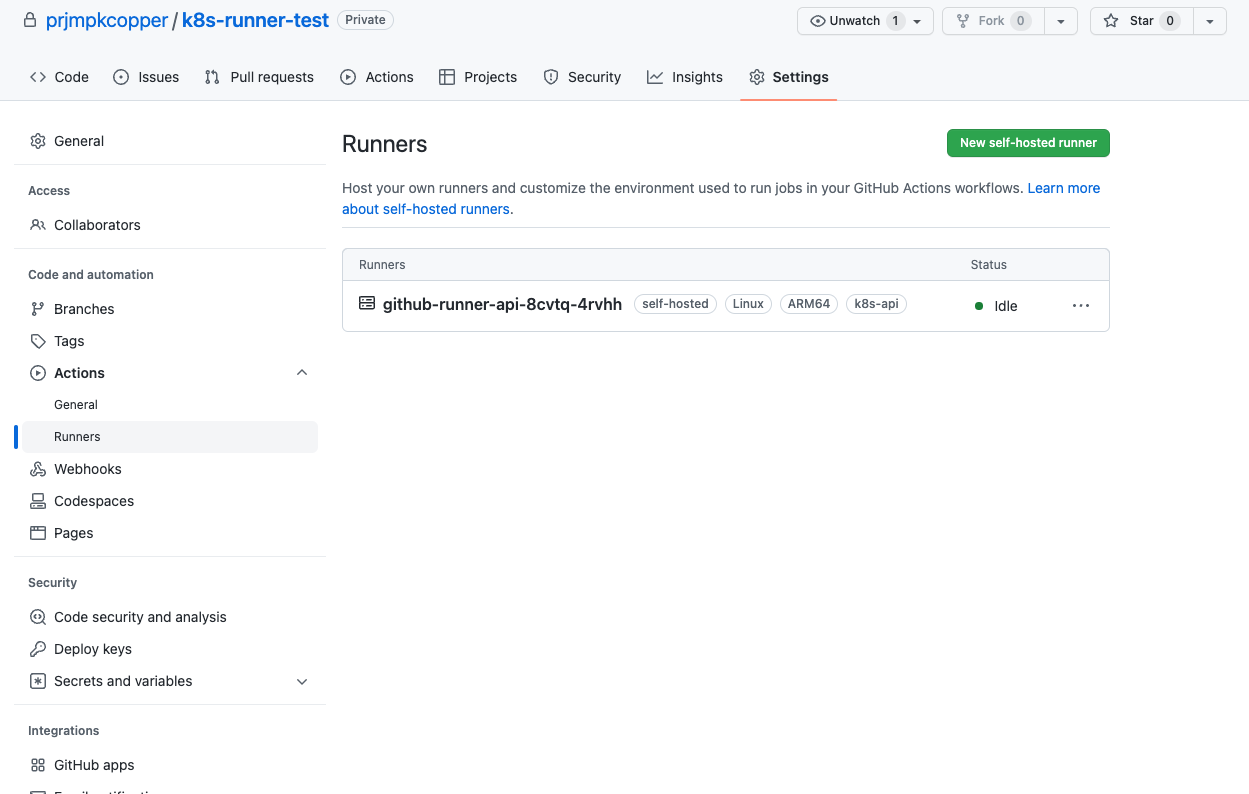
After waiting for a while, you will see our self-hosted runner on GitHub. Our runner has k8s-api label, we will use this in workflows.
3. Setup demo workflows
I will create a simple workflows, we will have one job to list all pod on k8s cluster. The content is same as below.
name: Auto Build/Deploy

on:
  push:
    branches:
      - "*"

jobs:
  build:
    name: Build
    runs-on:
      - self-hosted
      - k8s-api
    steps:
      - name: Get Pods
        run: |
          set -ex
          cd $HOME
          wget https://dl.k8s.io/release/v1.26.0/bin/linux/arm64/kubectl
          chmod +x ./kubectl
          ./kubectl auth can-i get pods
          ./kubectl get pods -A
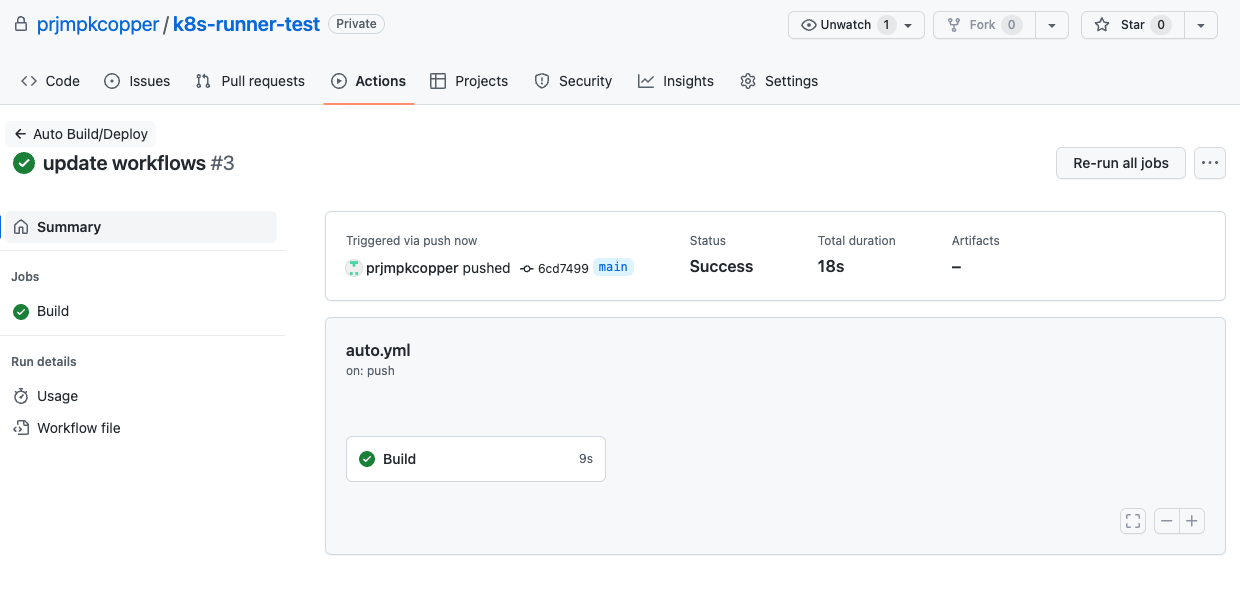
Push code to Github and open action tab, you will see our runner is running.
View the Build job.
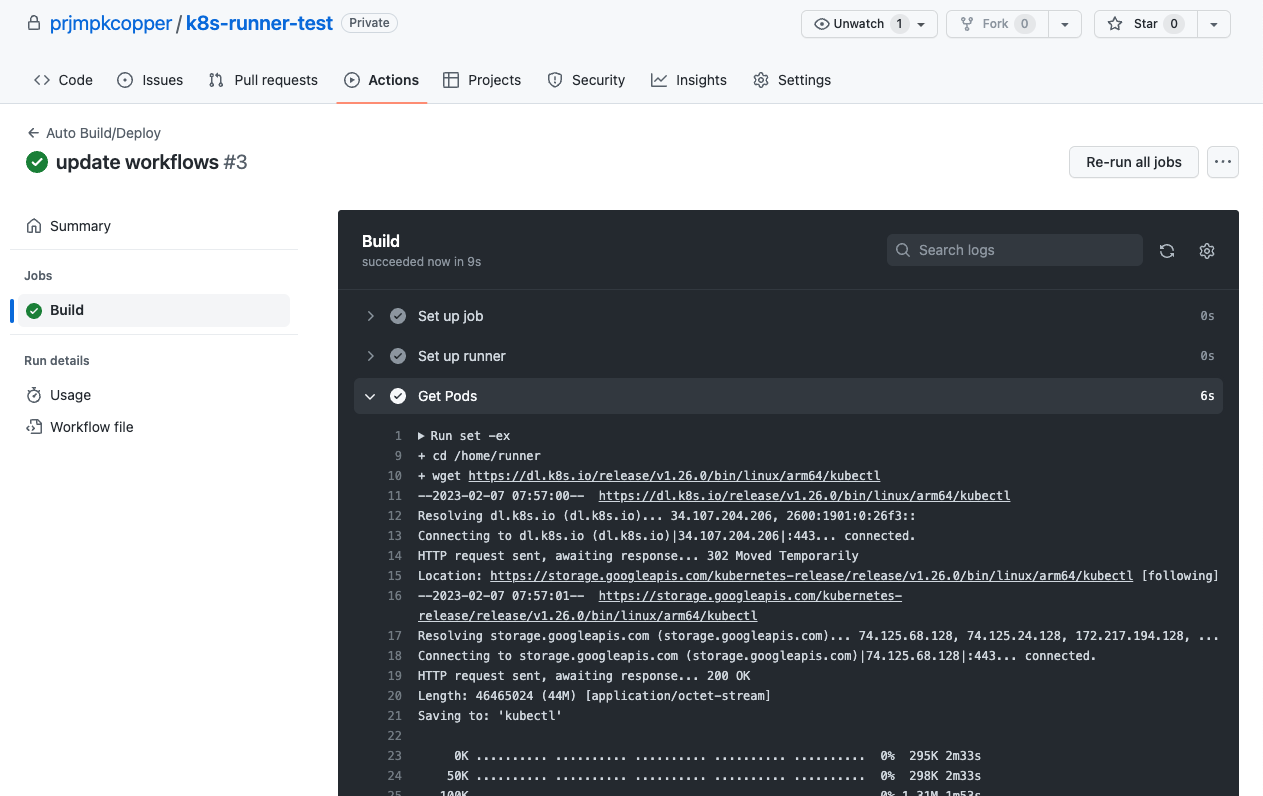
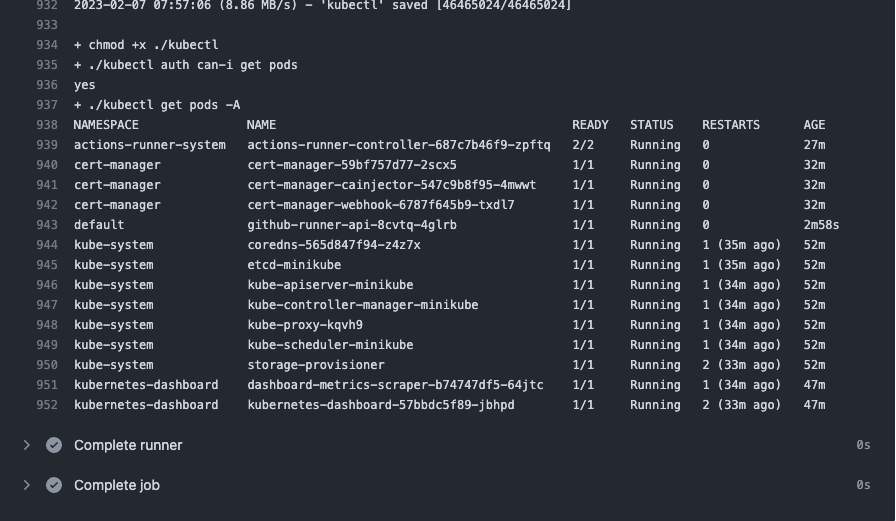
Check the get pods step.
That is, we already able to create GitHub action self-hosted runner. Thank for reading.