I. What is XAMPP ?
XAMPP is an open-sourced server setup to test the projects on a local machine before making it available to everyone over the web. This web app development server comes pre-installed with Apache web server, MySQL database, PHP, and Perl that help you build an offline application with desired features and functions.
XAMPP is a lightweight solution that works perfectly on multiple platforms likes Linux, Windows, and Mac OS.
II. What is MYSQL ?
MySQL is an open-sourced relational database management system (RDBMS) that relies on SQL (structured query language). Most of the web-based applications use RDBMS for its development. Basically, MySQL helps you structure your data, present the information in an organized manner, edit, delete, update, or retrieve data whenever required.
III. How to Install XAMMP on Windows 10
Let’s get started with the step-by-step guide to how to install XAMPP on Windows 10.
Step 1: Download and Install XAMPP
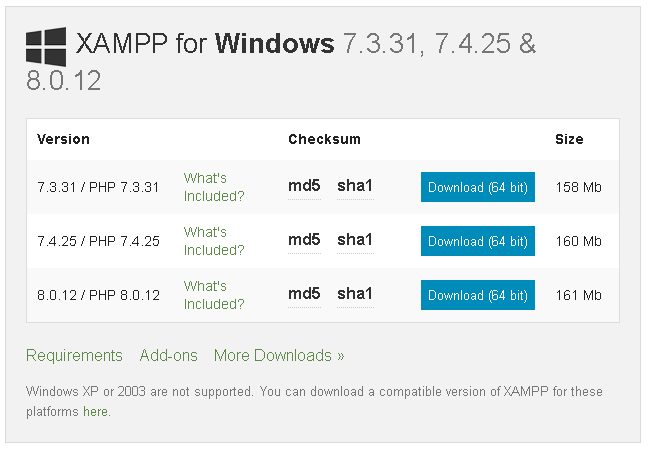
To download and install XAMPP, go to apachefriends downloads page.
You will see XAMPP ready to download for cross-platform like Windows, Linux, Mac OS X. Since we are discussing How to install XAMPP on Windows 10, we will choose the Windows option as shown below.
Step 2: Run the Installer to Install XAMPP
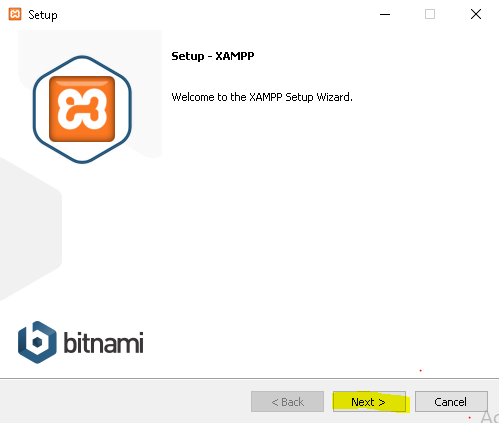
1. XAMPP Setup Wizard
During the installation process, you may come across warning pop-ups. But you would probably click ‘Yes’ to start the installation process. Soon after you click on the downloaded file, the XAMPP setup wizard will open. Now click on the ‘Next’ Button to proceed.
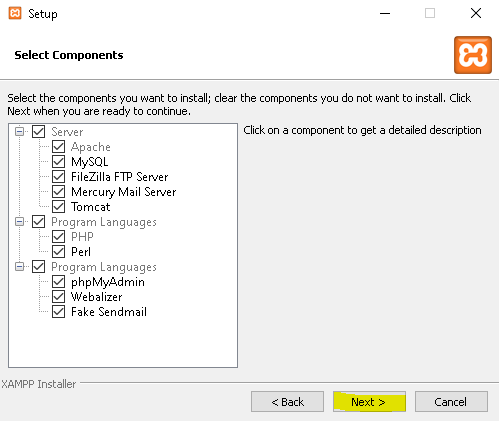
2. Select Components
Next, you need to check the components which you want to install and can uncheck or leave as it is which you don’t want to install. You can see there are a few options which are light grey in color. These are the options which are necessary to run the software and will automatically be installed. Now click on the ‘Next’ button to continue.
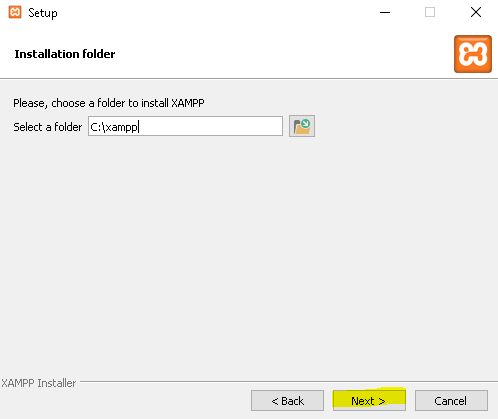
3. Select Installation Folder
Now you need to choose the folder where you want to install the XAMPP. You can choose the default location or you can choose any location of your choice and choose the ‘Next’ button to move ahead.
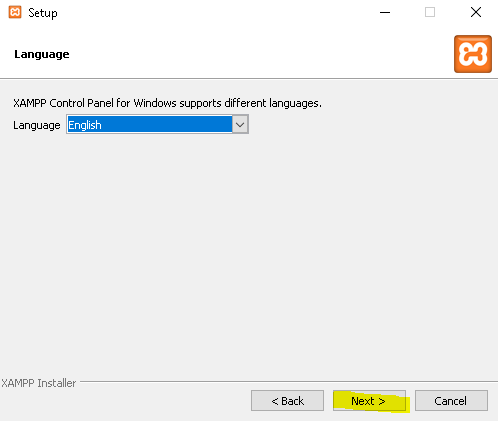
4. Select language
Now will see a window showing you information about language. You can choose which language you want to work with. Then, click on the ‘Next’ button to continue.
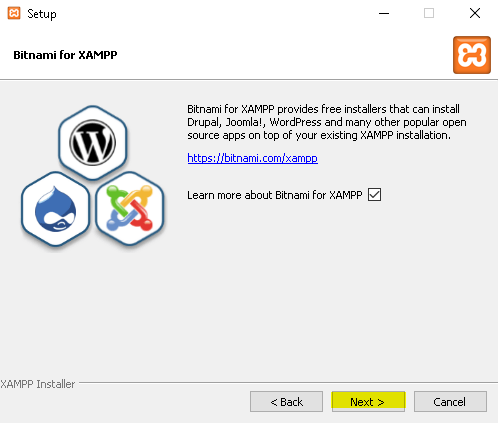
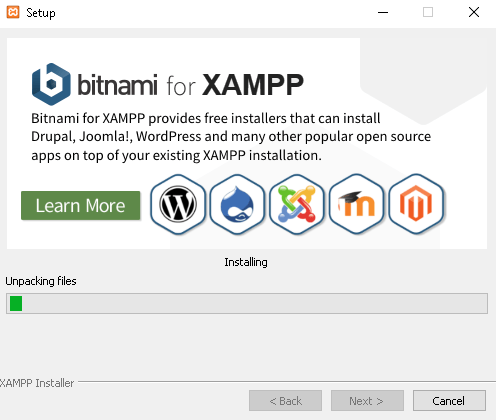
5. Bitnami for XAMPP
Now will see a window showing you information about Bitnami. Simply click on the ‘Next’ button to move further. However, if you wish to learn more about the Bitnami, then you may check the box saying ‘Learn more about Bitnami for XAMPP.’
Basically Bitnami is for installing open source applications i.e. WordPress, Joomla etc on your newly installed XAMPP.
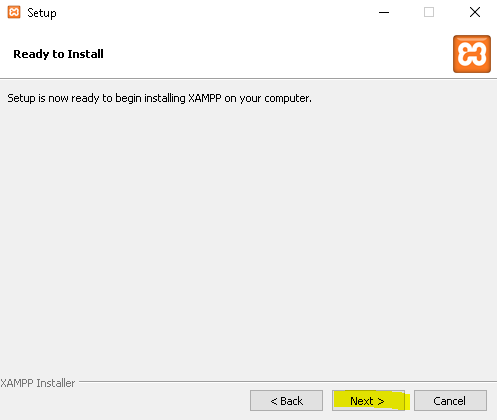
6. Ready to Install XAMPP
Now you’ll see another window with a message “Setup is now ready to begin installing XAMPP on your computer” like shown below. You just have to hit the ‘Next’ button to proceed.
7. Waiting for installing process
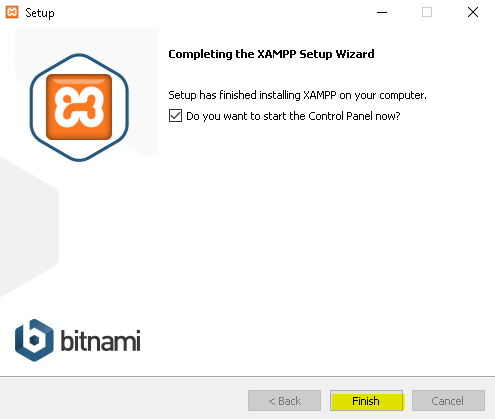
8. XAMPP Installation Complete
Once the installation is completed, you will be asked whether you would like to start the control panel now or not, displaying the message “Do you want to start the control panel now?” Check the box and click on the ‘Finish’ button and see if the XAMPP is working fine.
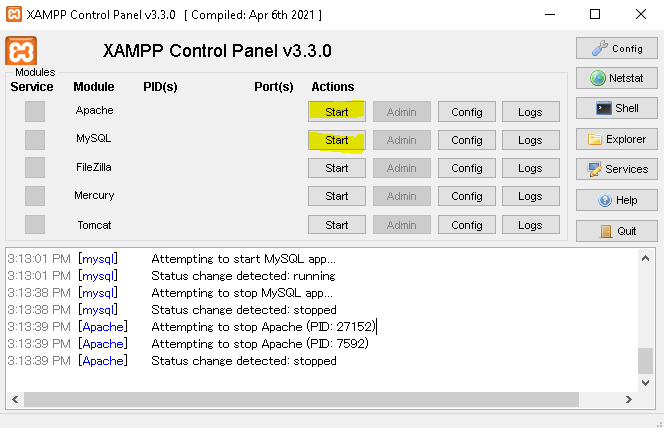
Step 4: XAMPP is now Installed on Windows, run it
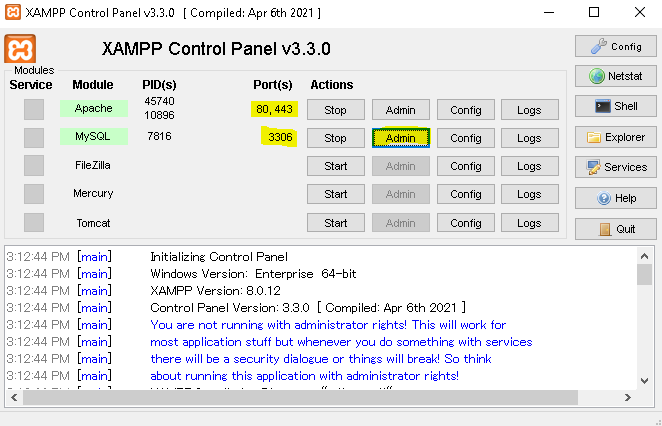
If the entire process of XAMPP installation went correctly, then the control panel would open smoothly. Now click on the ‘Start’ button corresponding to Apache and MySQL.

IV. Create a simple MYSQL Database on XAMPP with phpMyAdmin
To working with MYSQL we need a web interface - phpMyAdmin which makes working with database easy and simple. Click 'Admin' on Xampp Control Panel or enter the link http://localhost/phpmyadmin/ to access it.

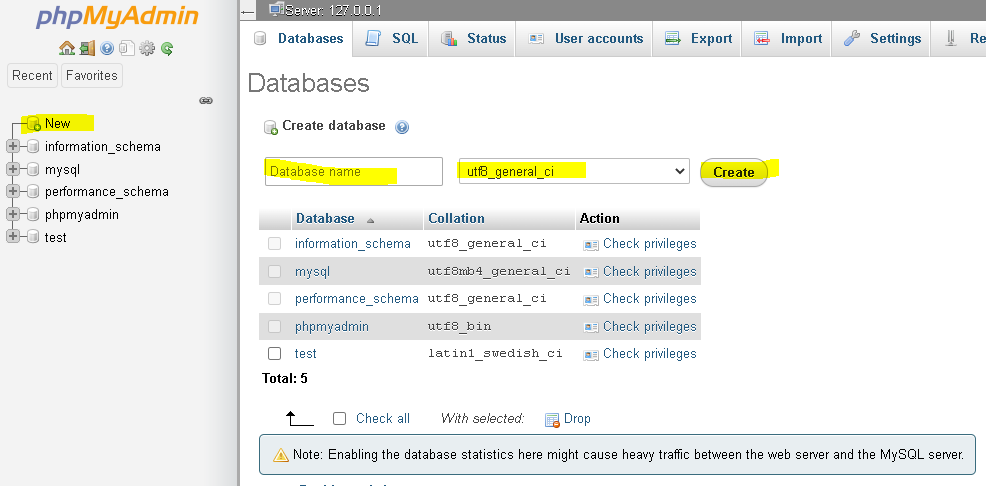
1. Create your first Database
You can create you Database by click 'New' then you will see the form which you need to complete to create your own. Enter name of Database, charset, then click 'Create' to start creating.
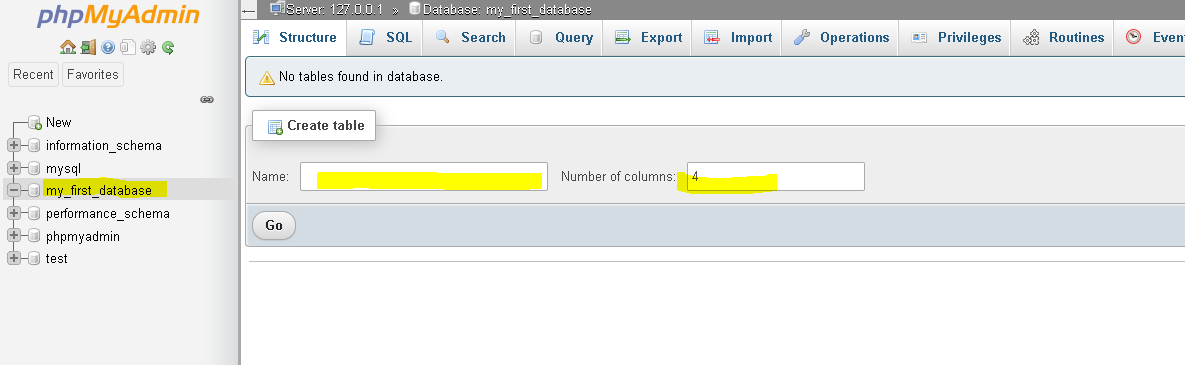
2. Create Table on your Database
After creating Database successfully you can see your Database in the list on you left side. In the right side, you can create table by enter the name and number of column then click 'Go' to go ahead.
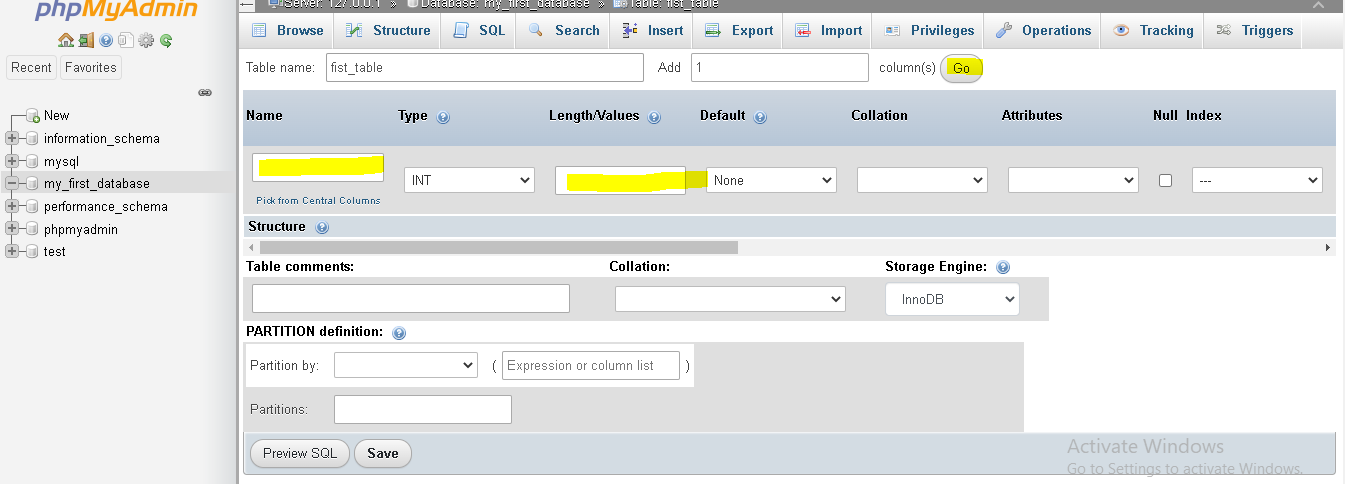
You can set you field name, type, length, .etc... in your table and then click 'Save' to complete creating Table.
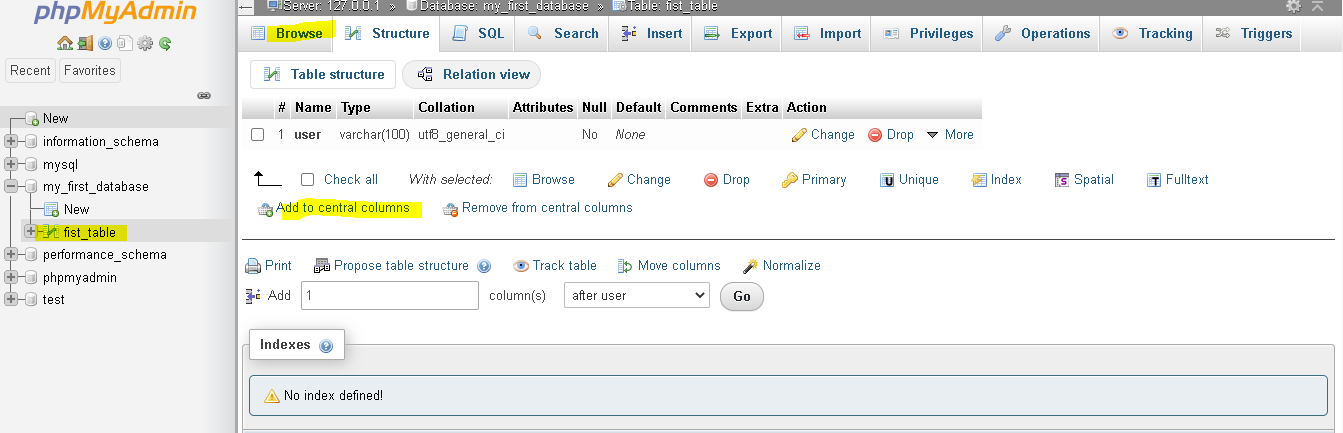
Done, you can see all table in the left side list... and simply to update, create more tables.
3. Set Password to phpMyAdmin on XAMPP
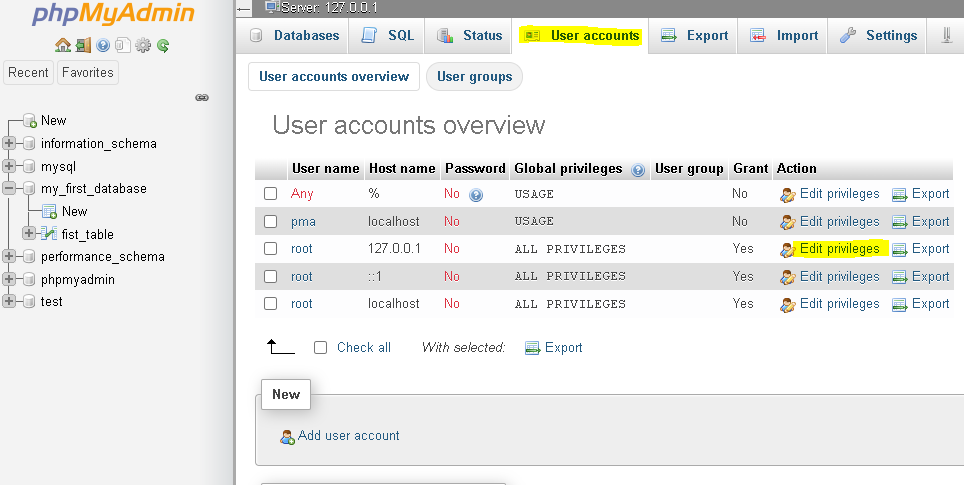
Step 1: On phpMyAdmin page, click on the ‘User accounts’ option at the top of the page.
Step 2: Now press the ‘Edit Privileges’ under ‘Actions’ option for the Username ‘root’ and Hostname ‘localhost.’
Step 3: Now choose the third tab ‘Change password’ and type your password in the provided field, retype the password to confirm it and then finally click on the ‘Go’ key to conclude the process.
4. Import Database on XAMPP phpMyAdmin
In order to import MySQL database via phpMyAdmin XAMPP, follow the following step.
- Open the Database in phpMyAdmin.
- Click on the Databases from the top menu.
- Select the name of the database from the drop-down menu which you want to import.
- Click on the Import tab.
- Browse your .sql file by clicking on the ‘Choose File’ option that you wish to import. And then click on the ‘Go’ button at the bottom.
- You’re done!!

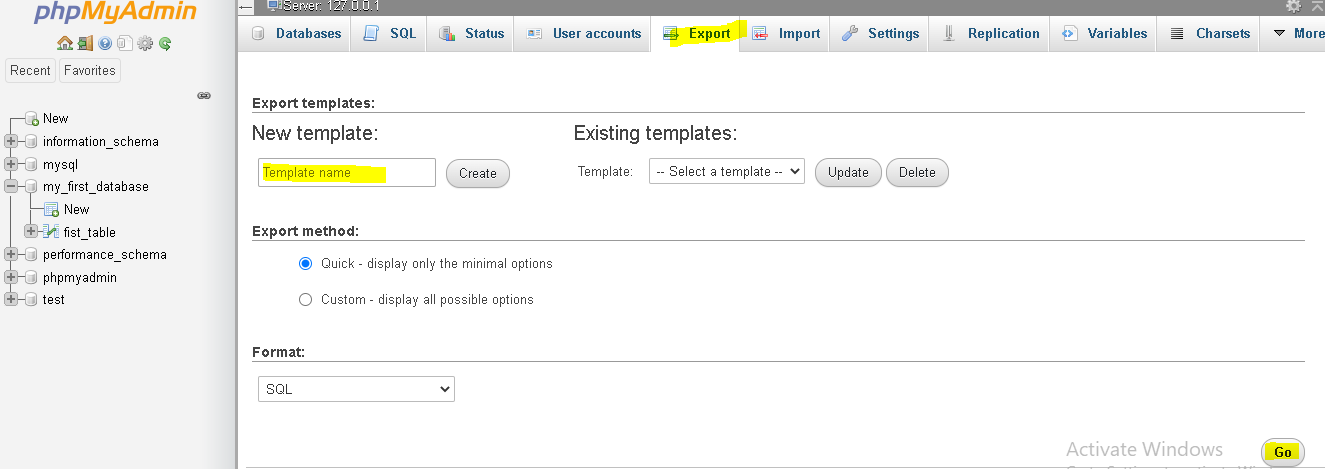
5. Export Database on XAMPP phpMyAdmin
In order to export MySQL database via phpMyAdmin XAMPP, follow the following step.
- To begin the export process, log in to the cPanel and open the phpMyAdmin interface.
- In the left pane of the phpMyAdmin, select the database you want to export.
- Select the ‘Export’ tab at the top.
- Now, you shall see two options i.e. Quick and Custom. You can select Quick if you want to go with default option or select Custom if you want to select particular tables and compression type of the exported file in addition to many other options.
Note: The older version of phpMyAdmin does not support Quick. So you’ll have to follow another method for that.
- Now, single out the format you wish to export your database in. Click on the drop-down menu and opt out the one from the given list.
- Confirm your choice by clicking on the ‘Go’ button.
- Now, you will be asked to either open or save the chosen file. You may select save the file and save it to your desired location.
Congratulations!! You have successfully exported the file.
V. Conclusion
As you can see all the things in phpMyAdmin XAMPP are greatly powerful that gives you the freedom to manage the database efficiently.
Now, you can easily to install your own Machine to work with MYSQL on XAMPP. Certainly, the biggest advantage of installing XAMPP is that you don’t have to worry about the number of attempts you make or the kind of experiments you perform on your site. You can freely try anything you want without any tension of losing your users.