

VueJS FrontEnd
Let's create a basic Vue.js app using the Vue CLI. If you haven't installed the Vue CLI, you can do so by running the following commands (choose one)
npm install -g @vue/cli #
yarn global add @vue/cli
Now, let's create a new Vue.js project:
vue create vue-csharp-api-app
Next, create a new component for displaying the data. Create a file named ApiData.vue in the src/components directory:
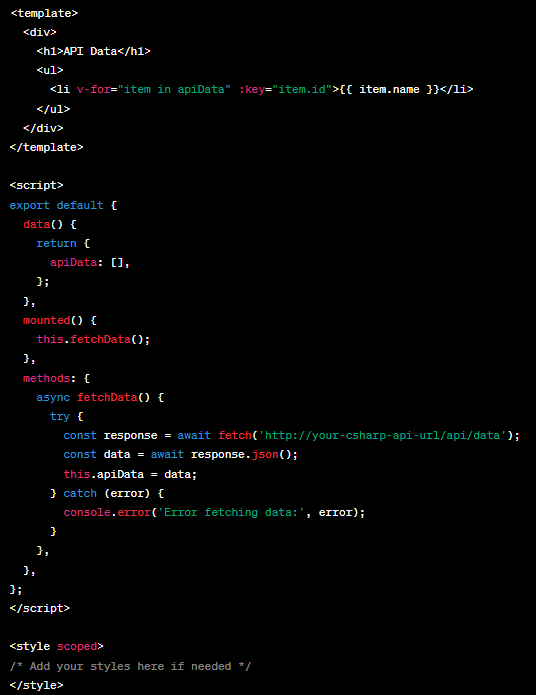
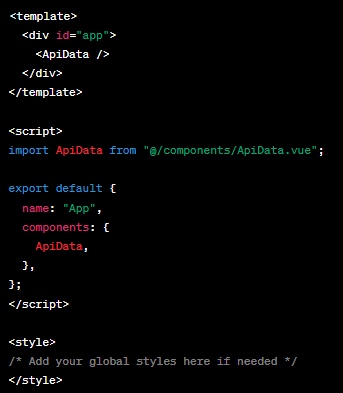
Now, use this component in the src/App.vue file:
Make sure to replace 'http://your-csharp-api-url/api/data' with the actual URL of your C# API endpoint later
Run your Vue.js app: npm run serve or yarn serve
C# BackEnd
Create a new ASP.NET Core Web API project using Visual Studio or your preferred method.
In the Controllers folder, add a new controller named DataController.cs with the following content:
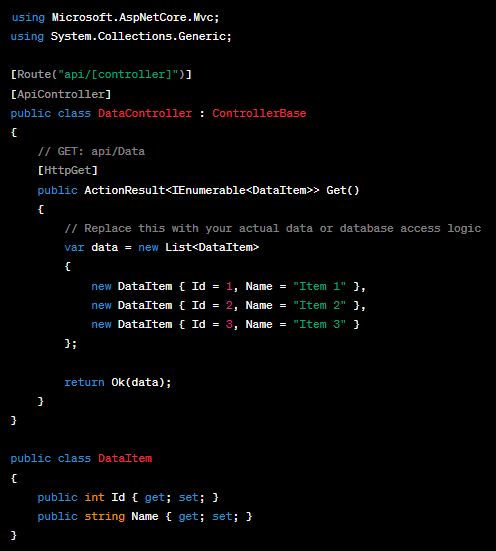
- The
DataControllerdefines a simple API endpoint that returns a list ofDataItem. The[HttpGet]attribute specifies that this method should handle HTTP GET requests. - Run your ASP.NET Core API. The default URL for this example would be something like
https://localhost:5001/api/data.
Now, you can update the Vue.js app's API call URL in the ApiData.vue component to match your C# API endpoint. In the fetchData method, replace the URL with the one where your C# API is hosted:
const response = await fetch('https://localhost:5001/api/data');
Add Swagger for easier testing
Install the Swagger NuGet packages. Open your project in Visual Studio, right-click on the project, and select "Manage NuGet Packages." Search for and install the following packages:
- Swashbuckle.AspNetCore
- Swashbuckle.AspNetCore.Annotations
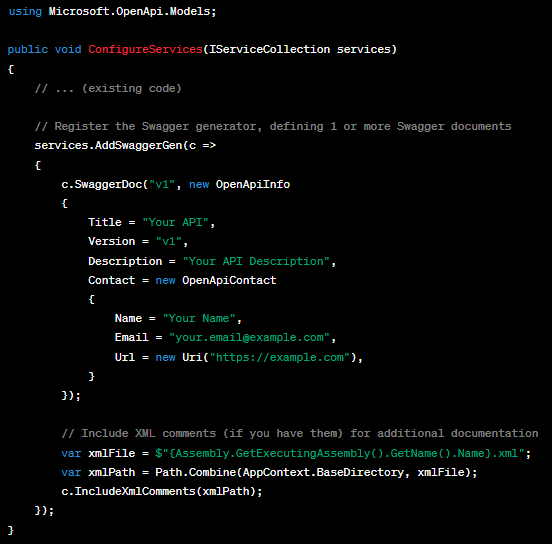
Open the Startup.cs file and add the following code to the ConfigureServices method to configure Swagger:
Add the following code to the Configure method in Startup.cs to enable Swagger UI:
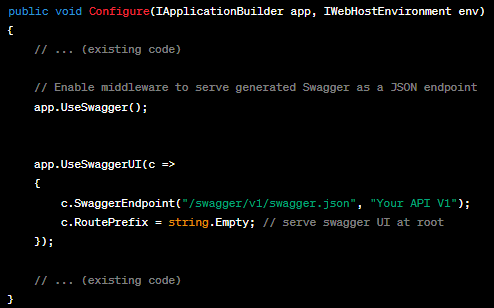
When you navigate to https://localhost:5001/swagger, you should see the Swagger UI, allowing you to explore and test your API. The Swagger documentation is automatically generated based on your API controllers and actions.
Deploy to Heroku
npm run build
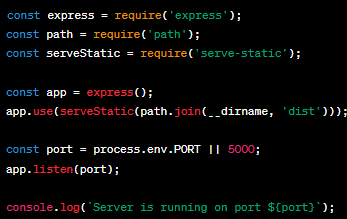
Heroku needs a server to serve your Vue.js app. Create a file named server.js in the root of your project with the following content:
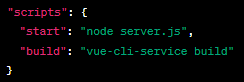
package.json file to run the serverCreate a file named Procfile in the root of your project (no file extension) with the following content:
web: npm start
If your project is not already a Git repository, run the following commands:
git init
git add .
git commit -m "Initial commit"
Open a terminal and run the following command to log in to your Heroku account:
heroku login
heroku create
git push heroku master
Once the deployment is complete, you can open your app in the browser:
heroku open
That's it! Your Vue.js app should now be deployed to Heroku. If you encounter any issues, check the Heroku logs using
heroku logs --tail