Karpenter is an open-source node provisioning project built for Kubernetes. Adding Karpenter to a Kubernetes cluster can dramatically improve the efficiency and cost of running workloads on that cluster. Karpenter works by:
- Watching for pods that the Kubernetes scheduler has marked as unschedulable
- Evaluating scheduling constraints (resource requests, nodeselectors, affinities, tolerations, and topology spread constraints) requested by the pods
- Provisioning nodes that meet the requirements of the pods
- Removing the nodes when the nodes are no longer needed
In the scope of this post, i will guide you to install Karpenter on EKS Cluster, create a deployment to see how Karpenter spin up/down node to satisfy deployment resource.
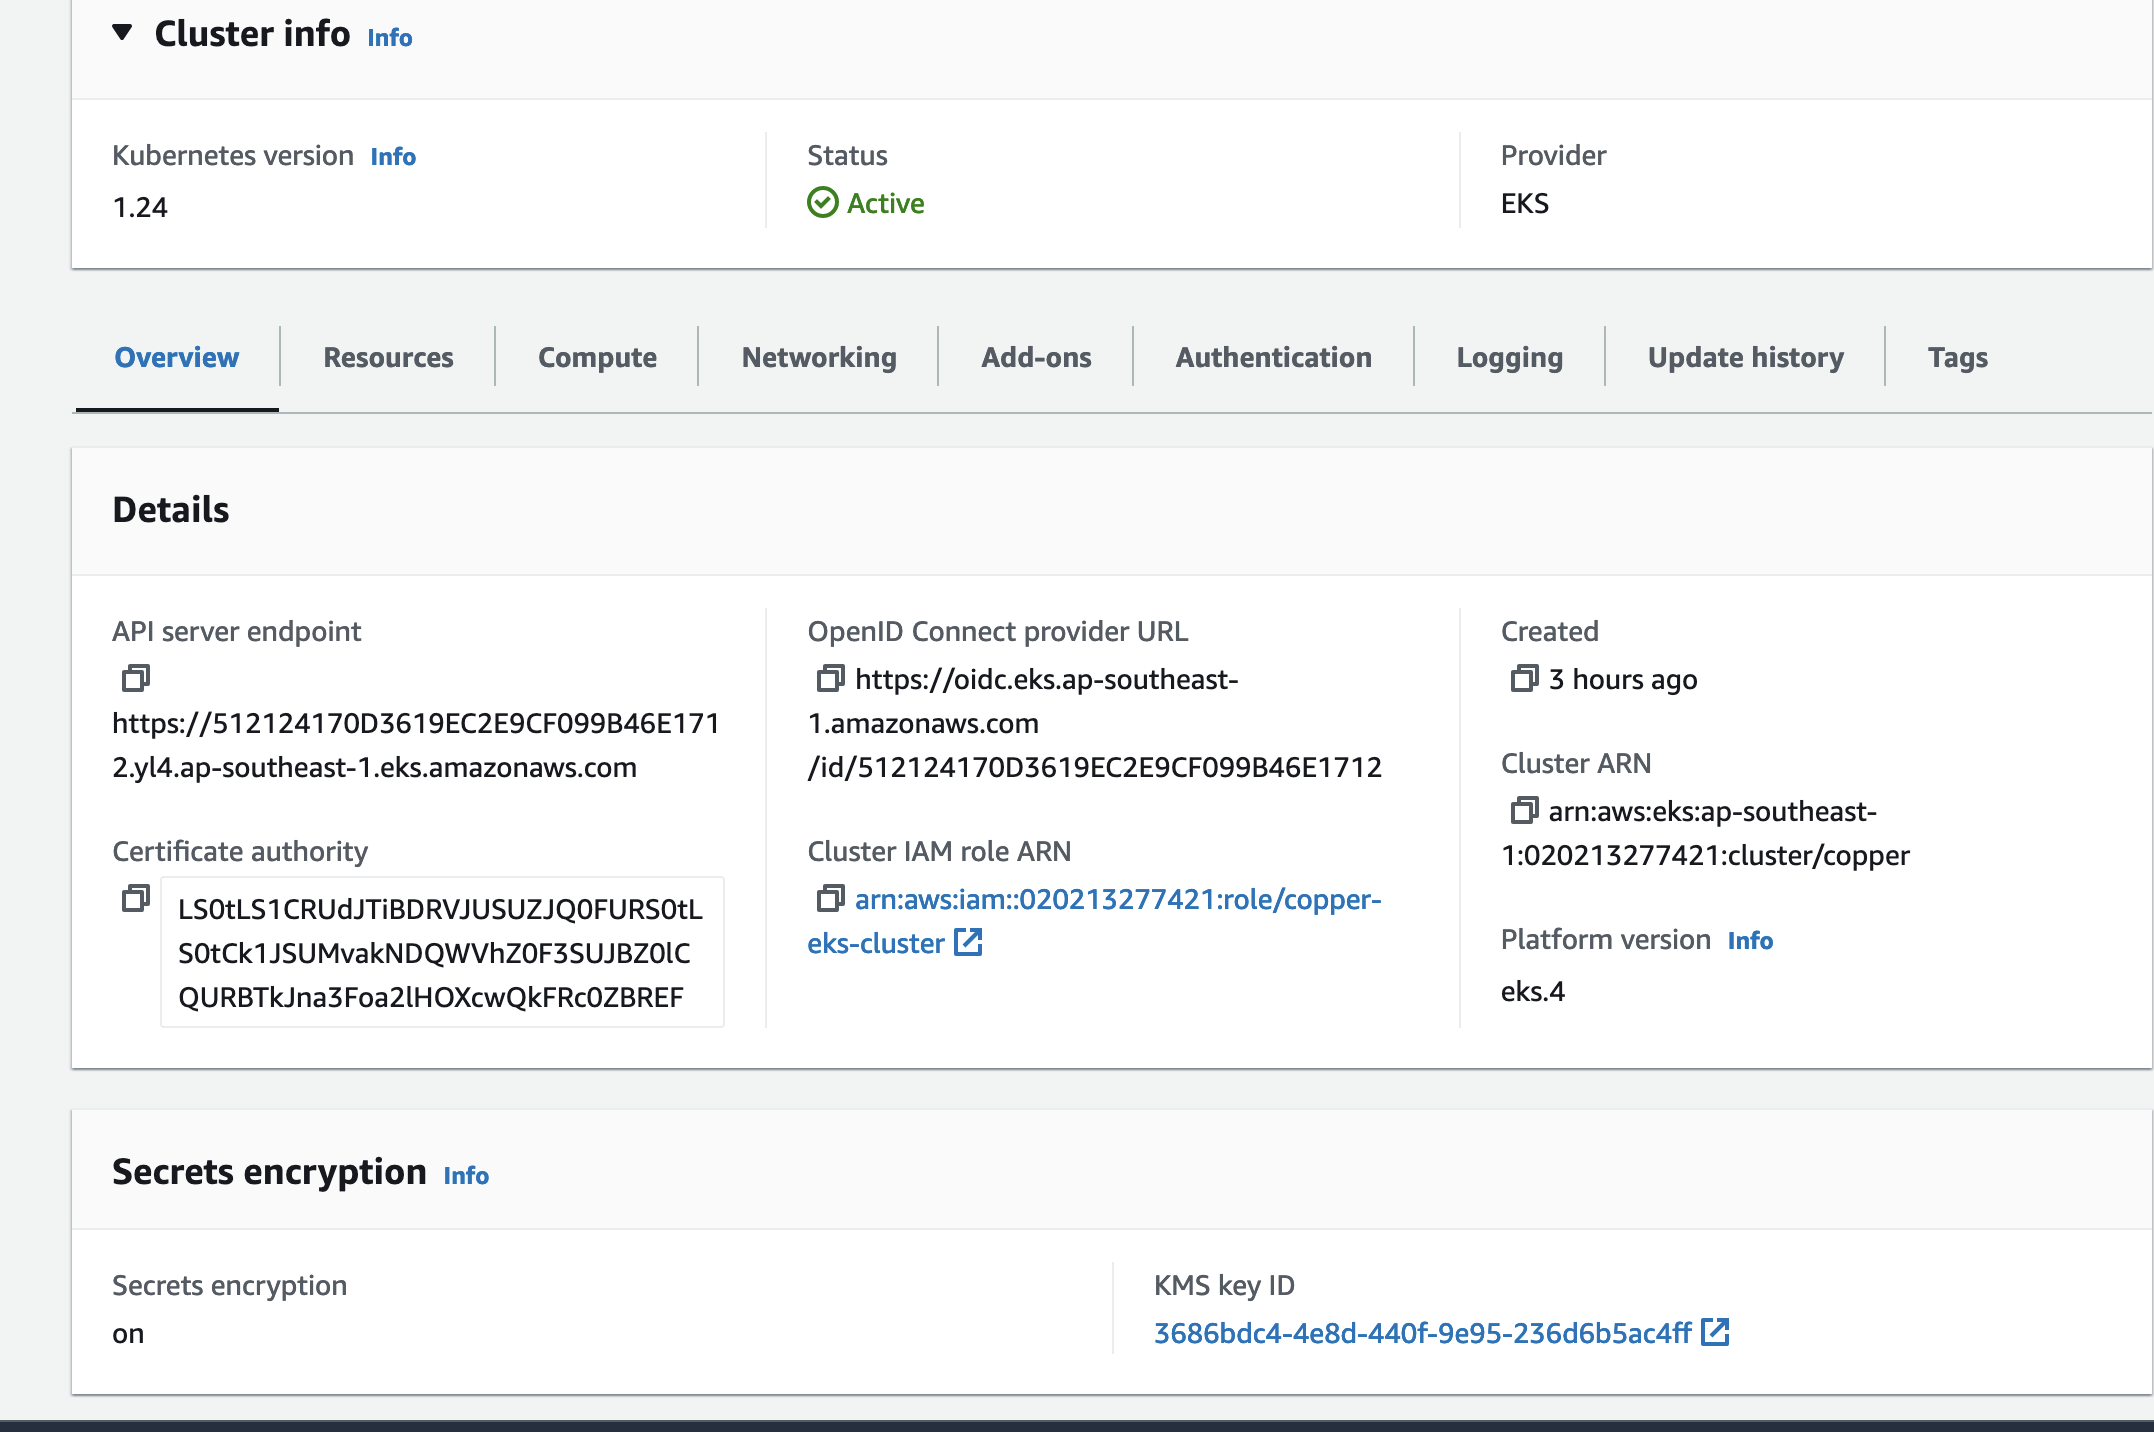
Let assume that we already have a EKS cluster with OIDC enabled.
We use IRSA to provide some required permission for karpenter to create/remove node to/from cluster. Beside that each node will have an instance profile attached to them, we did that by creating an IAM role and an instance profile associated with this role.
Create Karpenter Node Role/Instance Profile
Karpenter spin up a node that have an instance profile associate with this. The node need to have enought permission to pull image also joining EKS cluster.
The role permission need to include the aws-managed policy
- arn:aws:iam::aws:policy/AmazonEKSWorkerNodePolicy
- arn:aws:iam::aws:policy/AmazonEC2ContainerRegistryReadOnly
- arn:aws:iam::aws:policy/AmazonSSMManagedInstanceCore
The role after creating is look like this.
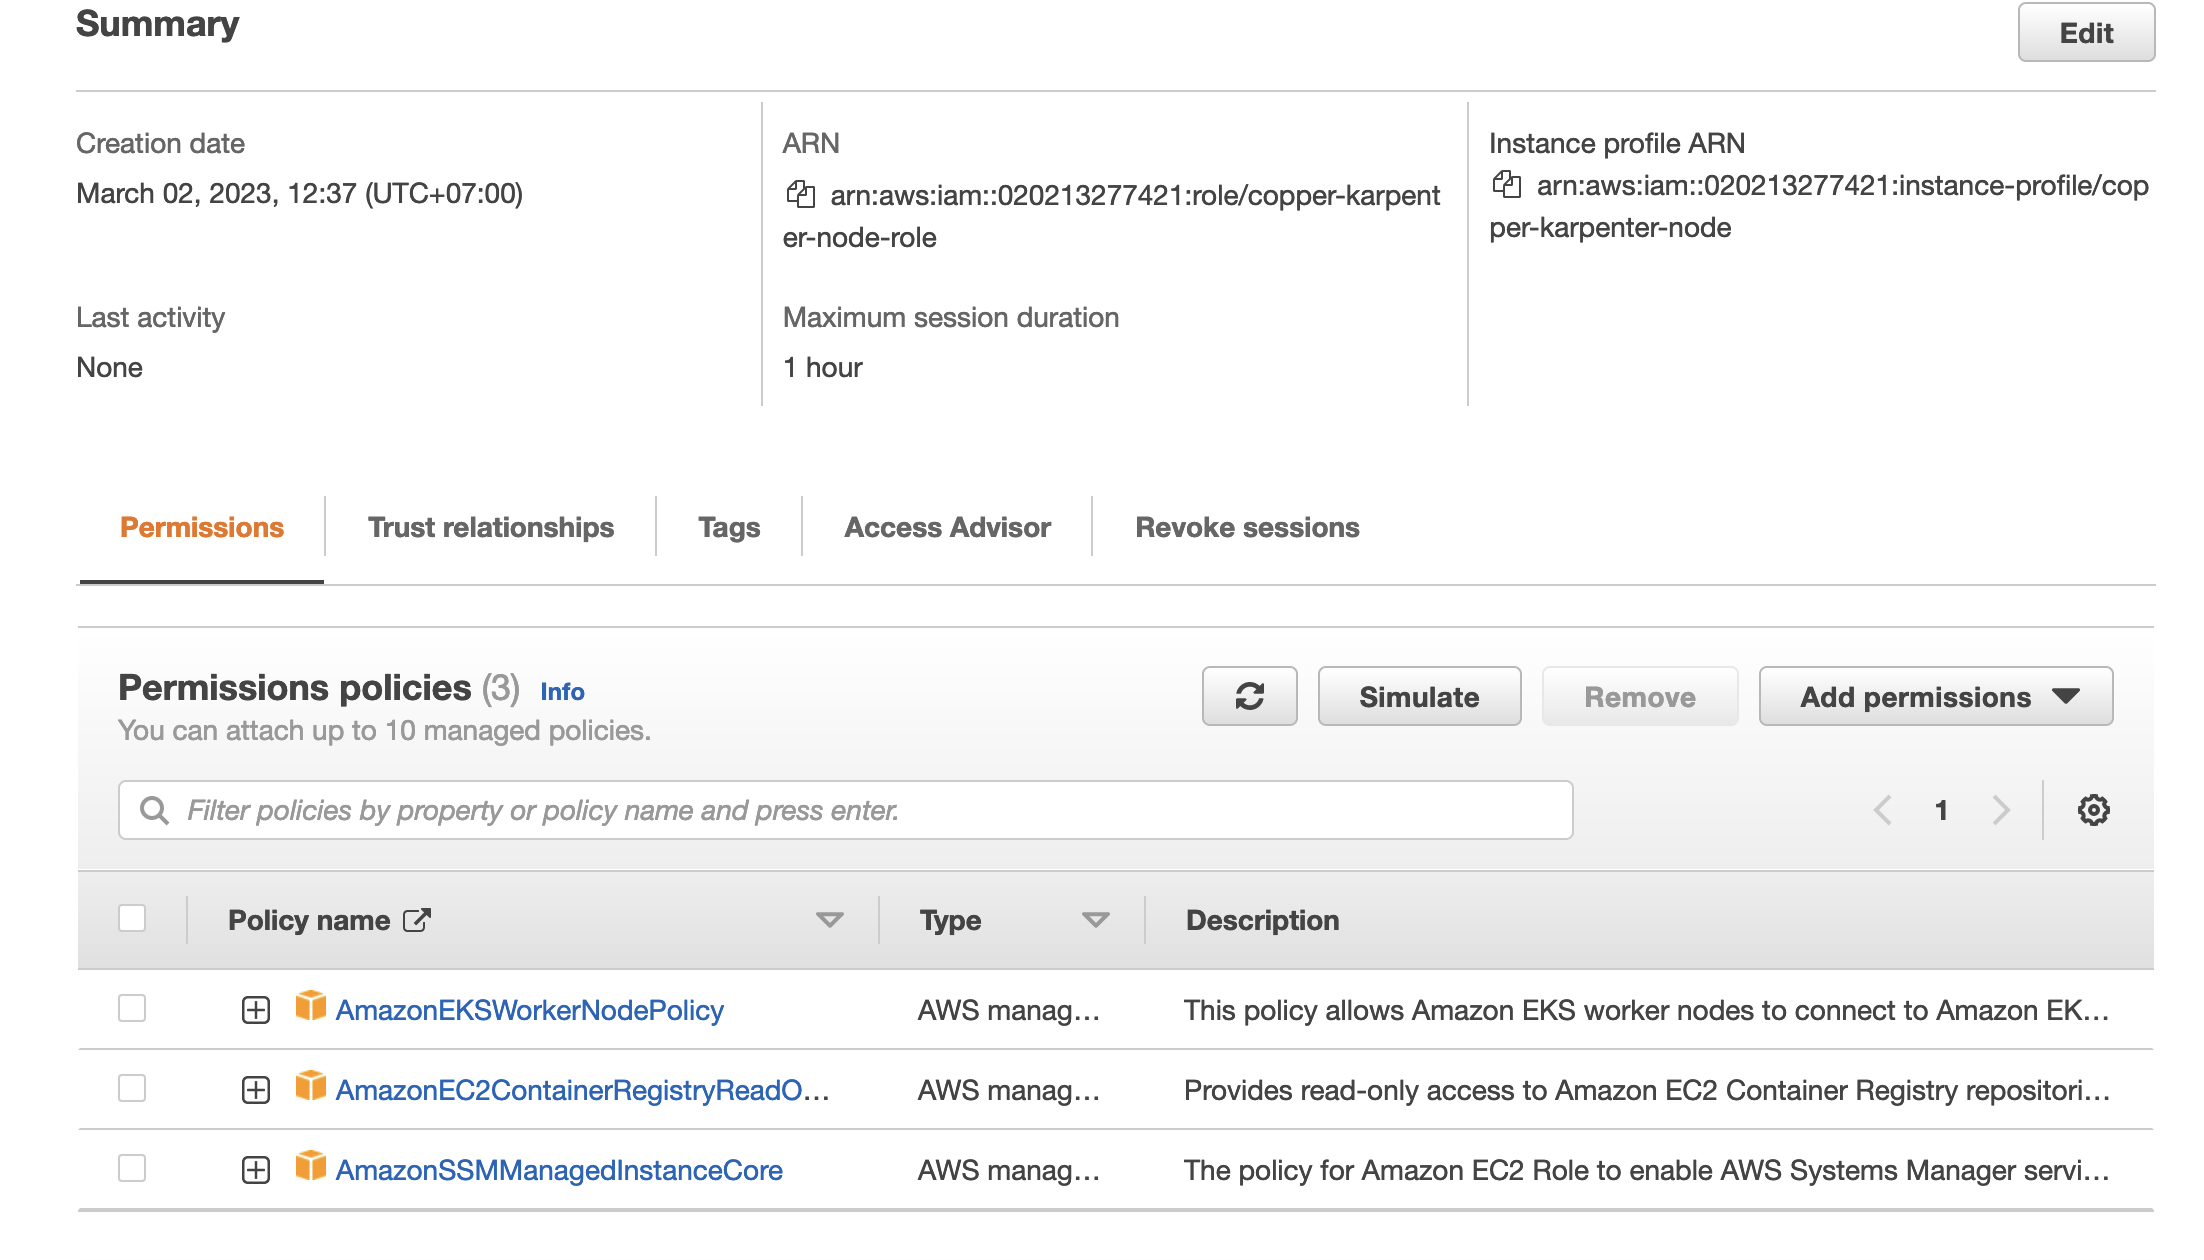
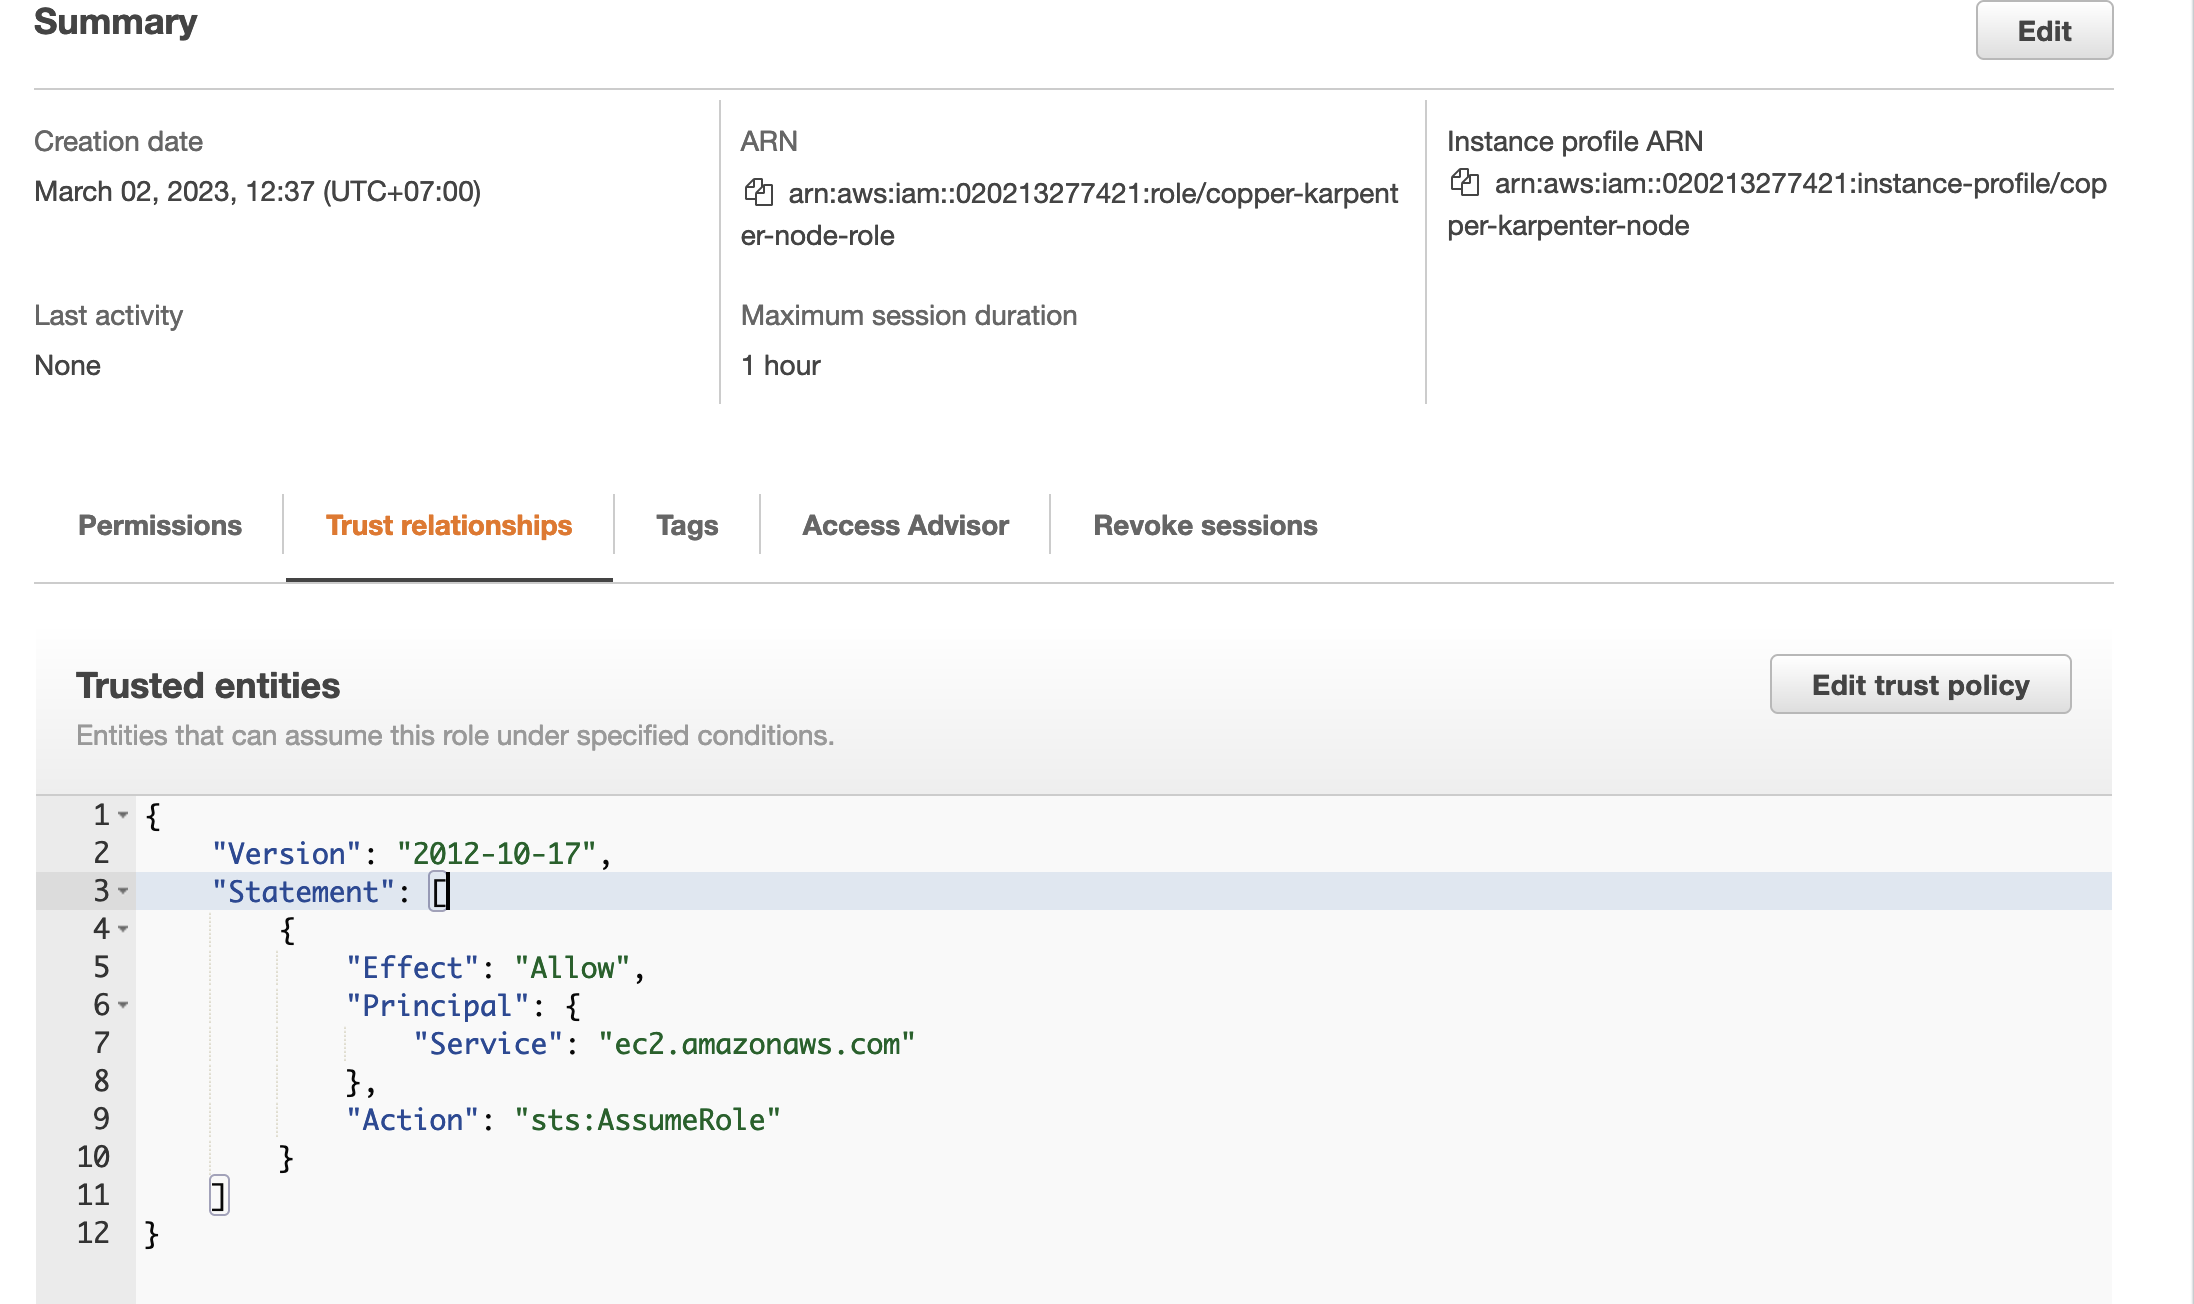
So we had a role arn:aws:iam::020213277421:role/copper-karpenter-node-role and an instance profile copper-karpenter-node.
Grant Karpenter Node Role to aws-auth Config Map
To make the karpenter node role has permission to join eks cluster, we need to update aws-auth config map in kube-system namespace.
To update this i will use kubectl edit command.
kubectl edit cm/aws-auth -n kube-system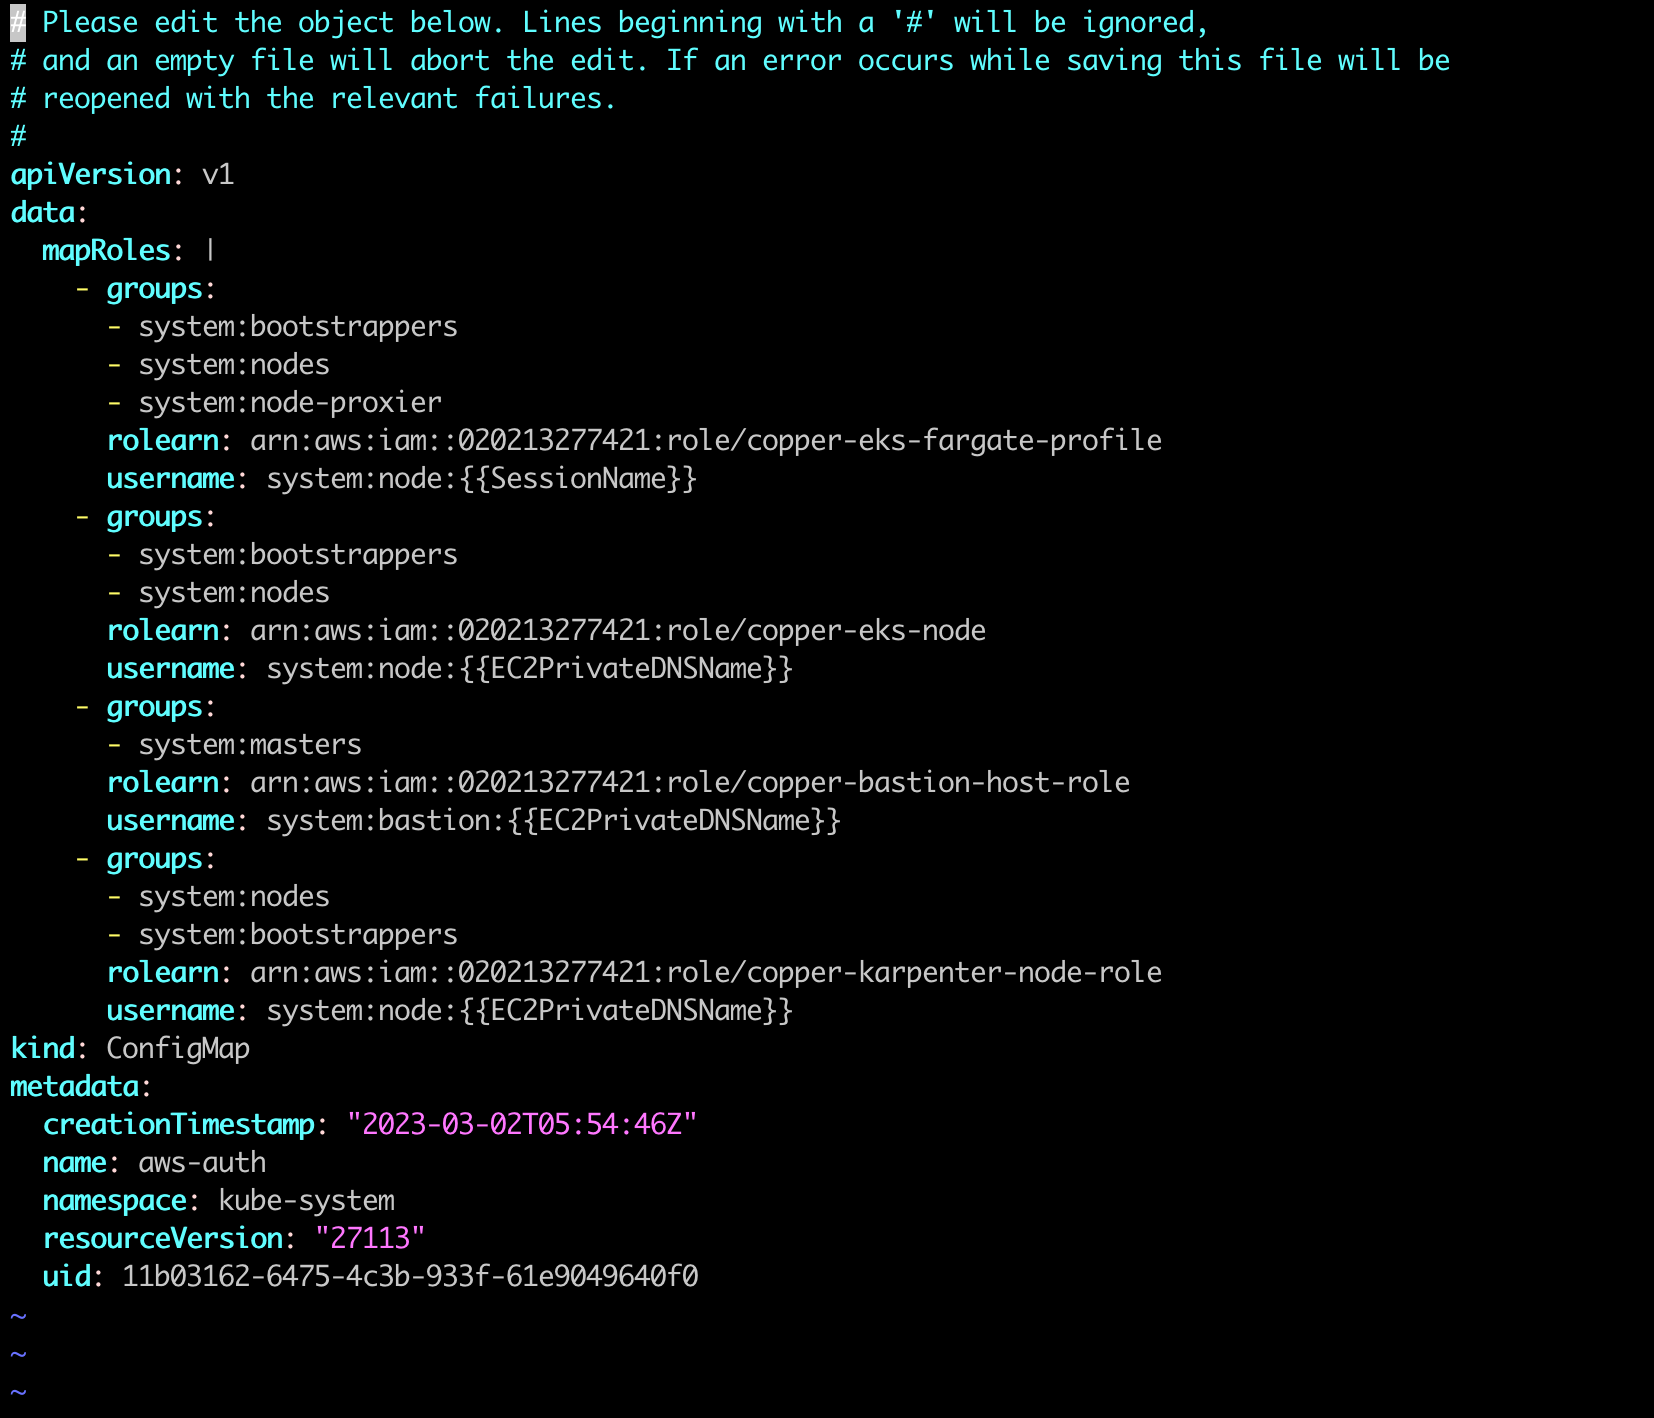
From the above image, you can see that i added karpenter node role to mapRoles array. After doing this step, we have done with karpenter node role.

Create IRSA for Karpenter
Karpenter will be deployed into karpenter namespace, the controller will have a service acccount name karpenter. So with the irsa we need to set a custom policy and trust relationship like this. Remember to change your OIDC url.
The irsa role need to describe cluster and also need to have permission to create/delete EC2 instance, beside that this need to pass Karpenter Node Role to EC2 instance.
{
    "Version": "2012-10-17",
    "Statement": [
        {
            "Sid": "",
            "Effect": "Allow",
            "Principal": {
                "Federated": "arn:aws:iam::020213277421:oidc-provider/oidc.eks.ap-southeast-1.amazonaws.com/id/512124170D3619EC2E9CF099B46E1712"
            },
            "Action": "sts:AssumeRoleWithWebIdentity",
            "Condition": {
                "StringEquals": {
                    "oidc.eks.ap-southeast-1.amazonaws.com/id/512124170D3619EC2E9CF099B46E1712:sub": "system:serviceaccount:karpenter:karpenter",
                    "oidc.eks.ap-southeast-1.amazonaws.com/id/512124170D3619EC2E9CF099B46E1712:aud": "sts.amazonaws.com"
                }
            }
        }
    ]
}{
"Statement": [
{
"Action": "eks:DescribeCluster",
"Effect": "Allow",
"Resource": "arn:aws:eks:ap-southeast-1:020213277421:cluster/copper"
},
{
"Action": "ec2:TerminateInstances",
"Condition": {
"StringLike": {
"ec2:ResourceTag/Name": "*karpenter*"
}
},
"Effect": "Allow",
"Resource": "*"
},
{
"Action": [
"ssm:GetParameter",
"ec2:DescribeImages",
"ec2:RunInstances",
"ec2:DescribeSubnets",
"ec2:DescribeSecurityGroups",
"ec2:DescribeLaunchTemplates",
"ec2:DescribeInstances",
"ec2:DescribeInstanceTypes",
"ec2:DescribeInstanceTypeOfferings",
"ec2:DescribeAvailabilityZones",
"ec2:DeleteLaunchTemplate",
"ec2:CreateTags",
"ec2:CreateLaunchTemplate",
"ec2:CreateFleet",
"ec2:DescribeSpotPriceHistory",
"pricing:GetProducts"
],
"Effect": "Allow",
"Resource": "*"
},
{
"Action": [
"iam:PassRole"
],
"Condition": {
"StringEquals": {
"iam:PassedToService": "ec2.amazonaws.com"
}
},
"Effect": "Allow",
"Resource": "arn:aws:iam::020213277421:role/copper-karpenter-node-role"
}
],
"Version": "2012-10-17"
}For me after creating IRSA i got irsa's arn equal to arn:aws:iam::020213277421:role/copper-karpenter-irsa-role
Install Karpenter With Helm
We had IRSA Karpenter Node Role/Instance Profile so far. Time to install karpenter using helm with the script below. Remember to change your cluster name also the role arn, profile name.
export KARPENTER_VERSION=v0.26.0
export CLUSTER_NAME=copper
export KARPENTER_IAM_ROLE_ARN="arn:aws:iam::020213277421:role/copper-karpenter-irsa-role"
export KARPENTER_INSTANCE_PROFILE=copper-karpenter-node

helm upgrade --install karpenter oci://public.ecr.aws/karpenter/karpenter --version ${KARPENTER_VERSION} --namespace karpenter --create-namespace \
  --set serviceAccount.annotations."eks\.amazonaws\.com/role-arn"=${KARPENTER_IAM_ROLE_ARN} \
  --set settings.aws.clusterName=${CLUSTER_NAME} \
  --set settings.aws.defaultInstanceProfile=${KARPENTER_INSTANCE_PROFILE} \
--waitAfter running this script. I successfully deploy Karpenter.
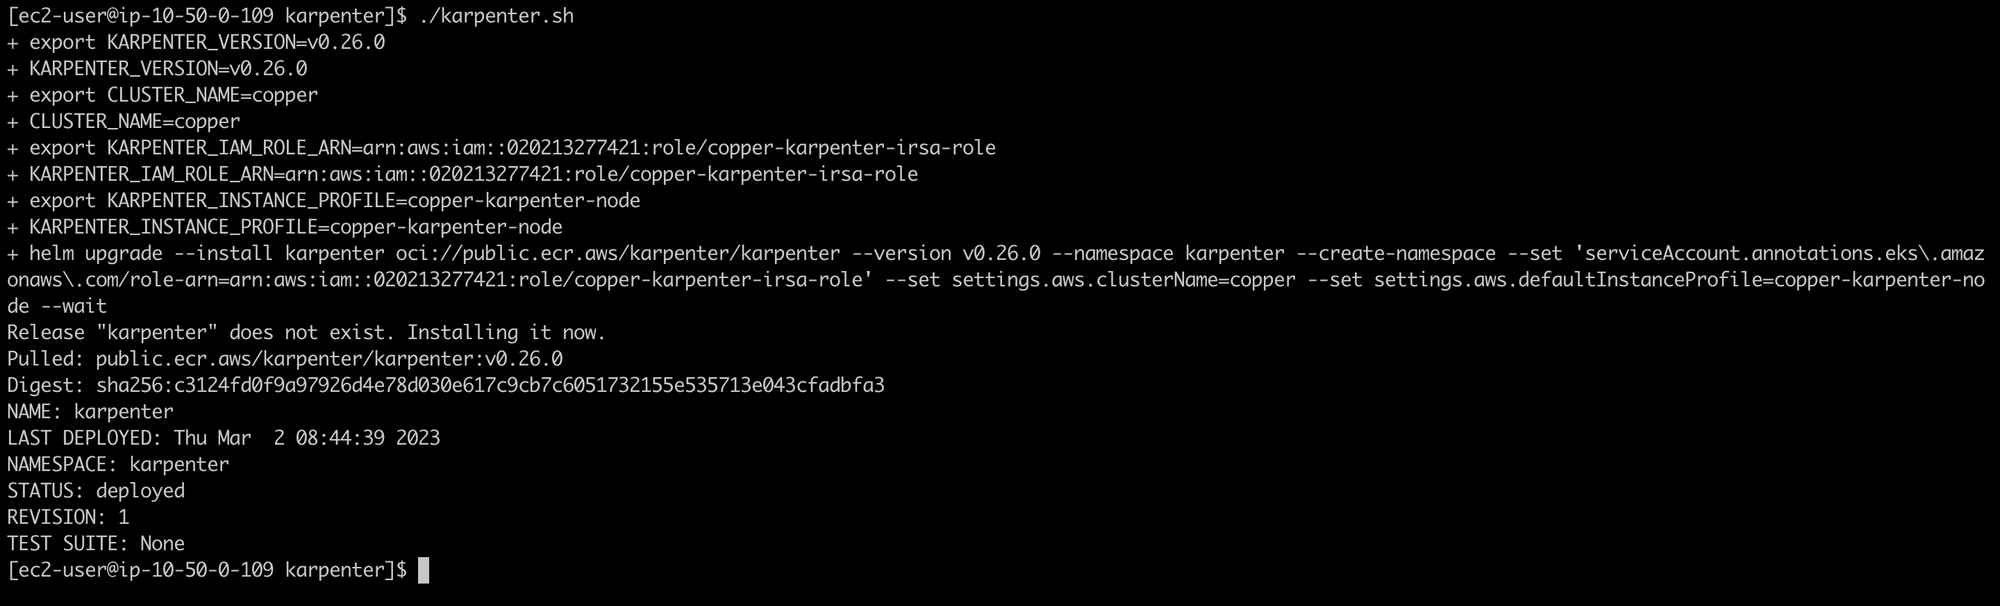
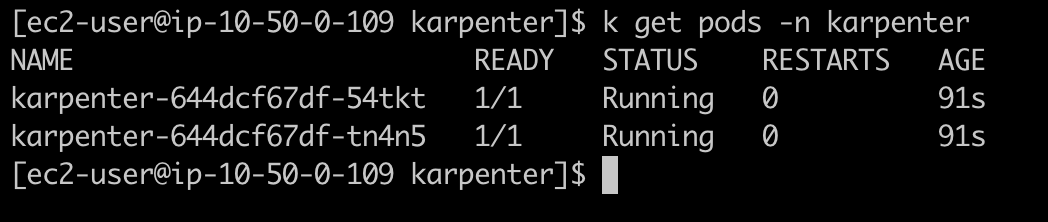
Verify the helm release and karpenter pods.

Deploy Karpenter Provisioner/Node Template.
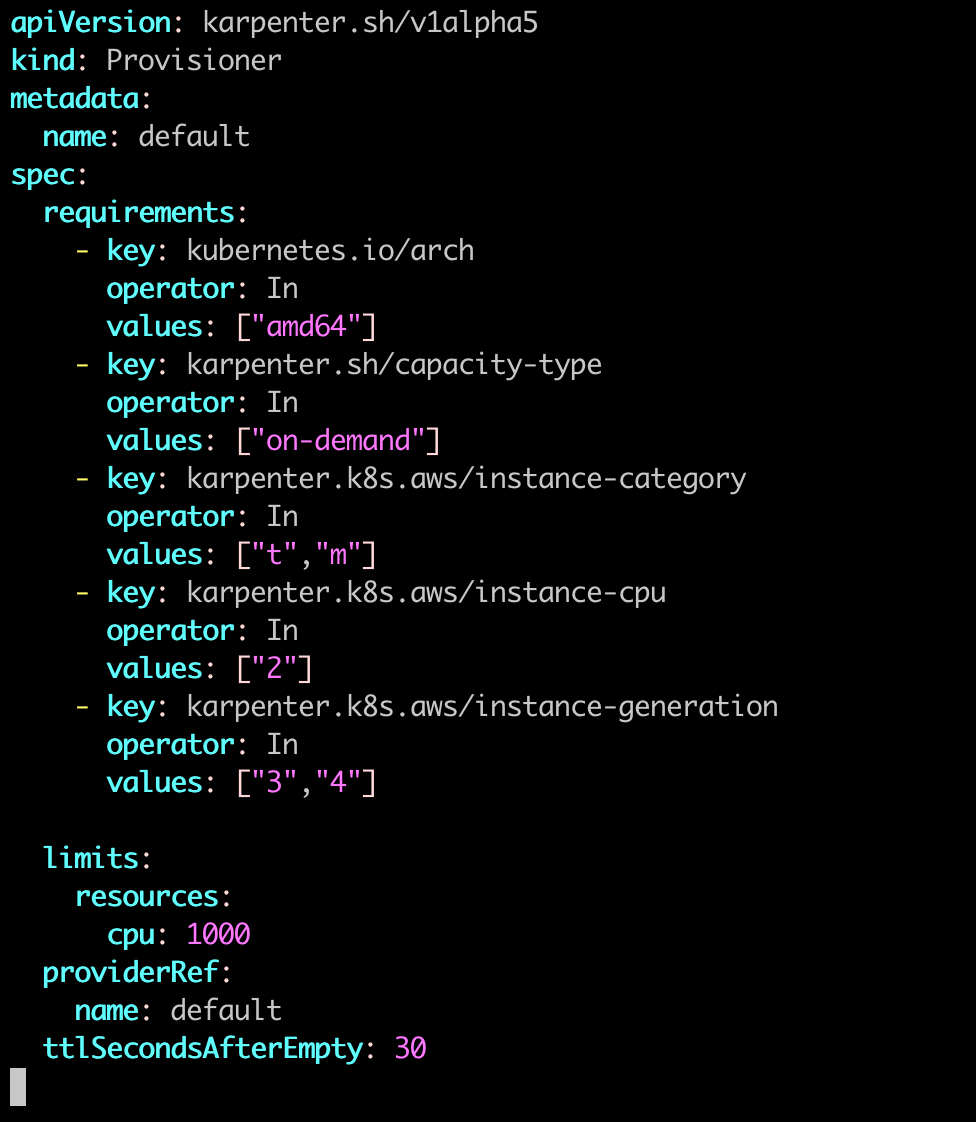
When you first installed Karpenter, you set up a default Provisioner. The Provisioner sets constraints on the nodes that can be created by Karpenter and the pods that can run on those nodes.
For me i will setup a default provisoner like this.

And a default NodeTemplate. For the karpenter node to be deployed, they will be deployed to Private Subnet and for ENI they will have a Security Group attached. This security is additional security group that you crecated when creating cluster.

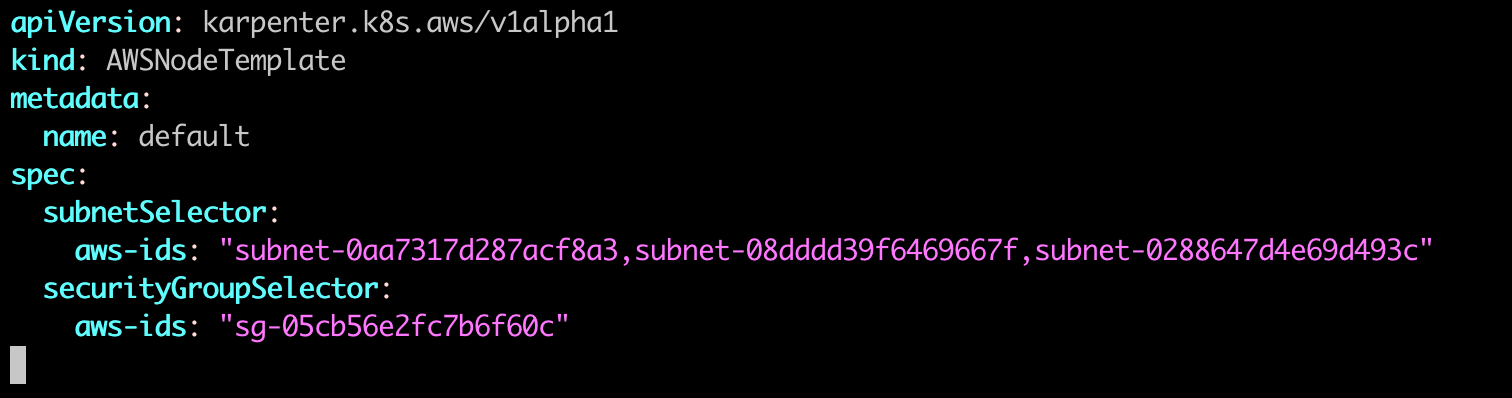
Apply NodeTemplate using kubectl

Deploy Test Deployment Resource
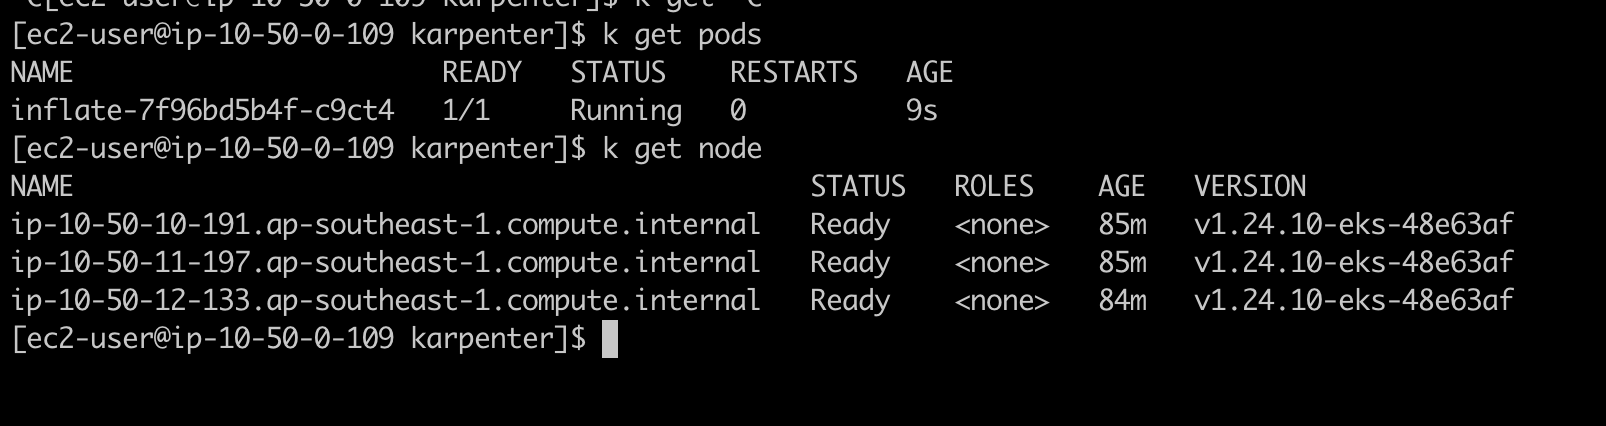
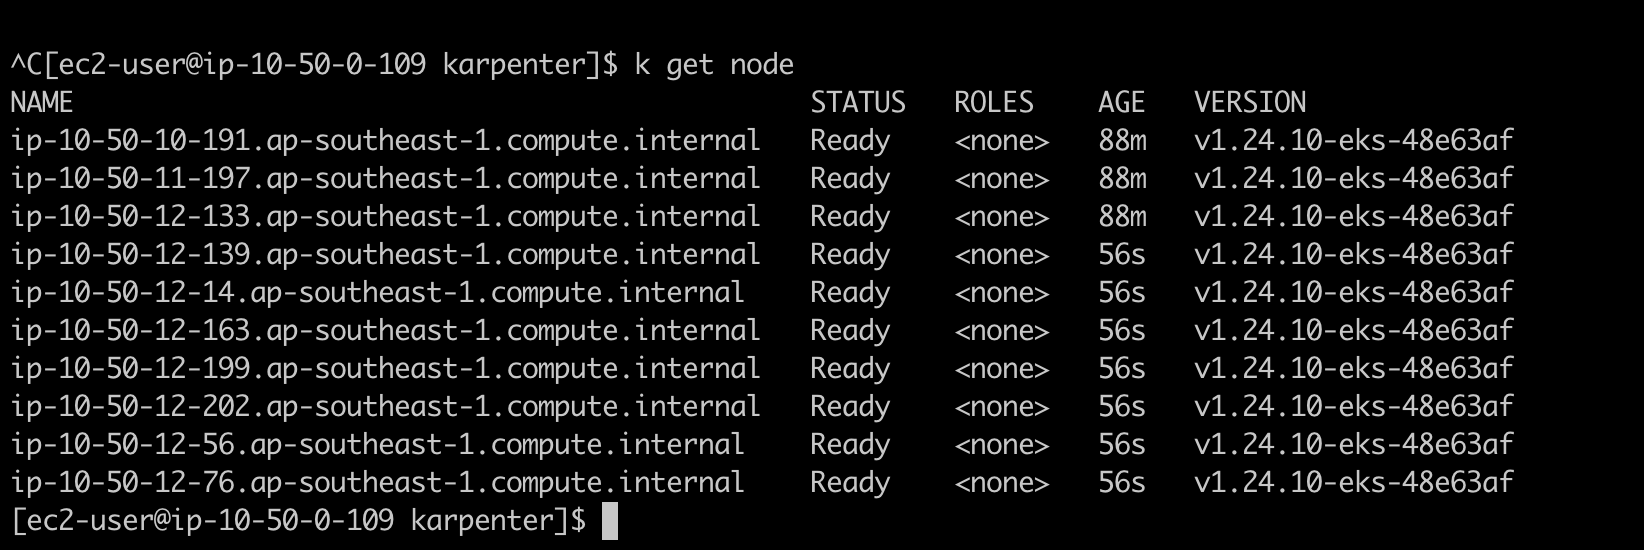
Currently i have 3 node on cluster.

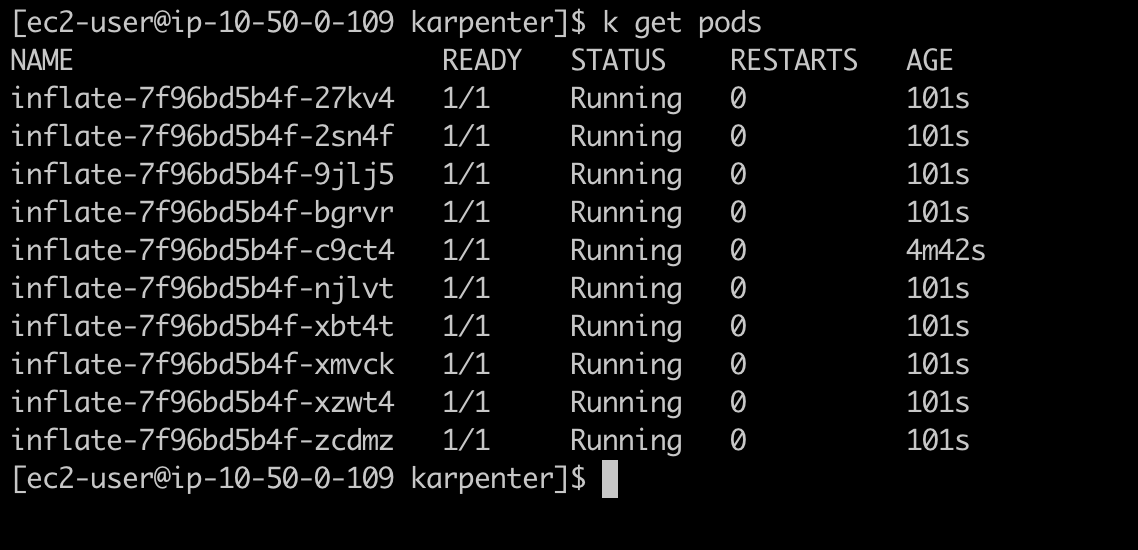
It's fine to deploy a deployment with one pod like this.
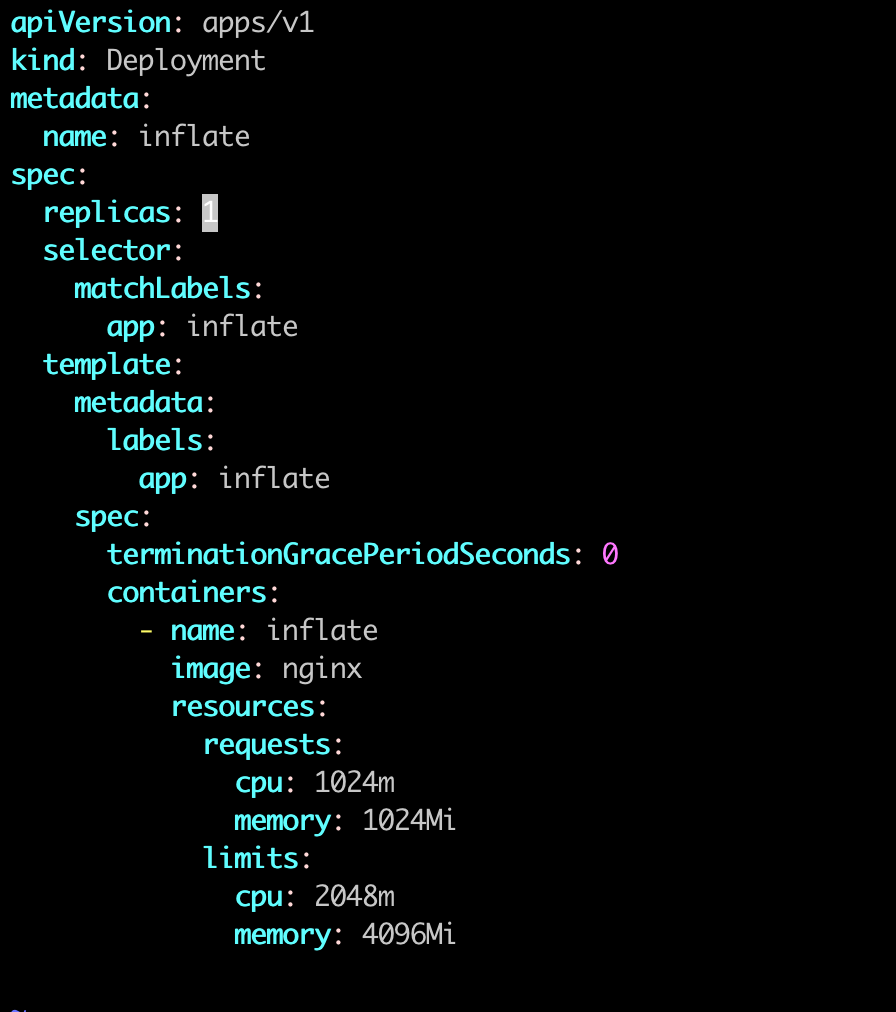

After creating this deployment, the cluster already have enough resource to lauch this pod. But when we update the replicate number to 10, there is no node to allocate pod.
Now, scale up replica to 10.

Let watch the node status
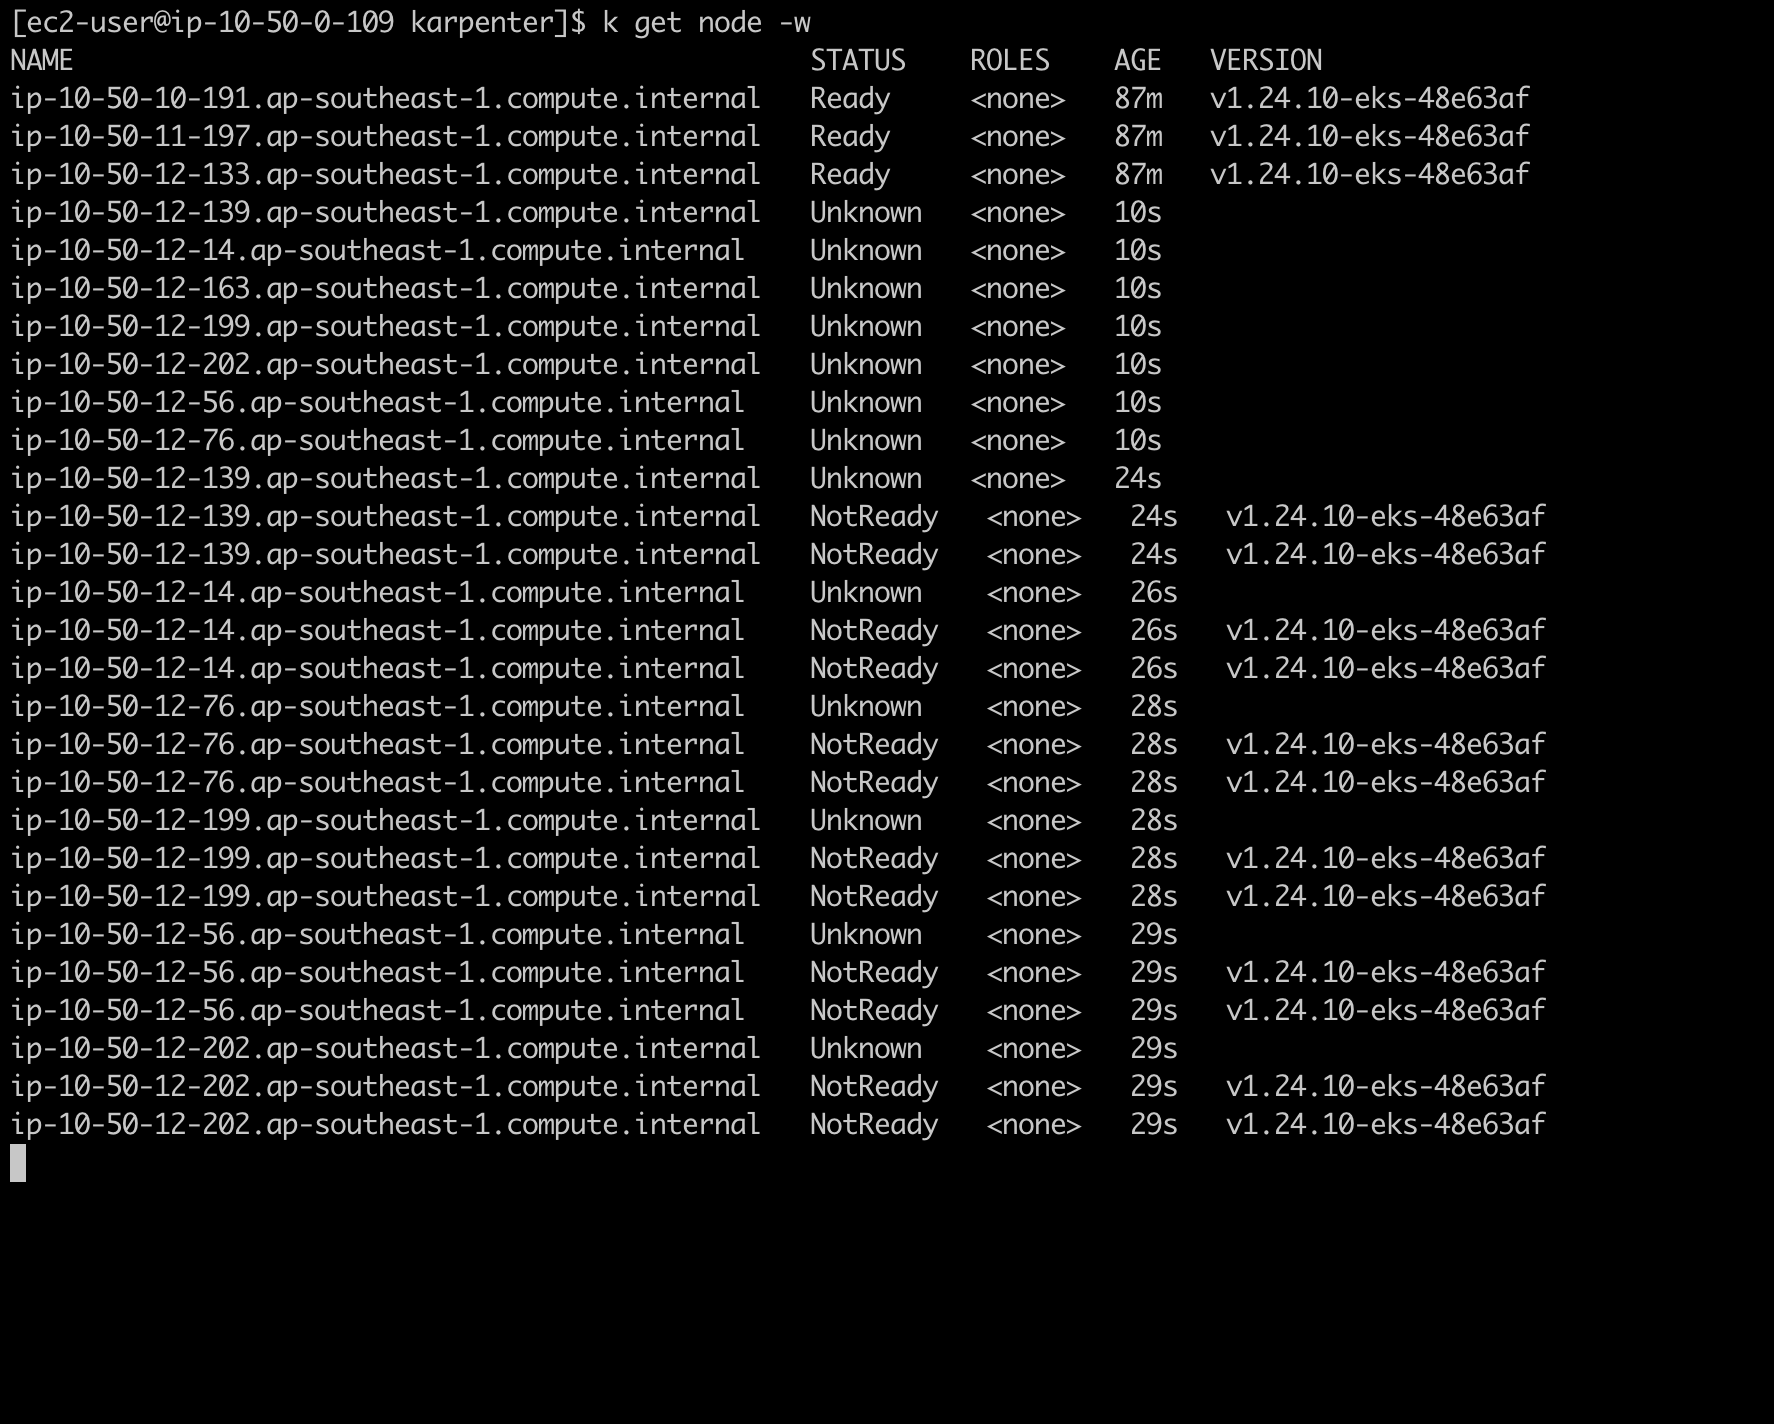
We can see that in just some seconds, the new node comming up and cluster placed the new pod.
Remove Deployment And See Karpenter Remove Node.
Let delete the deployment resource.

Watch the node status
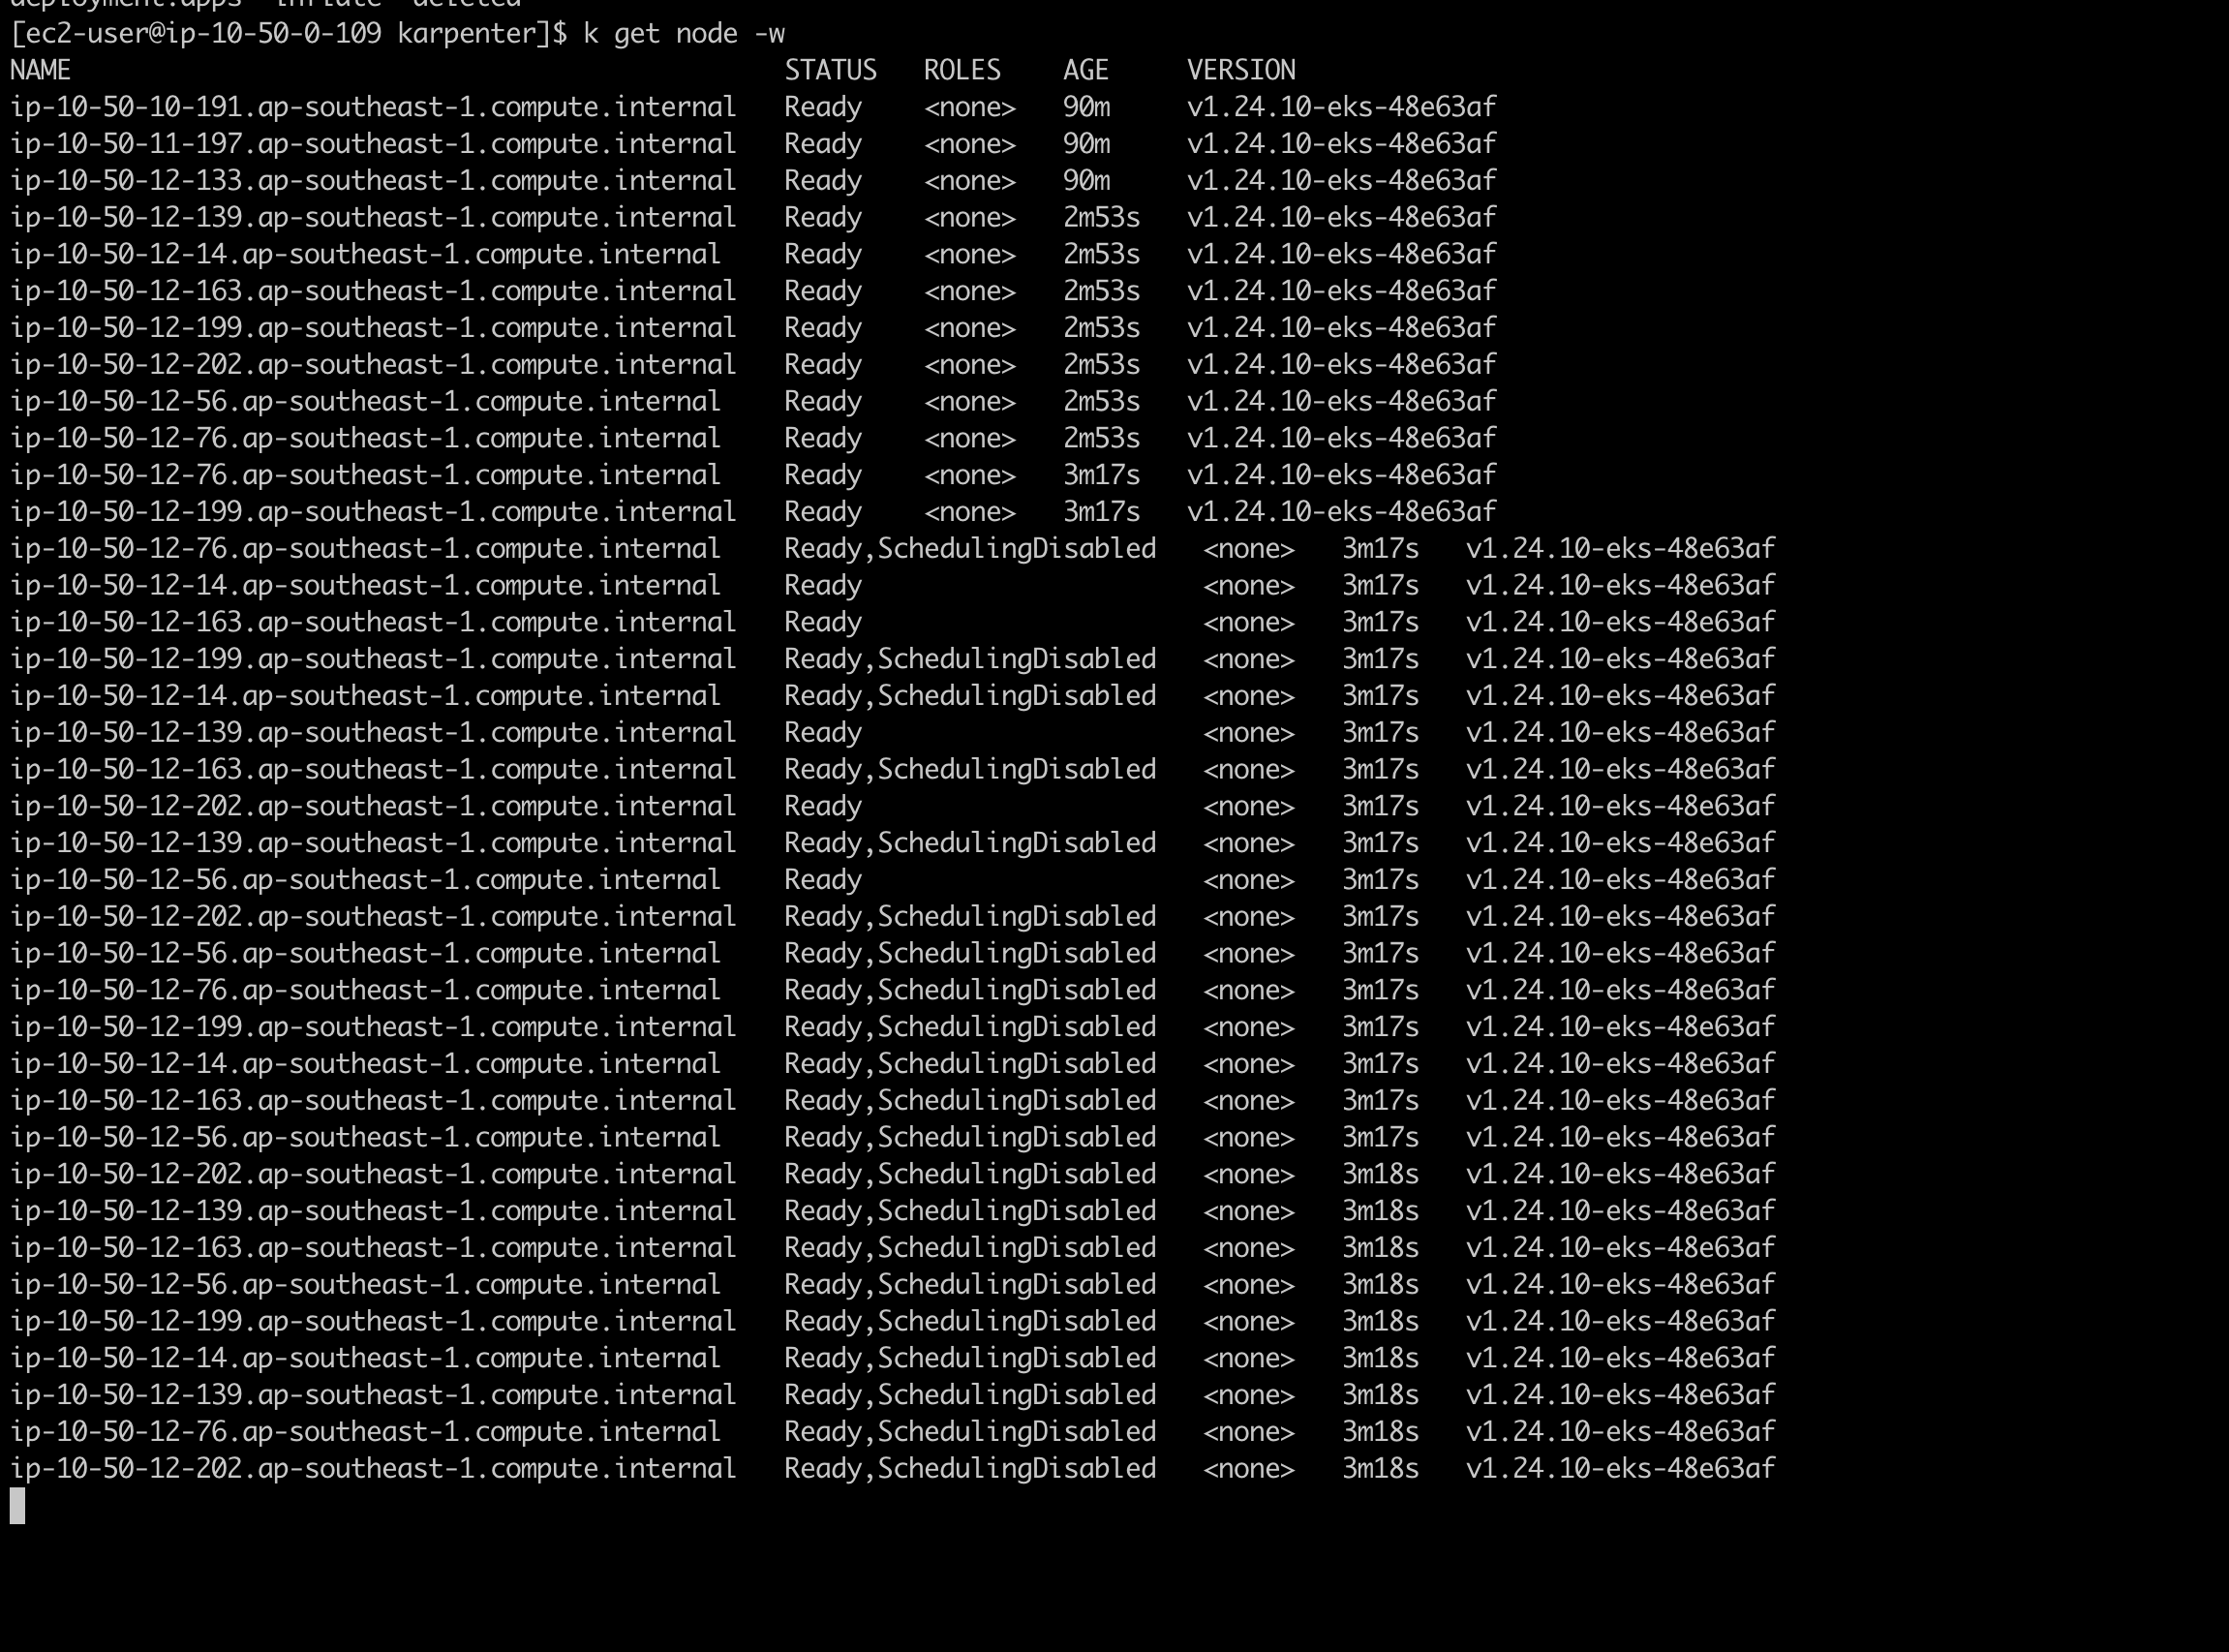
Karpenter auto remove the node that did not placed any pod after some seconds.
As we can see, we can now scale workload just-in-time second. Karpenter can do more that that, you can visit the official documentation to learn more.


Thank for reading.