


What's Minimal APIs
Microsoft has released .NET 6 on 2021-11-08 and Minimal API is a part of this release. Minimal APIs are architected to create HTTP APIs with minimal dependencies. They are ideal for microservices and apps that want to include only the minimum files, features, and dependencies in ASP.NET Core. Basically, with minimal API all you need is a csproj and a program.cs to get started.
Point of Minimal APIs:
Minimalism First
Rapidly move from idea to a functioning application. All the features of C# web applications without the ceremony.
Grows With You
As your web application grows, so do we! The C# ecosystem powers the most productive applications on the web.
Incredibly Fast
Proven to be one of the fastest web servers in the world, serving more than 4 million requests per second.
C# Ecosystem
Minimal APIs is built using C#. AN open-source, modern, object-oriented, and type-safe programming language. Build an API in C# with just 3 lines of code.
var app = WebApplication.Create(args);

app.MapGet("/", () => "Hello World");

app.Run();
CRUD and minimal APIs.
This part will show you how to build the backend to a Todo App using minimal APIs. By the end of this part, you will know-how:
- Create a minimal API
- Build interactive API documentation with Swagger UI
- Build CRUD application
- Store Todo items into a database.
Getting started
Before you can start building a minimal API, please install the following:
- .NET 6 SDK
- An editor of your choice, such as VS Code or Visual Studio.
Create new Minimal API project
dotnet cli
dotnet new web -o TodoApi
Run
Now, that you have created your minimal API you can now run it. To run your application navigate to the TodoApi folder and type the command below:
TodoApi> dotnet run
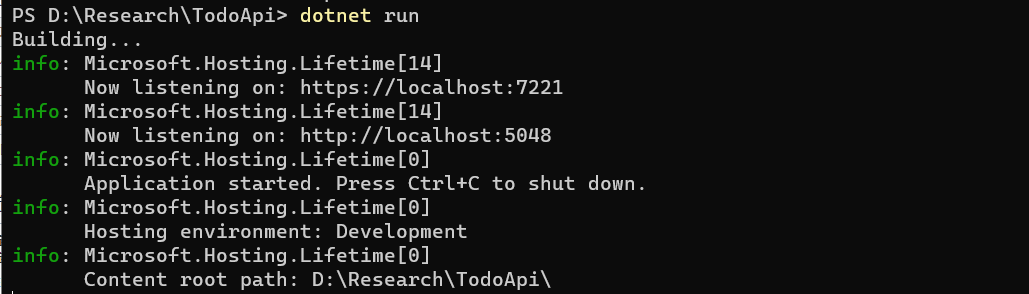
If you navigate or click on the localhost link provided to http://localhost:5048 in a browser, you'll see the text Hello World! as the browser makes a request to your app and display the output.
To shut down the application, go back to the terminal window and hit ctr + c.
Add a new route
Open your TodoApi app in an editor of your choice and open the Program.cs file.
Your Program.cs looks like this:
var builder = WebApplication.CreateBuilder(args);
var app = builder.Build();

app.MapGet("/", () => "Hello World!");

app.Run();
In Program.cs, create a new to-do route to our API that returns a list of items. Add a new MapGet after app.MapGet("", () => "Hello World");
// C# Tip: Item and Complete are referred to as anonymous types.
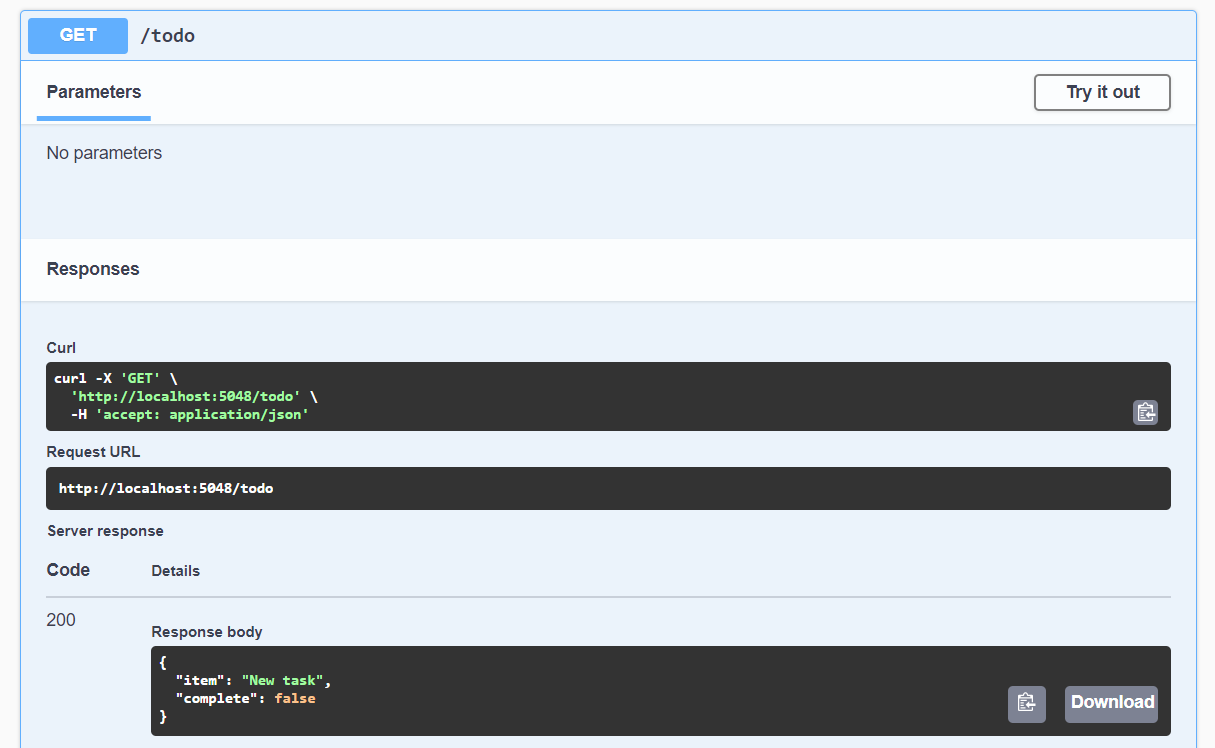
app.MapGet("/todo", () => new { Item = "New task", Complete = false });
This route will return one Todo item when you navigate to http://localhost:5048/todo.
You'll see the JSON response:
{
    "item": "New task",
    "complete": false
}
Interactive API docs
Add Swagger UI to your application
Install the Microsoft OpenAPI and Swagger packages.
Using .NET CLI
In a terminal window, type the following command:
TodoApi> dotnet add package Swashbuckle.AspNetCore --version 6.1.4
To set up swagger UI, add the following two code snippets:
Snippet 1: Under var builder = WebApplication.CreateBuilder(args); , add the following lines of code:
builder.Services.AddEndpointsApiExplorer();
builder.Services.AddSwaggerGen(c => {
    c.SwaggerDoc("v1", new Microsoft.OpenApi.Models.OpenApiInfo {
        Title = "Todo API",
        Description = "Minimal APIs sample",
        Version = "v1"
    });
});
The AddSwaggerGen method adds information such as title, description, and version to your API.
Snippet 2: Above app.MapGet code block, add the following lines of code:
app.UseSwagger();
app.UseSwaggerUI(c => {
    c.SwaggerEndpoint("/swagger/v1/swagger.json", "Todo API V1");
});
The preceding code snippet does the following:
- app.UseSwagger enables middleware to server the generated OpenAPI description ad JSON content.
- app.UseSwaggerUI enables middle to serve the Swagger UI elements.
- SwaggerEndpoint specifies the OpenAPI description's endpoint.
Go back to your browser where your app is and navigate to this URL http://localhost:5048/swagger
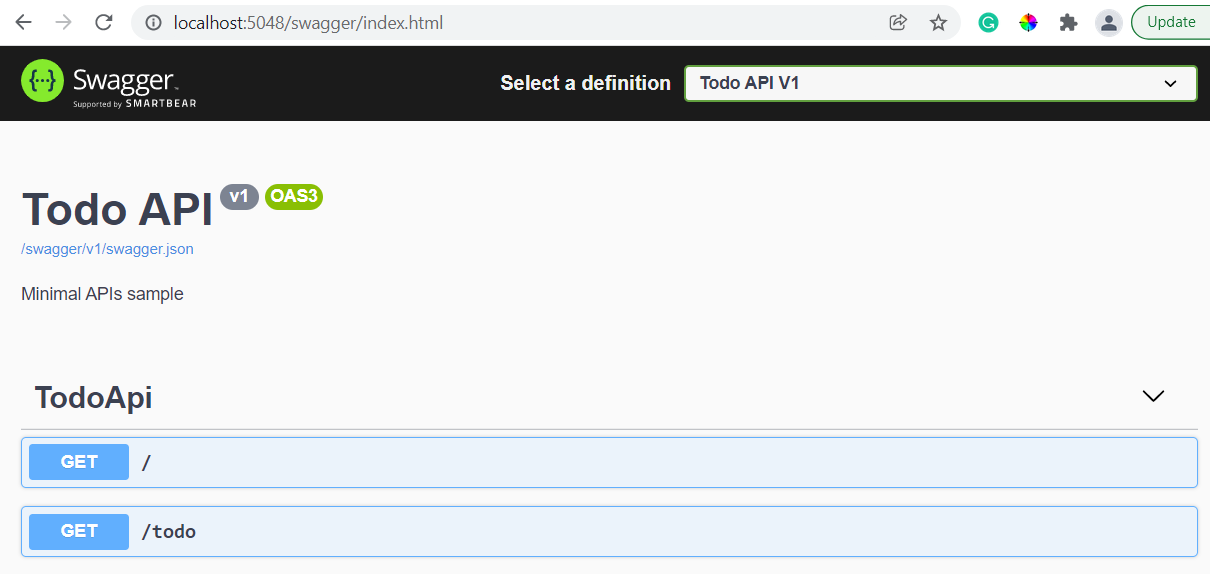
Now that Swagger UI is set up, you can visualize and interact with your API.
Create Read Update Delete
Our to-do APIs is going to:
- Create a new item.
- Return a specific item on a list.
- Update an existing item.
- Delete and item.
Create the class that models the data we want to collect aka Data model. The code for your TodoItem will go after app.Run()
Create a data model
class TodoItem
{
    public int Id { get; set; }
    public string? Item { get; set; }
    public bool IsComplete { get; set; }
}
Now, that we have defined the data we want to collect we need to save it.
Store an Item
To store the item in the to-do list we are going need to install the Entity Framework core InMemory package below:
Entity Framework is a code library that enables the transfer of data stored in relational database tables(E.g SQLite and MySQL, SQL Server etc) into objects that are more commonly used in application code.
Using .Net CLI
In your terminal window
TodoApi> dotnet add package Microsoft.EntityFrameworkCore.InMemory --version 5.0.7
Add using Microsoft.EntityFrameworkCore; to the top of your Program.cs file.
Now, that we have EntityFramework we can now write up our code to the data we want to save and query it. To do it we are going to create a TodoDb class. TodoDb class is going to do the following:
- Expose our
Todosproperty from our listTodoItemin the database. UseInMemoryDatabasewires the in-memory database storage. This will store data as long as the app is running.
To set up your in-memory database add the following code snippets to our code.
Snippet 1: Below the TodoItem create a TodoDb class
class TodoDb: DbContext
{
    public TodoDb(DbContextOptions options) : base(options) {}

    public DbSet<TodoItem> Tasks { get; set; }

    protected override void OnConfiguring(DbContextOptionsBuilder optionsBuilder)
    {
        optionsBuilder.UseInMemoryDatabase("Todos");
    }
}
DbContext represents a connection/session which is used to query and save instances of entities in a database.
Snippet 2: Before AddSwaggerGen services add the code snippet below.
builder.Services.AddDbContext<TodoDb>(options => options.UseInMemoryDatabase("item"));
Return a list of items
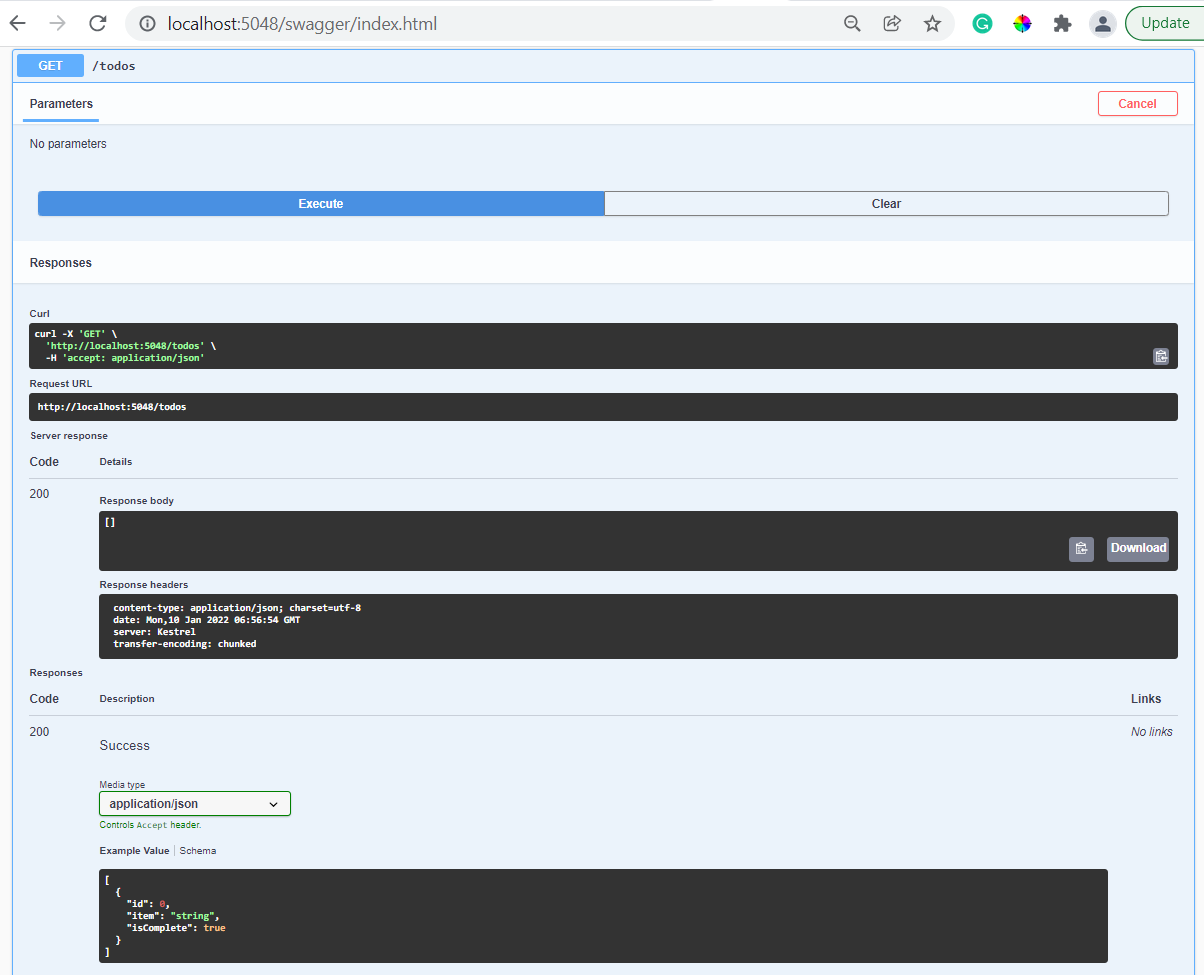
To read from a list of items in the todo list replate the "/todo" route with "/todos" route below.
app.MapGet("/todos", async (TodoDb db) => await db.Tasks.ToListAsync());
Go back to your browser and navigate to http://localhost:5048/swagger click on the GET /todos button and you will see the list is empty under Response body.
Create new items
Let's POST new tasks to the to-do list. Below app.MapGet you create earlier.
app.MapPost("/todos", async (TodoDb db, TodoItem todo) => {
    await db.Tasks.AddAsync(todo);
    await db.SaveChangesAsync();
    return Results.Created($"/todo/{todo.Id}", todo);
});
Go back to swagger and now you can see the POST /todos. To add new items to the to-do list.
- Click on the
POST/todos - Click on
Try it out - Update
id,item, andisComplete - Click
Execute
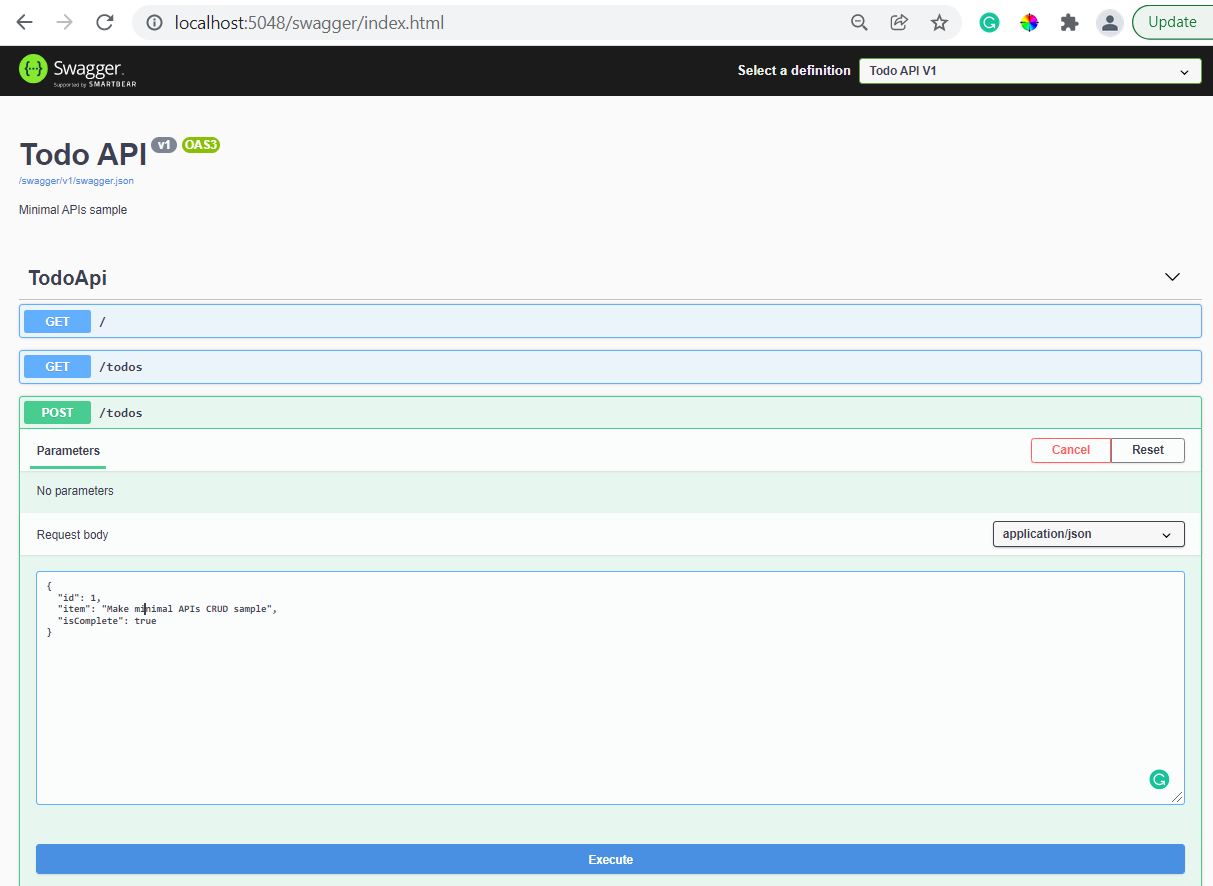
Post result:
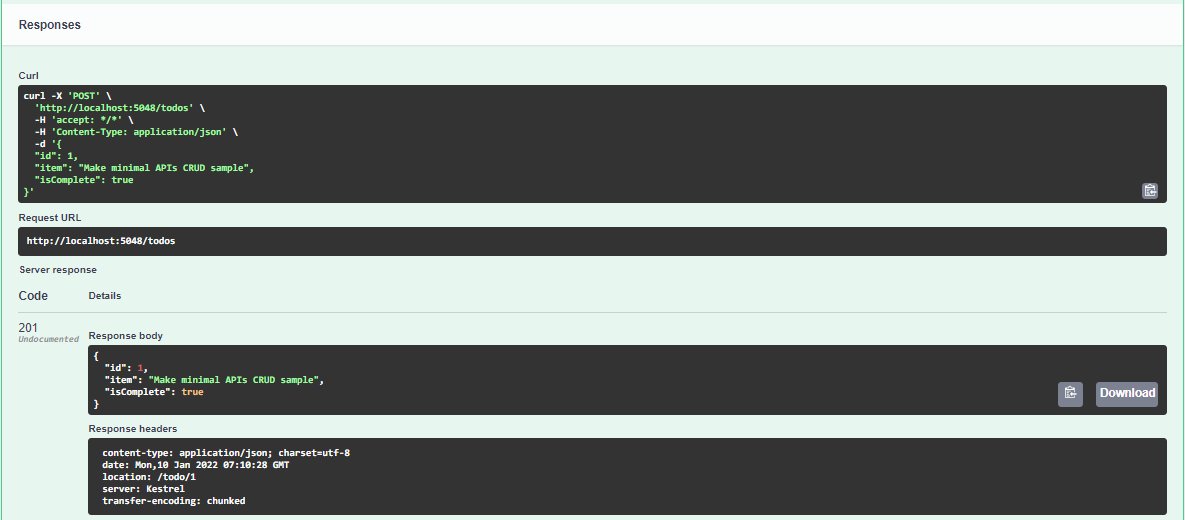
Read the list items in the list
To read the items in the list
- Click on
GET/todos - Click on
Try it out - Click
Execute
The Response body will include the items just added.
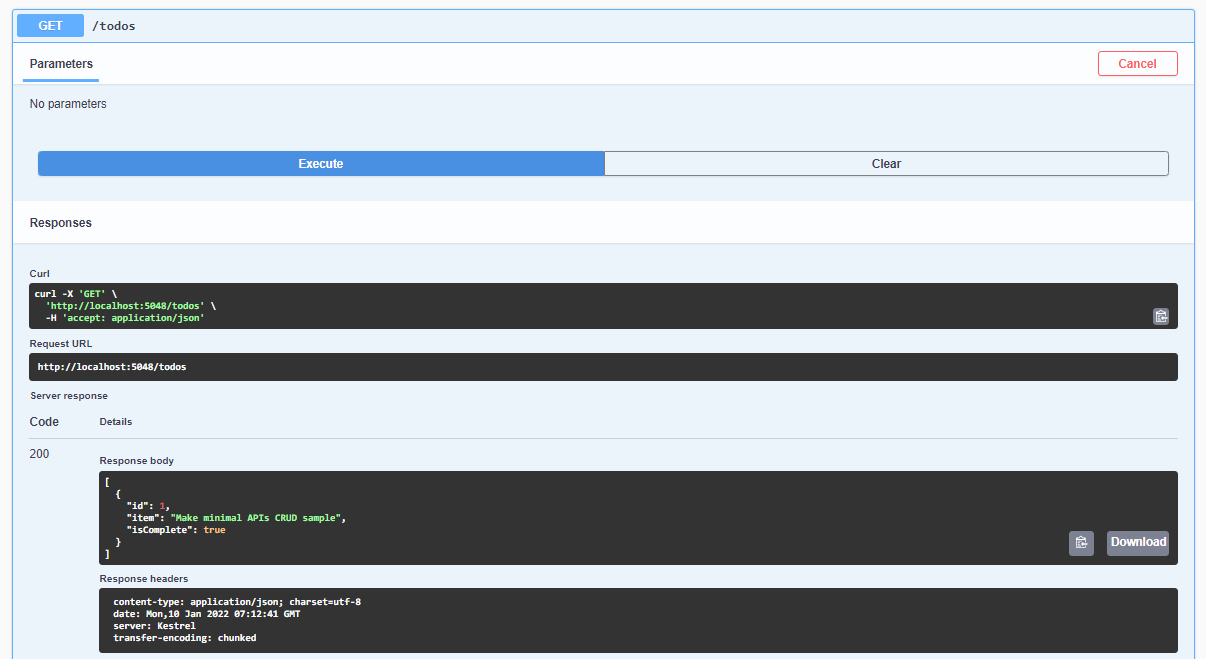
To GET an item by id add the code below app.MapPost route create earlier
app.MapGet("/todos/{id}", async (TodoDb db, int id) => await db.Tasks.FindAsync(id));
To check this out you can either go to http://localhost:5048/todos/1 or use the Swagger UI
Update an item
To update an existing item add the code below GET /todos/{id}
app.MapPut("/todos", async (TodoDb db, TodoItem updateTodo, int id) => {
    var todo = await db.Tasks.FindAsync(id);
    if (todo is null) return Results.NotFound();

    todo.Item = updateTodo.Item;
    todo.IsComplete = updateTodo.IsComplete;

    await db.SaveChangesAsync();
    return Results.NoContent();
});
- Click on the
PUT /todos/{id} - Click on
Try it out - In the
idtext vox enter 1 - Update
Request bodypast the JSON below and updateisCompletetotrue
{
  "id": 1,
  "item": "Make minimal APIs CRUD sample",
  "isComplete": false
}
- Click
Execute
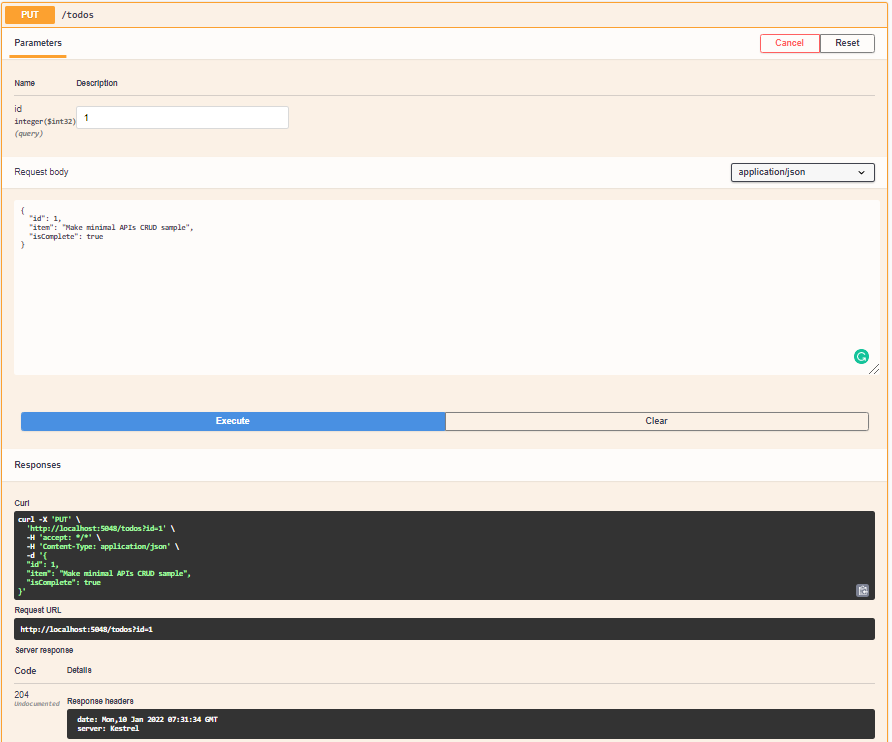
- Access
http://localhost:5048/todos/1to result after update

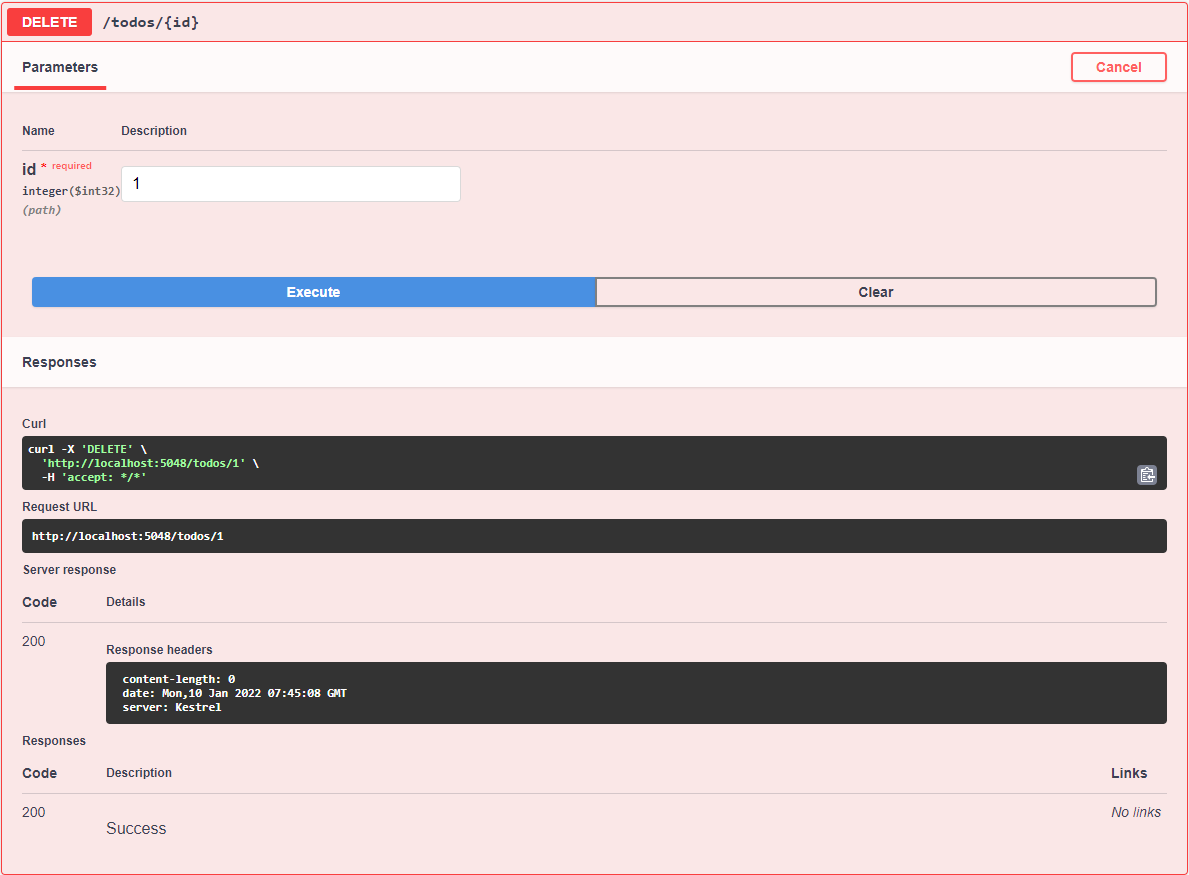
Delete an item
To delete an existing item add the code below PUT /id/{id} we create above.
app.MapDelete("/todos/{id}", async (TodoDb db, int id) => {
    var todo = await db.Tasks.FindAsync(id);
    if (todo is null) return Results.NotFound();

    db.Tasks.Remove(todo);
    await db.SaveChangesAsync();

    return Results.Ok();
});
Now, try deleting an item.
Reference: