


IAM
Stands for Identity and Access Management
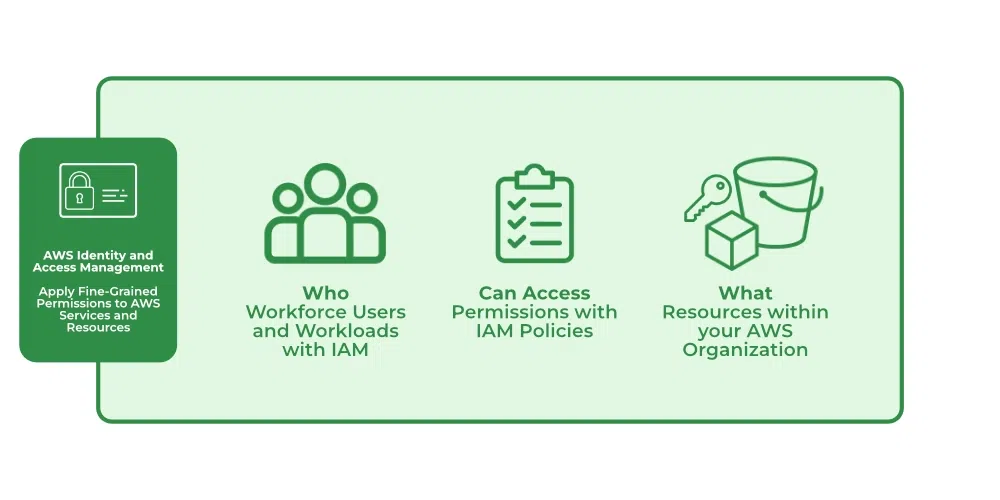
Responsible for identifying and authorizing who (who) and what (what) can access resources on AWS in what manner, centrally managing detailed rights, and analyzing access to refine permissions.
IAM use case
- Apply detailed rights and scale with access control based on attributes. E.g., Department, job role, team name.
- Manage access by account or extend access scale across AWS accounts and applications.
- Establish protection & prevention rules for the entire organization.
- Set up, verify, and adjust the scale of rights for minimum privileges through setting up, verifying, customizing.
IAM Concept
To design & build systems on AWS that meet security criteria and avoid trouble, we need to thoroughly understand the basic concepts of IAM, including: User, Group, Role, Permission (Policy).
IAM – Policy
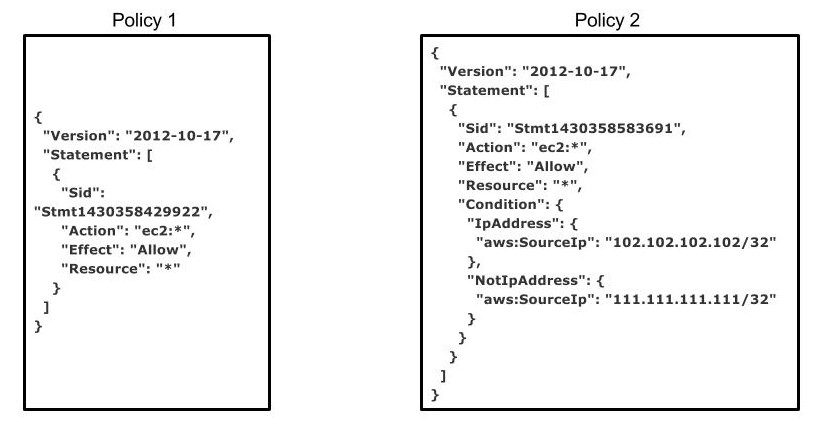
Regulates who/what can or cannot do. A policy often includes multiple Statements specifying Allow/Deny actions on a resource based on conditions.
Each statement needs to define the following information:
- Effect: There are 2 types, Allow & Deny. Deny is prioritized.
- Action: A set of allowed actions.
- Resource: A set of resources allowed for interaction.
- [Condition]: Conditions attached to apply this statement.
Policies can be attached to Roles/Groups/Users.
Policy types are: Inline Policy and Managed Policy
- Inline policy: Attached directly to Role/User/Group and cannot be reused in other Roles/Users/Groups.
- Managed Policy: Created separately and can be attached to multiple Users/Groups/Roles.
Managed Policy is divided into two types: AWS Managed and User Managed.
The choice between Inline vs. Managed must be calculated based on factors such as reusability, centralized change management, versioning & rollback.
IAM – User

Represents a profile of a user on an AWS account. Users can log into AWS Console using username/password. By default, a user created has no rights. Rights are granted to users through Policies or Groups. Users can issue access-key/secret-key for use with CLI or testing SDK during code testing. This key pair also represents the user (instead of using username/password).
IAM Role

Represents a set of permissions on AWS. It's different from the concept of a user's Role in system authorization; this distinction should be noted to avoid confusion. Used to grant permissions to an entity that can interact with other resources on AWS. Commonly attached to EC2, Lambda, Containers, etc. It can also be used to grant permissions to a user from another AWS account without creating a user profile for them on your AWS account. By allowing a user to assume a role on the account, the user can have temporary permissions to perform operations.
IAM – Group
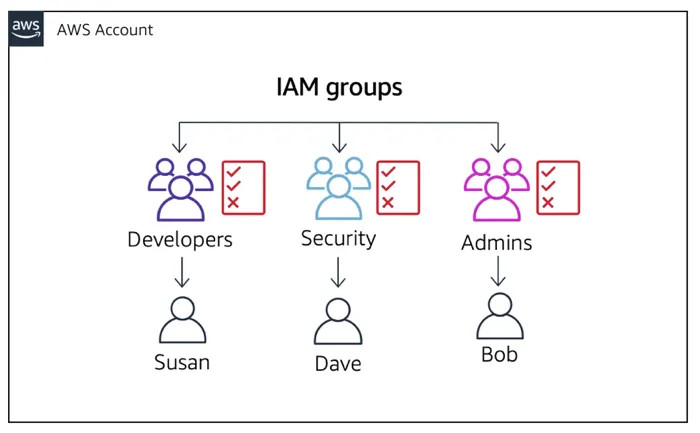
- Represents a group of users in the system.
- Used to divide rights based on roles in the project, department, etc.
- It's advisable to design user groups and assign rights appropriately; then, when new people join, we just need to add that user to the necessary groups, saving time and avoiding mistakes (granting too much or too few rights).
*Note to avoid overlapping rights (e.g., one group allows action A but another group denies action A). A group cannot contain another group (nesting). A user may not belong to any group or may belong to multiple groups. A group may have no users or many users.
IAM Policy vs. Resource Policy
Some resources like S3, SQS, KMS support defining policy at the resource level. Essentially, the structure of a resource policy is similar to an IAM policy but is assigned to a specific resource. The rights of a user (group/role) towards a resource will be the combination of IAM Policy & Resource Policy after excluding Deny. Some high-security resources will often be prioritized for setting resource policy.
*Note: IAM Policy generally does not affect the root account. If you accidentally set deny all and cannot operate on a resource, you can log in with the root account to adjust.
IAM – Assume Role
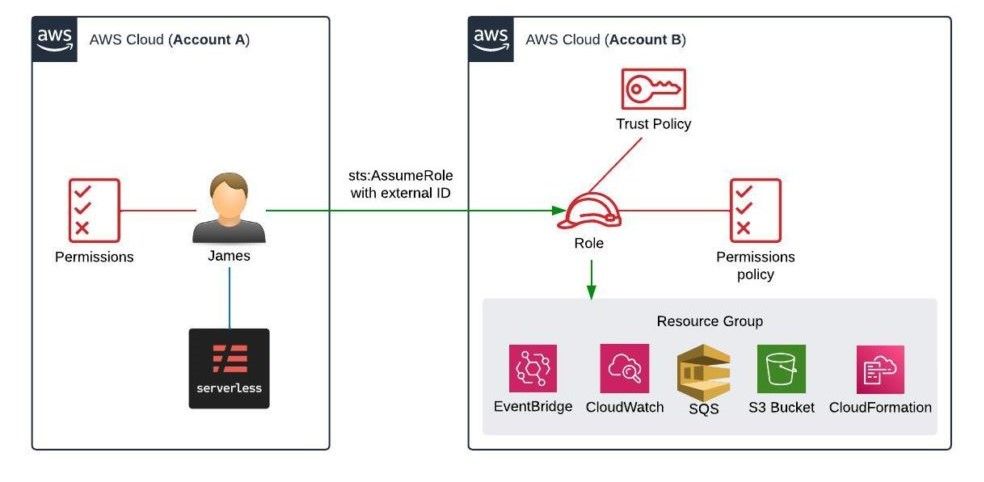
Request AWS STS to provide a set of temporary security credentials to access resources that normally we do not have access to. It is possible to assume a role on the same account or a different account. Used in use cases for granting temporary permissions without the need to create multiple users, managing users centrally through Single-Sign-On instead of creating users on each account.
IAM – Switch Role
When wanting to grant access permissions for user X to account B without creating a profile, we can allow user X to switch to role Y of account B, from there they can perform operations on account B. After switching roles, the user will abandon their original permissions and will interact with other resources as role Y. To switch roles, role Y must have set up a trust policy beforehand that allows user X to switch roles.
IAM – Trust policy
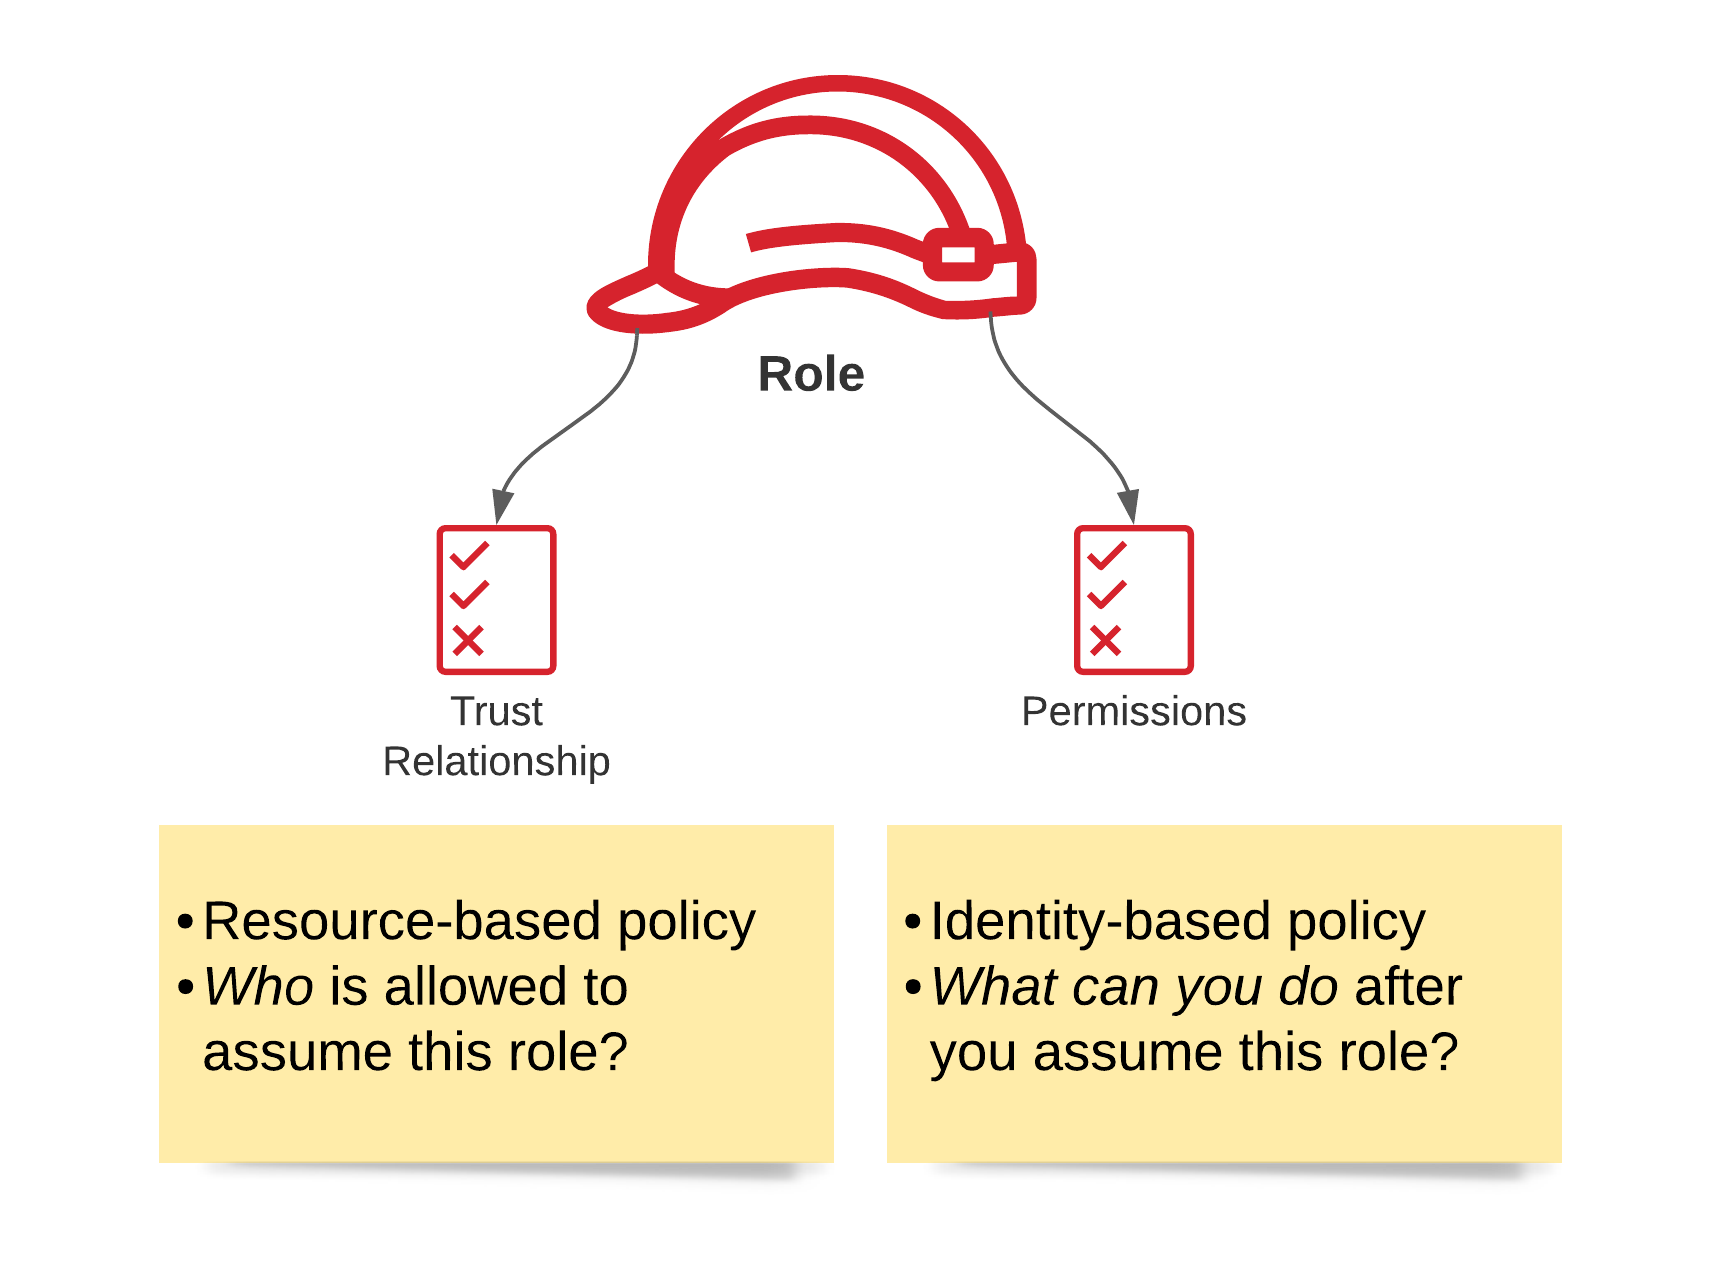
Specifies who can assume the role attached to this trust policy. The trusted entity can be a User/Role/AWS service.
In many cases, AWS services need to have a trust policy explicitly set to assume a necessary role.
Example
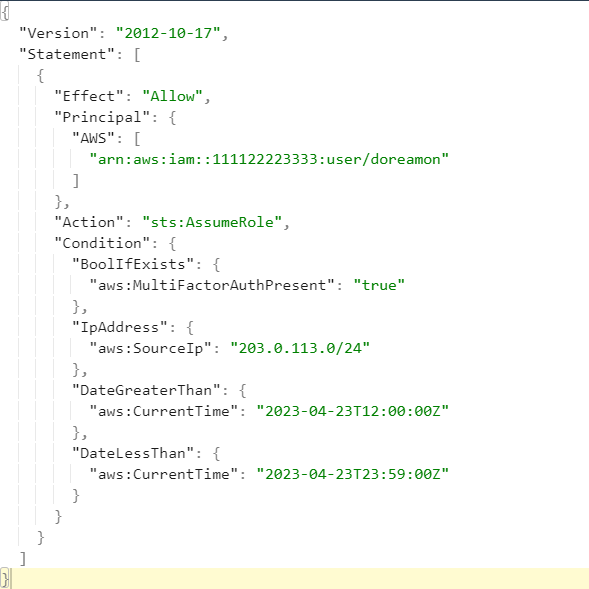
This trust policy allows user doreamon to assume the role attached to this policy under the conditions that MFA is enabled, the connection comes from the IP range 203.0.113.0/24, and specifies the time from 2023/04/23 12:00 to 2023/04/23 23:59.
Best practices for IAM
- Use groups to assign permissions to users.
- Grant just enough permissions to users, avoiding excess.
- Pay attention to deny rules when designing policies to avoid permission conflicts between groups (one group allows but another denies).
Always enforce MFA for IAM users (those who do not enable MFA will not be able to use the console). It might be a bit inconvenient to use CLI combined with MFA, but it will not take much time to get used to. - Use Roles when you want to grant permissions to servers/applications. Access/Secret keys should only be used for CLI operations locally or for testing apps in development.
- Absolutely DO NOT share User or Access/Secret keys among project members.
Thank you for your reading!