
Usually when developer need to access to the bastion host, we will give them the private key or they give us the public key then we will add the public key to bastion host. But there is another way, it's Session Manager.
Session Manager is a fully managed AWS Systems Manager capability. With Session Manager, you can manage your Amazon Elastic Compute Cloud (Amazon EC2) instances, edge devices, and on-premises servers and virtual machines (VMs). You can use either an interactive one-click browser-based shell or the AWS Command Line Interface (AWS CLI). Session Manager provides secure and auditable node management without the need to open inbound ports, maintain bastion hosts, or manage SSH keys. Session Manager also allows you to comply with corporate policies that require controlled access to managed nodes, strict security practices, and fully auditable logs with node access details.
In the scope of this post, i will guide you to create a bastion host, a IAM user which has enough permission to use Session Manager to login into the bastion host.
Bastion Host
The bastion host need out bound access to the internet also an instance profile attached that has same policy as below.
{
"Version": "2012-10-17",
"Statement": [
{
"Effect": "Allow",
"Action": [
"ssm:DescribeAssociation",
"ssm:GetDeployablePatchSnapshotForInstance",
"ssm:GetDocument",
"ssm:DescribeDocument",
"ssm:GetManifest",
"ssm:GetParameter",
"ssm:GetParameters",
"ssm:ListAssociations",
"ssm:ListInstanceAssociations",
"ssm:PutInventory",
"ssm:PutComplianceItems",
"ssm:PutConfigurePackageResult",
"ssm:UpdateAssociationStatus",
"ssm:UpdateInstanceAssociationStatus",
"ssm:UpdateInstanceInformation"
],
"Resource": "*"
},
{
"Effect": "Allow",
"Action": [
"ssmmessages:CreateControlChannel",
"ssmmessages:CreateDataChannel",
"ssmmessages:OpenControlChannel",
"ssmmessages:OpenDataChannel"
],
"Resource": "*"
},
{
"Effect": "Allow",
"Action": [
"ec2messages:AcknowledgeMessage",
"ec2messages:DeleteMessage",
"ec2messages:FailMessage",
"ec2messages:GetEndpoint",
"ec2messages:GetMessages",
"ec2messages:SendReply"
],
"Resource": "*"
}
]
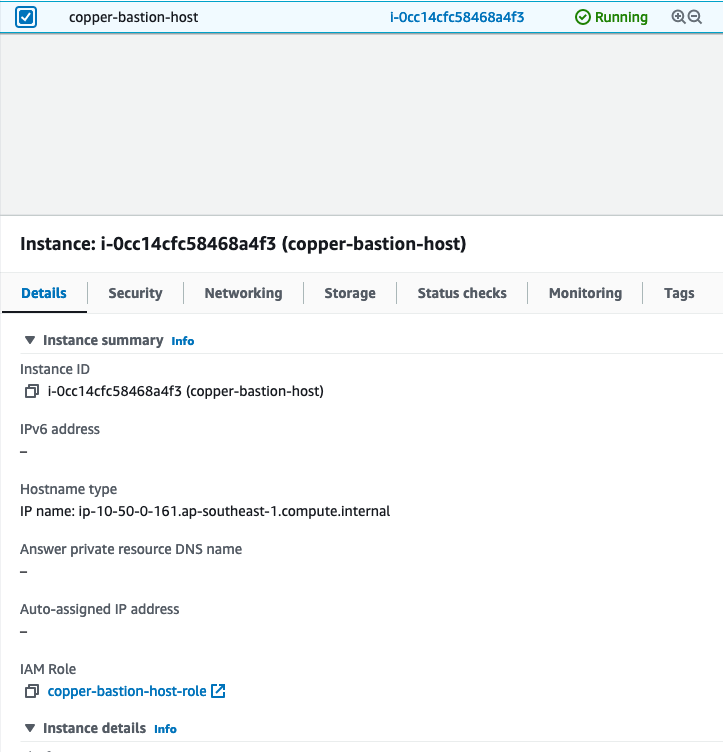
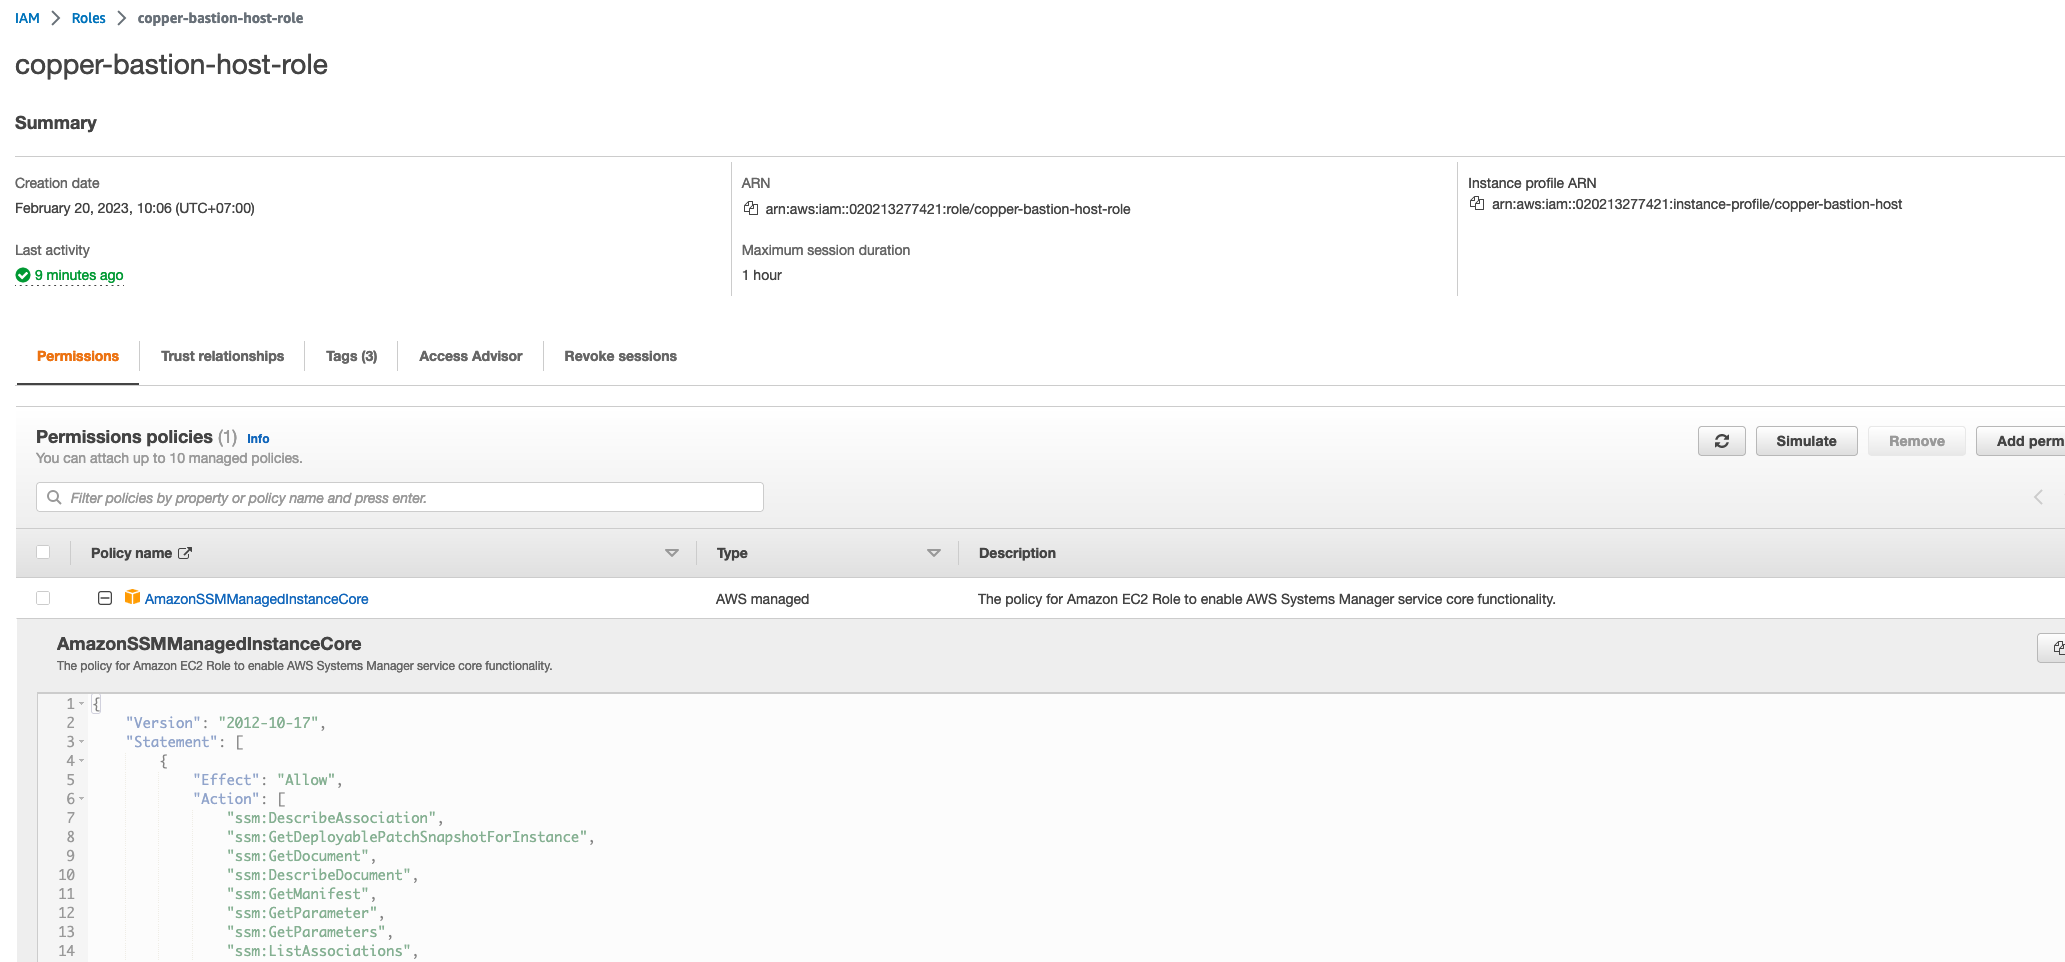
}You can also use AmazonSSMManagedInstanceCoreAWS. On the console, the instance is look like this.
And the IAM role is same as.
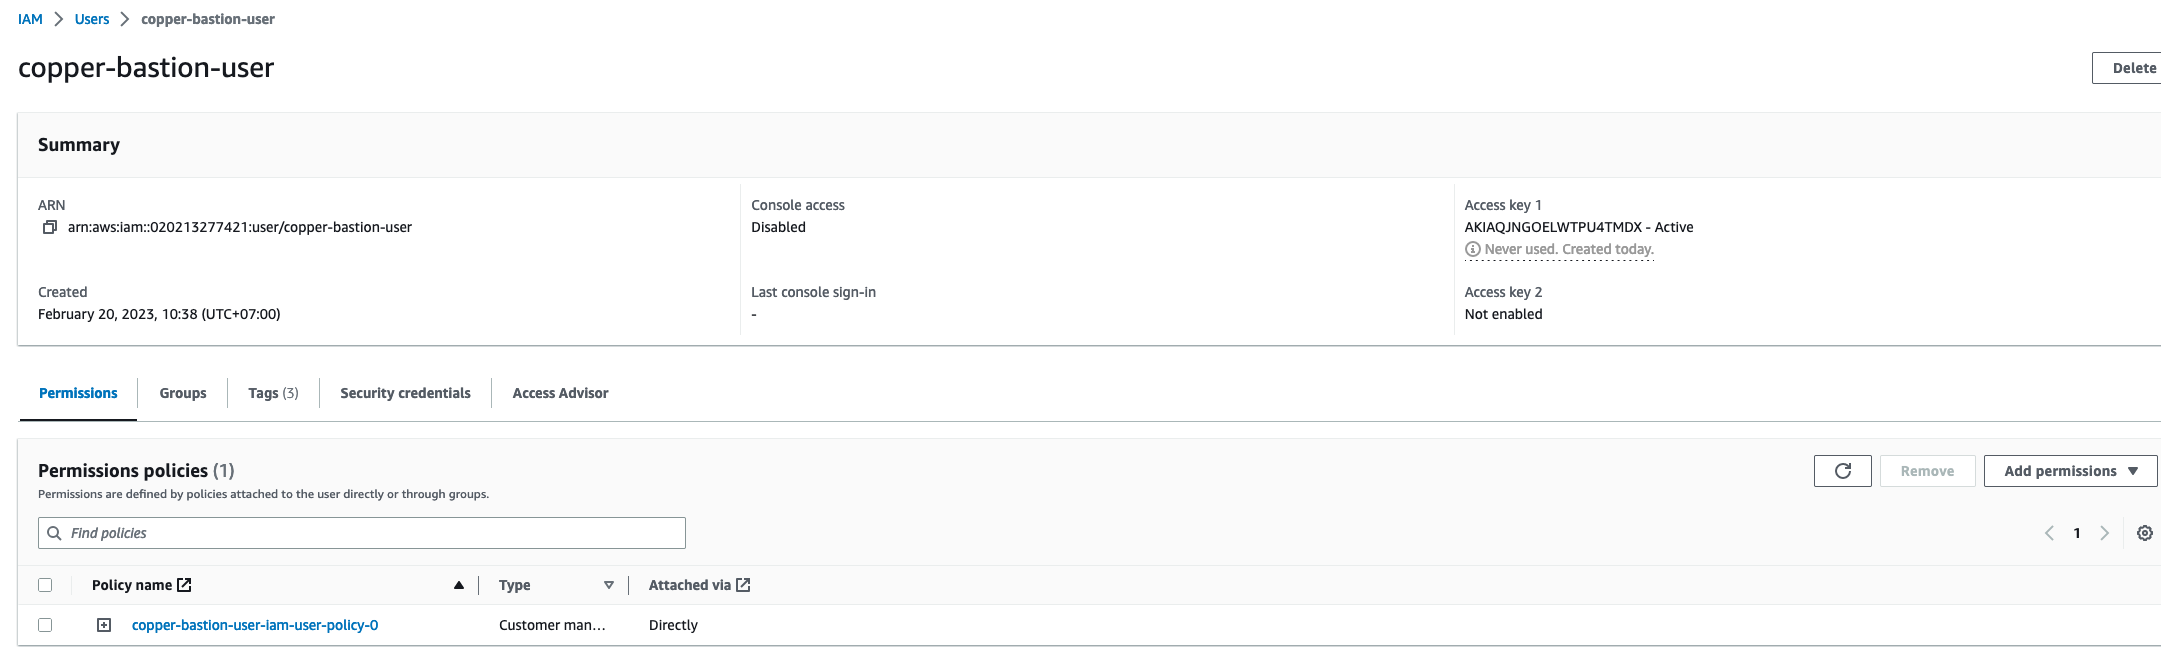
Create Bastion Host Iam User
This user will use AWS CLI to start a session to the bastion host instance so they need to have enought permission. I will create an IAM user and create aws access key and aws secret access key for them. The user is same as below.
The policy is same as below, you have to change your Bastion Host Instance ID also the region , account id and bastion host iam user name
{
"Statement": [
{
"Action": [
"ssm:StartSession"
],
"Effect": "Allow",
"Resource": [
"arn:aws:ec2:ap-southeast-1:020213277421:instance/i-0cc14cfc58468a4f3"
]
},
{
"Action": [
"ssm:TerminateSession"
],
"Effect": "Allow",
"Resource": [
"arn:aws:ssm:ap-southeast-1:020213277421:session/${BASTION_HOST_USER_NAME}-*"
]
}
],
"Version": "2012-10-17"
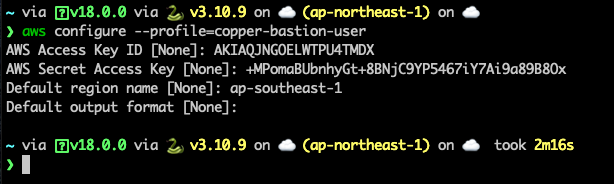
}Next, we need to configure a AWS_PROFILE to use with AWS CLI, (the Access Key and Secret Access Key you saw in the below image will be removed after the end of this post).
Next, install session manager plugin for AWS CLI. Please follow this post

For MacOS
- Download the bundled installer.
curl "https://s3.amazonaws.com/session-manager-downloads/plugin/latest/mac/sessionmanager-bundle.zip" -o "sessionmanager-bundle.zip"2. Unzip the package.
unzip sessionmanager-bundle.zip3. Run the install command.
sudo ./sessionmanager-bundle/install -i /usr/local/sessionmanagerplugin -b /usr/local/bin/session-manager-pluginRun Start Session Command
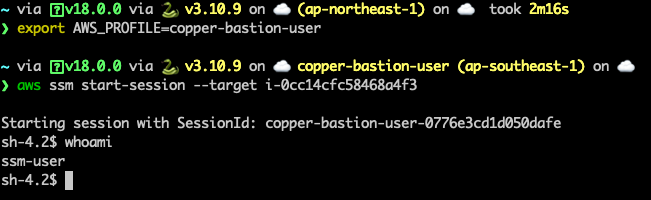
After installing session manager plugin for AWS CLI we can use AWS CLI to run session command.
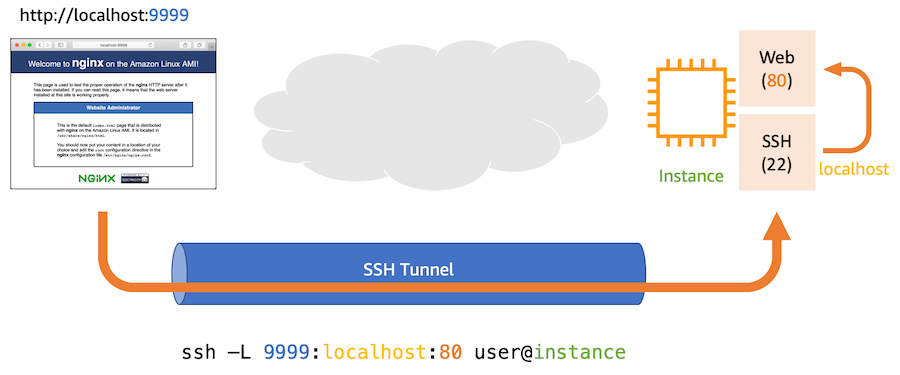
Remote Port Forwarding
Another feature like SSH port forwarding. To use this, we have to update the policy for iam user. We need permission to do ssm:StartSession on resource arn:aws:ssm:${REGION}::document/AWS-StartPortForwardingSessionToRemoteHost.
The updated policy is same as below.
{
    "Statement": [
        {
            "Action": [
                "ssm:StartSession"
            ],
            "Effect": "Allow",
            "Resource": [
                "arn:aws:ec2:ap-southeast-1:020213277421:instance/i-0cc14cfc58468a4f3",
                "arn:aws:ssm:ap-southeast-1::document/AWS-StartPortForwardingSessionToRemoteHost"
            ]
        },
        {
            "Action": [
                "ssm:TerminateSession"
            ],
            "Effect": "Allow",
            "Resource": [
                "arn:aws:ssm:ap-southeast-1:020213277421:session/c${BASTION_HOST_USER_NAME}-*"
            ]
        }
    ],
    "Version": "2012-10-17"
}
Open terminal again and start session with this ssm document. You need to chang the portNumber, localPortNumber and host parameter.
$ aws ssm start-session --target i-0cc14cfc58468a4f3 --document-name AWS-StartPortForwardingSessionToRemoteHost --parameters '{"portNumber":["3306"],"localPortNumber":["1053"],"host":["192.168.10.100"]}'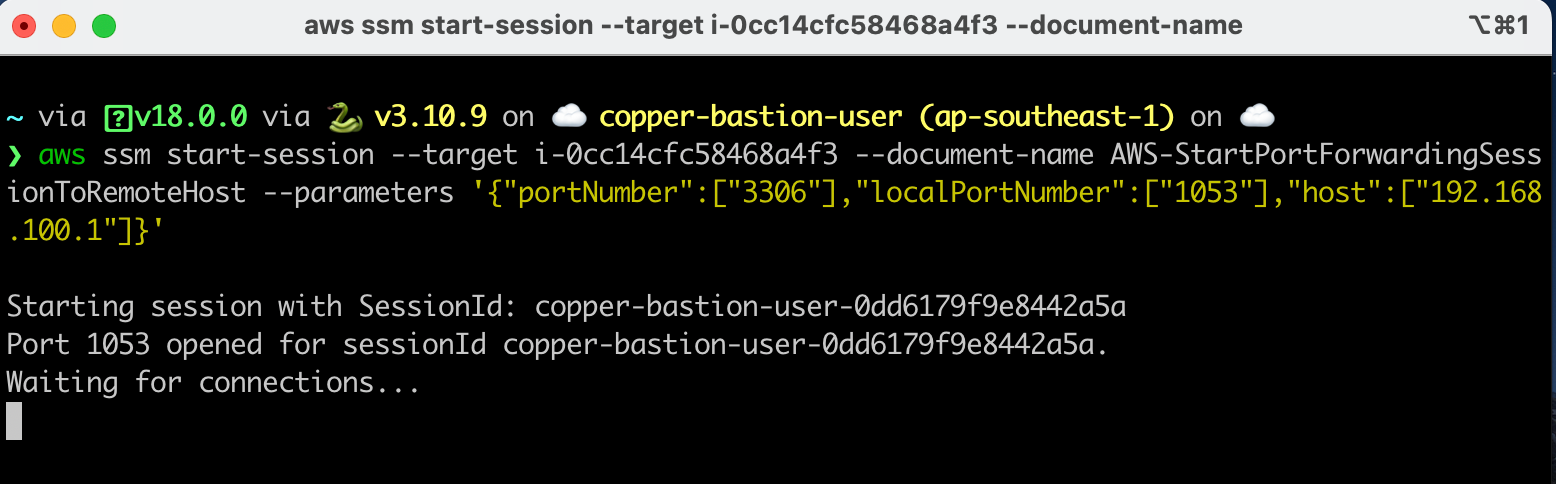
Let try to send a request to port 1053 on localhost, this request will be forwarded to remote.
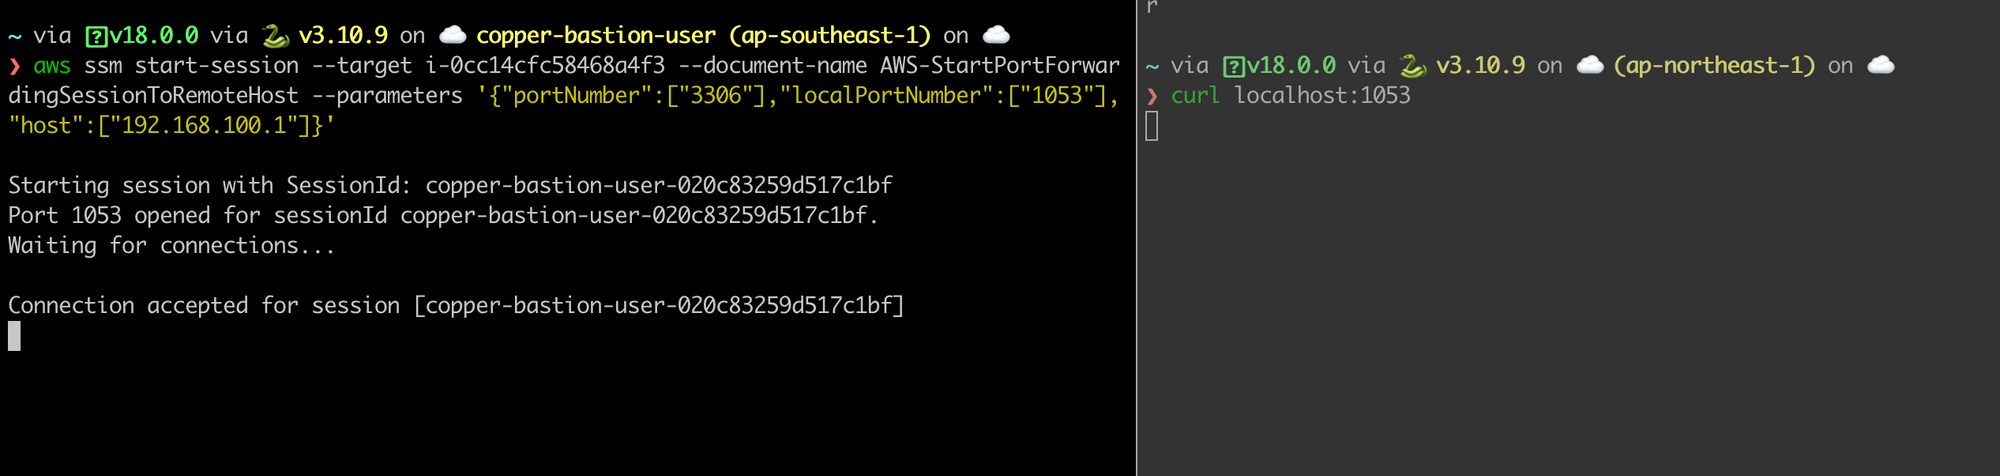
Yeah, that is. Thank for reading.